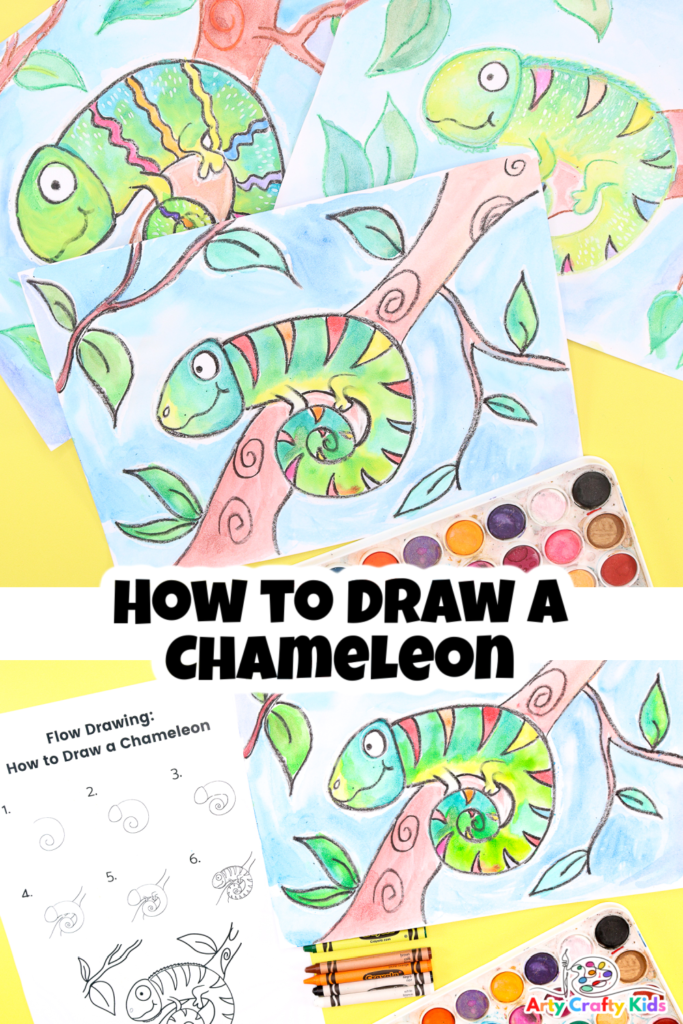

Learn how to draw a chameleon with our easy to follow step-by-step tutorial and supporting printable template and chameleon coloring pages.
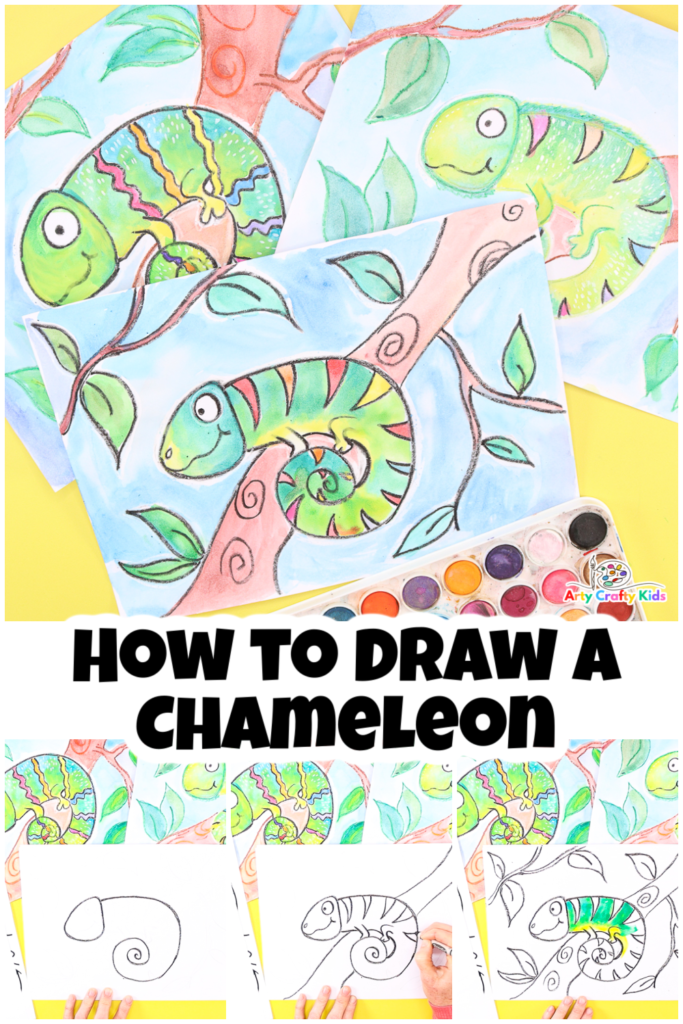
In this tutorial, we’ll start by using simple lines and shapes to draw the chameleon.
This approach makes it accessible and enjoyable for kids of all ages and beginners.
By following our step-by-step instructions, you’ll quickly see how the chameleon takes shape on paper.
But the creativity doesn’t end there! In the second part of the drawing lesson, we’ll explore the exciting world of coloring.
We’ll show you how to use a pencil, crayons and watercolors to add a burst of vibrant colors to your chameleon artwork.
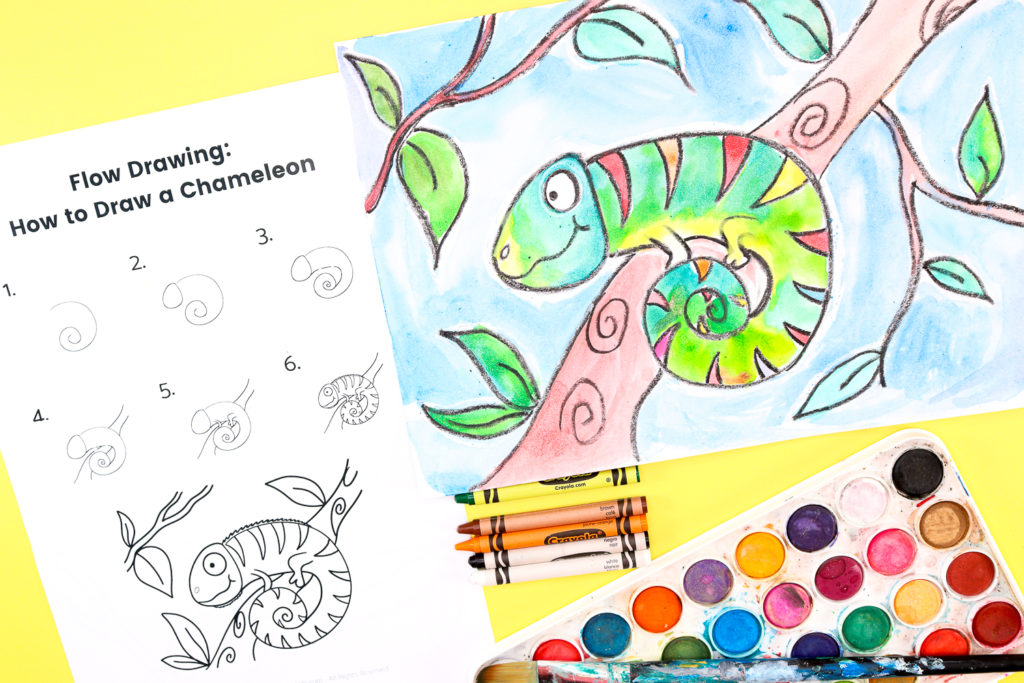
How to Draw a Chameleon – A Step-by-Step Guide
Our how to draw tutorial utilizes the ‘flow drawing technique’.
This is a method of drawing that encourages children not to aim for perfect lines and shapes but to instead engage with their natural flow by drawing in a rhythmical way – often repeating lines over and over to help define lines.
This technique allows children to draw and engage in art in a much freer way, incorporating a mindful approach to the process.
Materials:
- White Card Stock or Mix-Media Paper/ Watercolor Paper
- Black and White Crayons or Oil Pastels
- Watercolor Paint
- Pencil
- Optional – A Black Marker Pen for Outlining
Download the How to Draw a Chameleon Step-By-Step Tutorial:
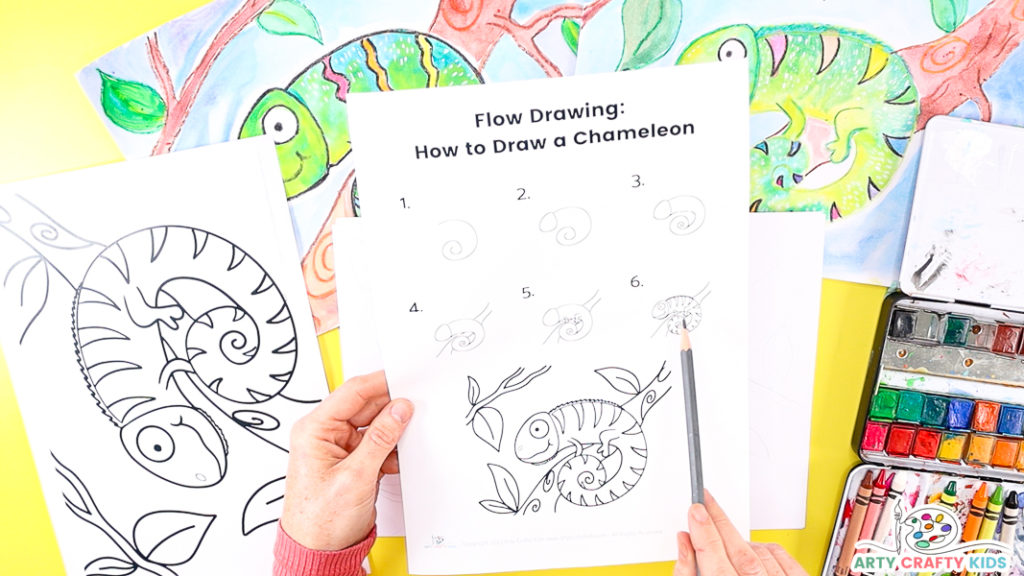
The How to Draw a Chameleon Step-by-Step Printable Download and coloring pages are available to members of the Arty Crafty Kids club.
Members will need to log in to access the templates: https://www.artycraftykids.com/product/flow-drawing-how-to-draw-a-chameleon-templates/
Not a Member?

Watch the Video Tutorial to see How Easy the Chameleon is to Draw and Paint!
Let’s Draw Chameleon!
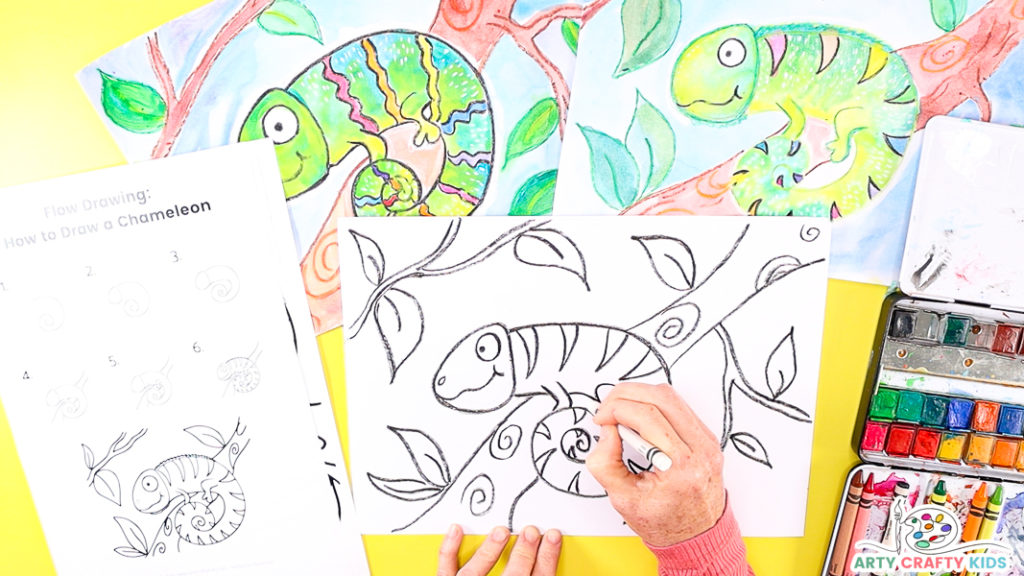
Here’s a helpful hint: Begin by sketching the chameleon’s outline with a pencil, and then go over the pencil lines using crayon.
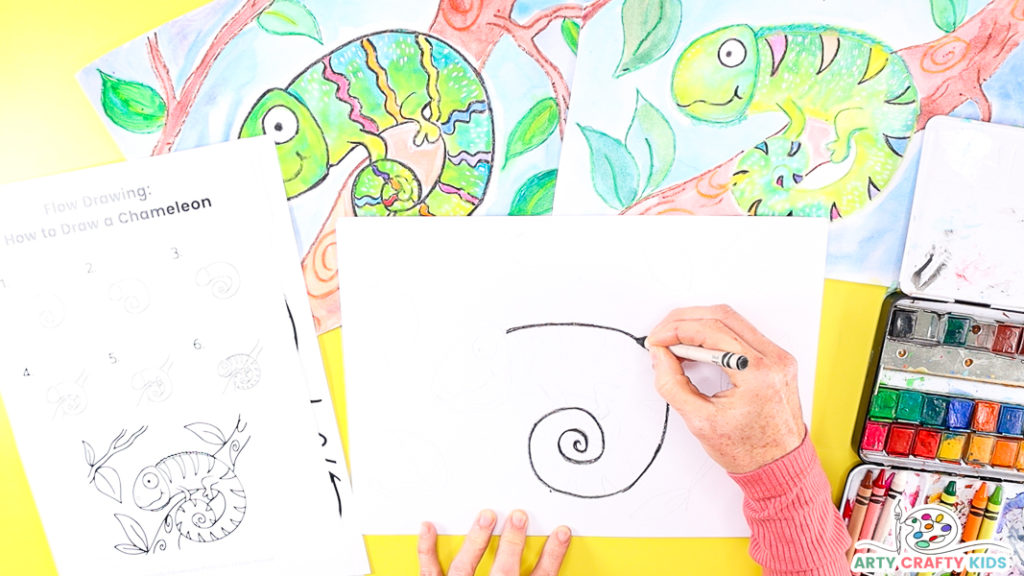
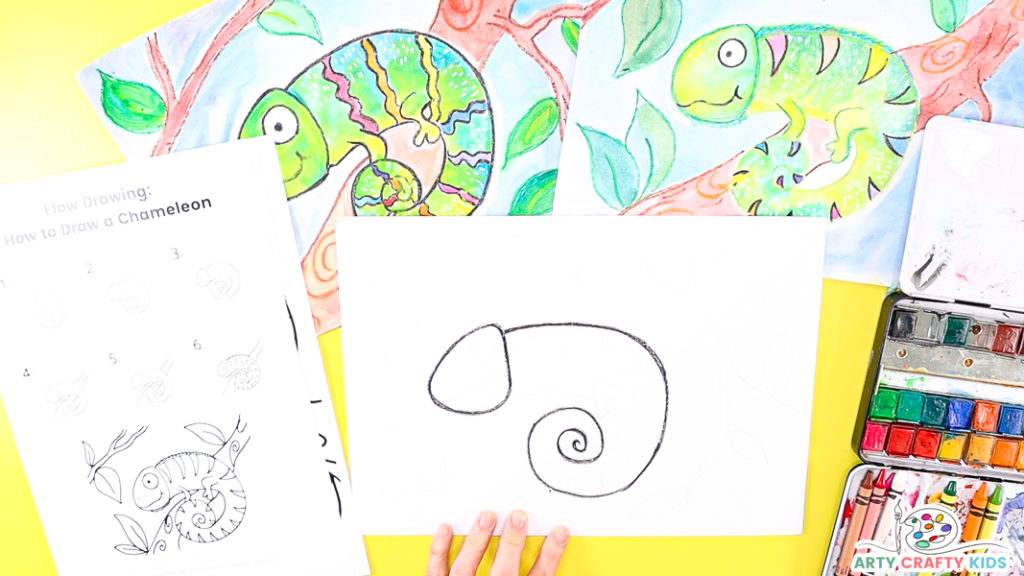
Step 1: Draw one long curved line to form the chameleon’s bark and swirly tail.
This arc shape step by can taken in one long sweeping movement or split into two; back first, followed by the swirly tail.
Step 2: Draw the chameleon’s head shape.
Chameleons possess a bony protrusion on their heads known as a casque.
When drawing, Arty Crafty Kids can choose to highlight this characteristic or opt for an angular head shape, as we have shown in our demonstration.
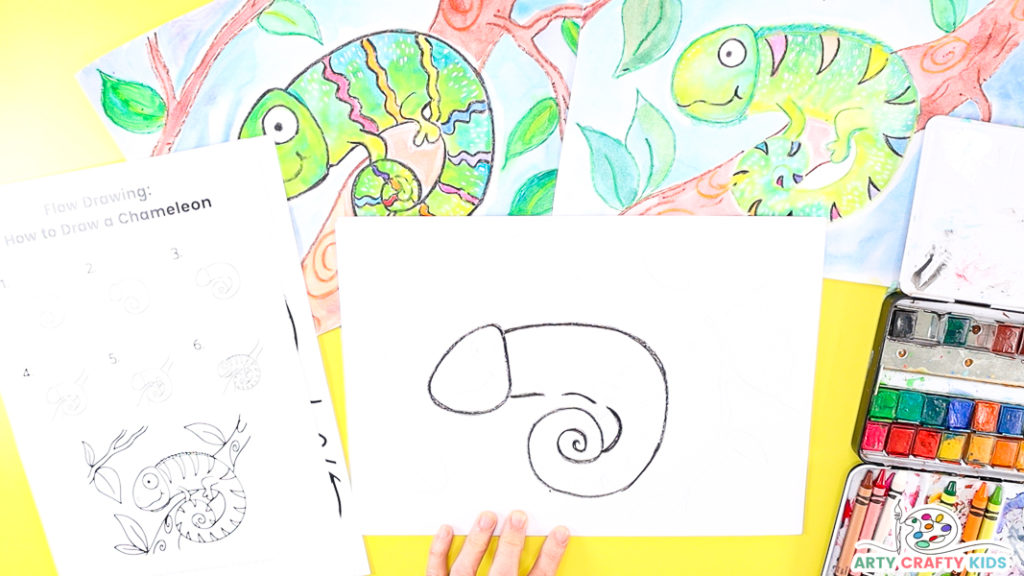
Step 3: Sketch a connecting line extending from the chameleon’s head to its tail, ensuring to leave gaps for the inclusion of the front and back legs.
This final line helps define the tail and completes the basic shape of our lizard.

Step 4: Starting from the bottom and moving towards the top of the page, depict a tree branch shaped object positioned behind the chameleon.
Once the tree branch shape is sketched, the chameleon’s front and back legs can be drawn following it, as they now have a surface to grip onto.
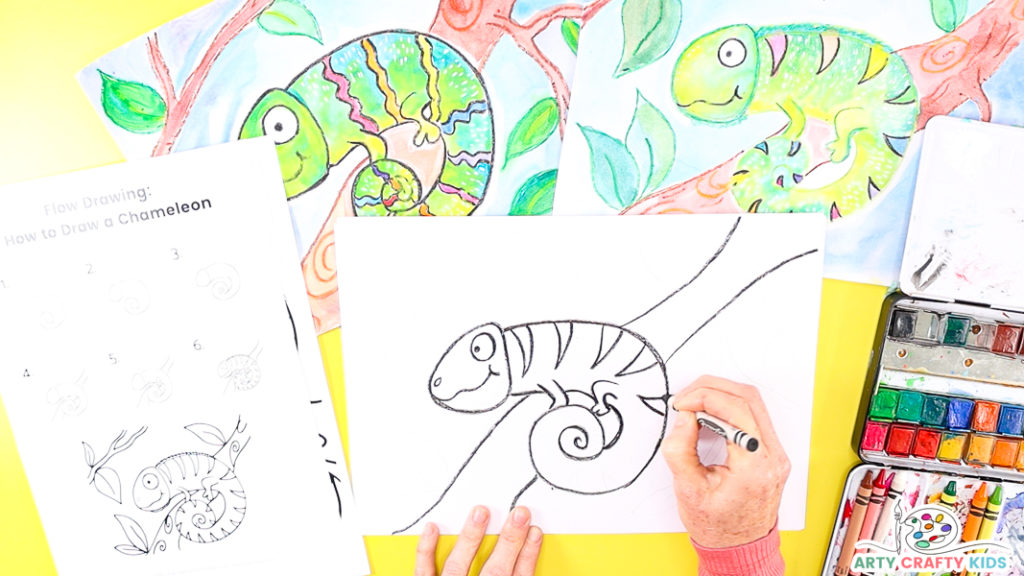
Step 5: Draw eyes, a smile, a nostril and body stripes/patterns.
Now it’s time to get creativite! For a cute cartoon-like chameleon look, try drawing a big eye with a small pupil and a whimsical wavy smile. Arty Crafty Kids may also like to add a tongue to their drawing!
On the other hand, if your Arty Crafty Kids prefer a more realistic approach, take inspiration from nature when sketching the chameleon’s features.
As for the body patterns, feel free to explore a variety of designs such as zig-zags, stripes, waves, spots, or any other patterns that inspire them.
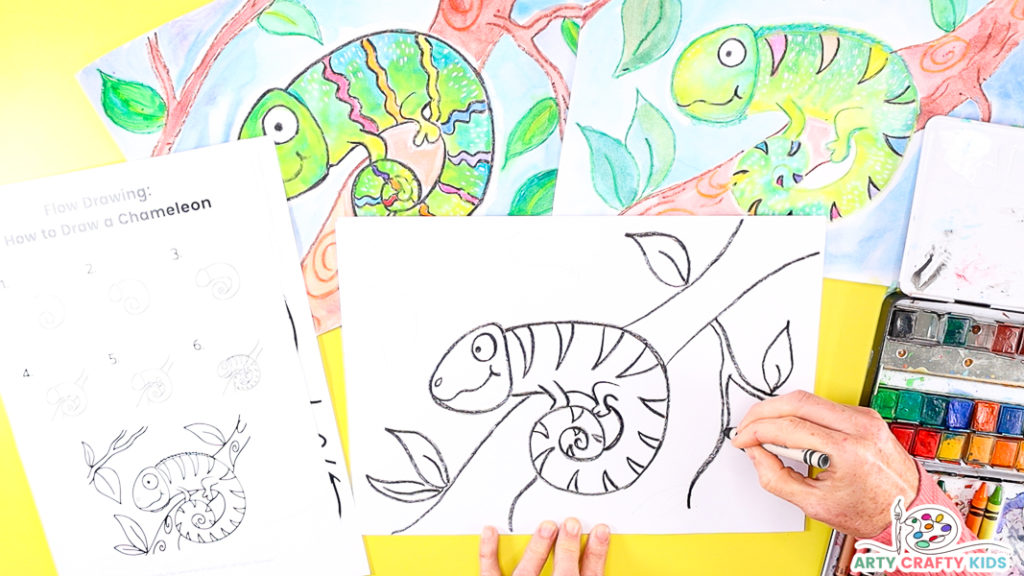
Step 6: Enhance the chameleon’s surroundings by adding additional branches and leaves to create a natural environment around it.
Utilize your knowledge about chameleons’ diverse habitats, ranging from rain forests and lowlands to mountains and deserts, to design a distinctive and unique habitat for your drawing.
Step 7: Use a white crayon or oil pastel to outline the chameleon or areas your Arty Crafty Kids would like to enhance in their painting.
The use of a white crayon can significantly enhance features and elements within a watercolor painting.
When applied on dry watercolor paper, the wax in the crayon creates a resist effect.
This means that when watercolor is applied over the wax, it does not adhere to those areas, leaving them white or lighter in color.
This technique allows for interesting effects and highlights in the artwork.
For children learning about watercolors, incorporating a white crayon adds an element of science and magic to the creative process.
They can experiment with the wax resist technique, observing how the crayon resists the watercolor and creates unique patterns and textures.
It offers a fun and educational way to explore the interaction between different materials while fostering creativity and imagination.
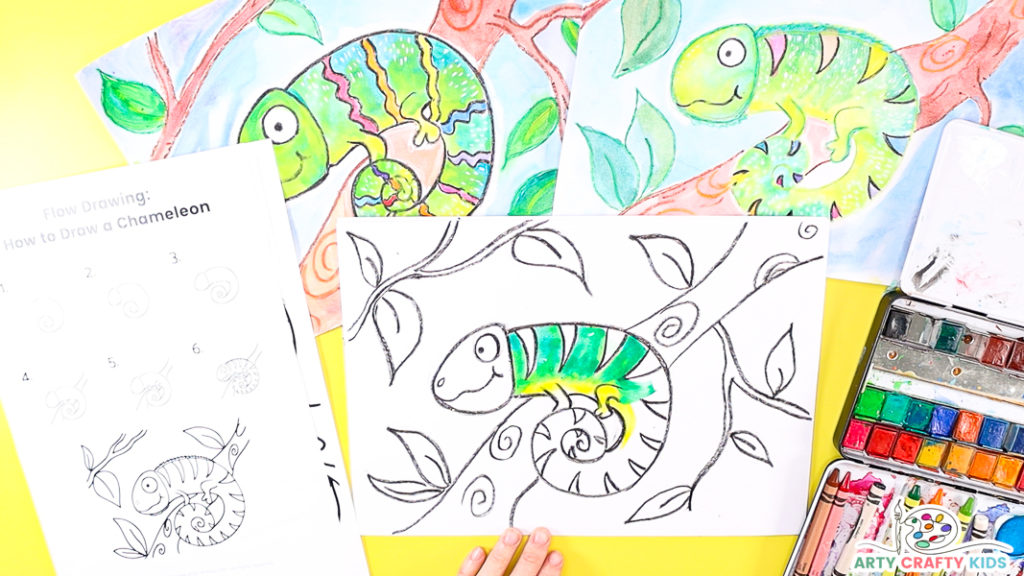
Step 8: Wet the paintbrush and blend it with the watercolor paint, then start applying color to the chameleon.
Inspire Arty Crafty Kids to explore various water ratios while painting.
They will discover that the paint spreads and blends in unique ways, resulting in visually interesting effects.
Chameleons are known to change the color of their skins to camouflage themselves from predators; matching their background to “blend in”, or distort their body’s outline. With this in mind, this gives Arty Crafty Kids an opportunity to get experimental with their colors choices.
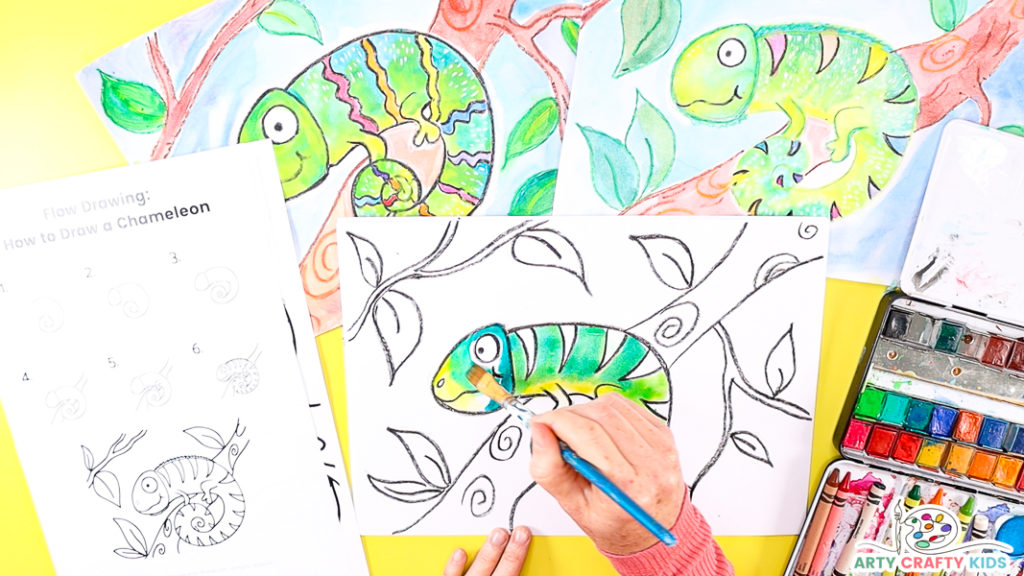
Step 9: Apply different shades of green, mixed with yellow to create various shades and tones within the chameleon.
The transparent nature of watercolors allows for layering and creating various shades and tones by applying multiple washes.
Children can explore different techniques, such as wet-on-wet ( wet paintbrush + wet surface) or wet-on-dry (wet paintbrush + dry surface), to achieve different textures and visual outcomes.
The fluidity of watercolors also encourages a sense of play and freedom, as the paint can be easily manipulated on the paper.
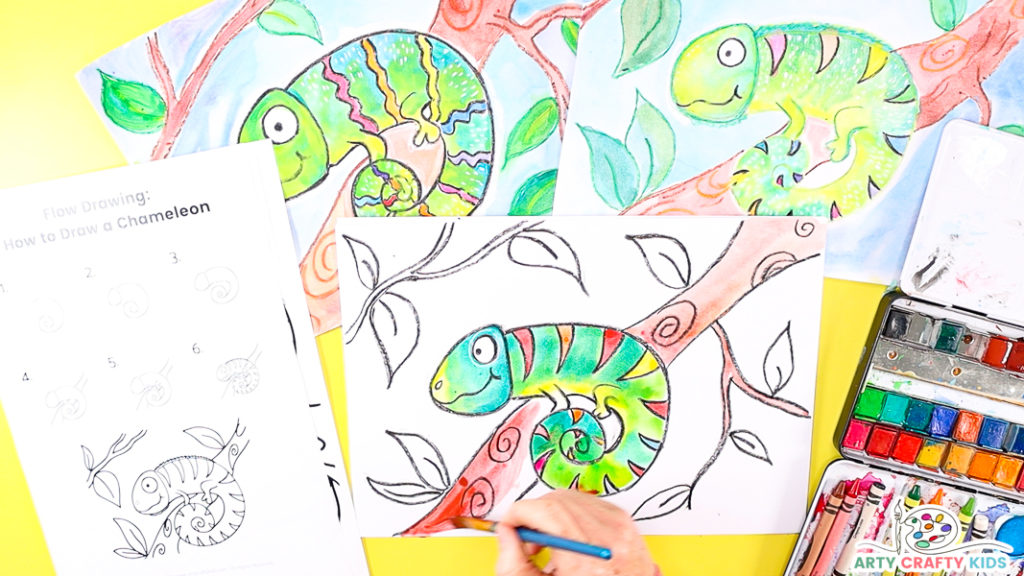
Keep painting the chameleon and the background, encouraging your Arty Crafty Kids to explore and experiment with different painting techniques as they progress.
When the chameleon and background are fully colored, the illustration and drawing lesson is finished!
This art project is a fantastic idea to explore during a rain forest and jungle-themed lesson, whether at school or home. The completed artworks could be showcased as stunning displays that will surely showcase the unique styles and colors put together by young artists.
More Summer Themed How to Draw
Tutorials and Art Ideas:
- How to Draw a Sun
- How to Draw a Fish
- How to Draw a Dandelion
- How to Draw a Sunshine Lion
- Ocean Animal Watercolor Art
- Creative Watercolor Art Ideas for Kids