
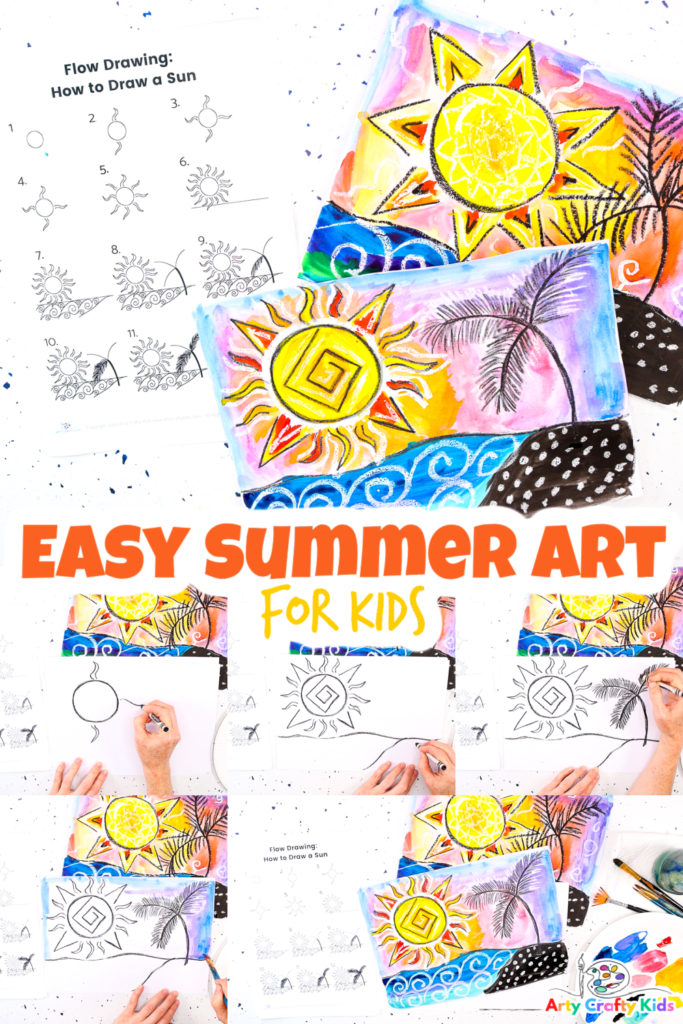
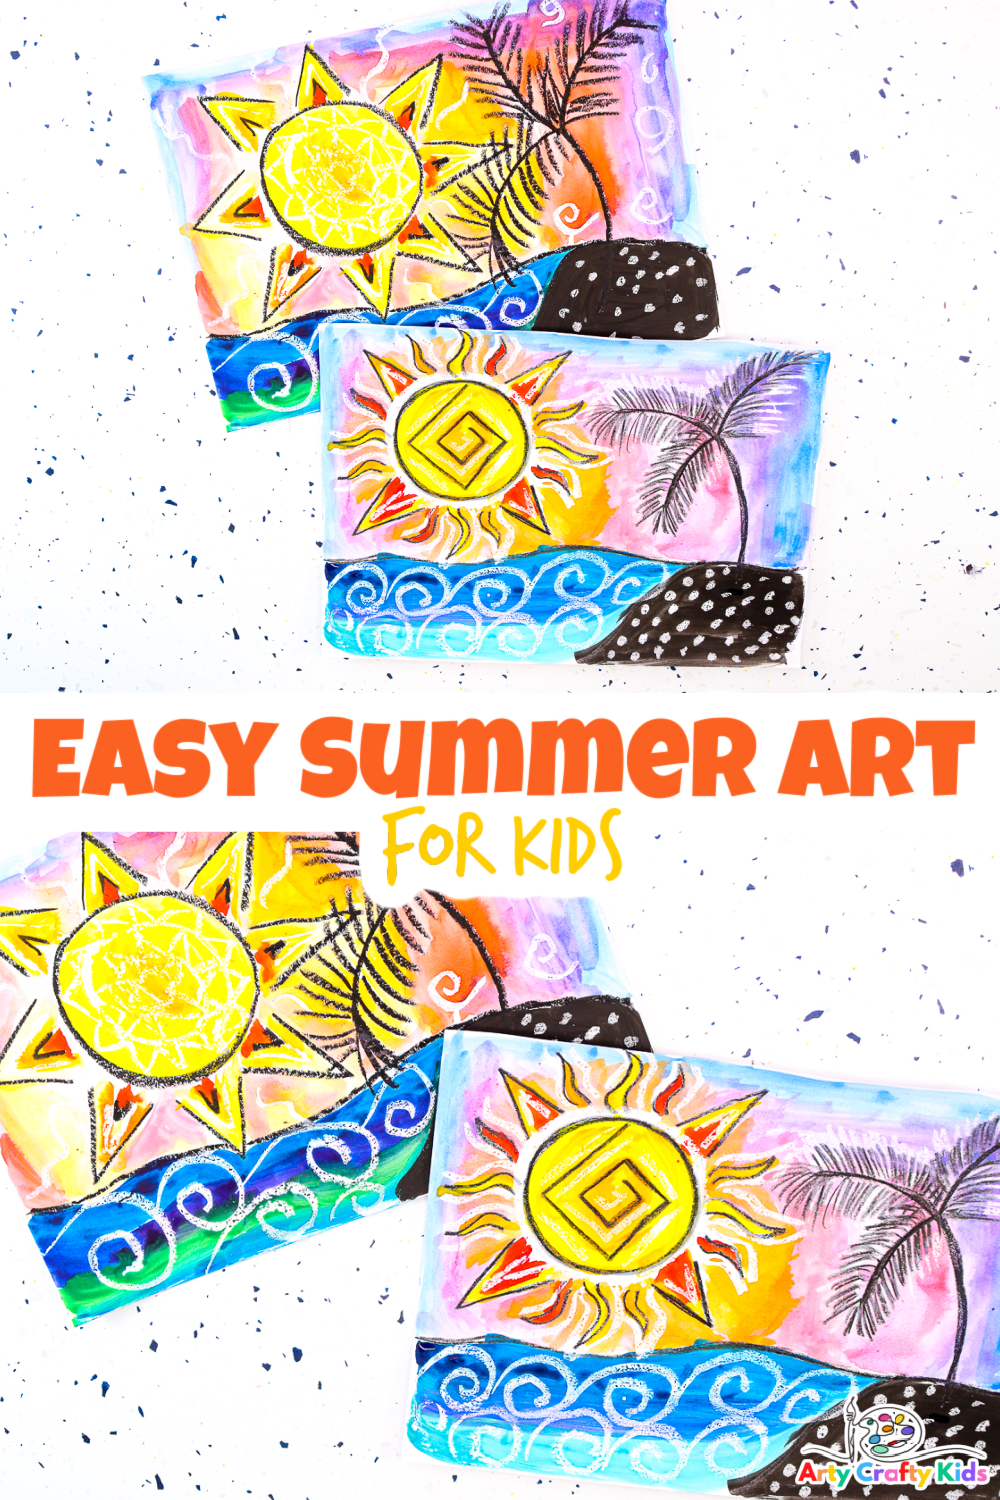
Welcome to “How to Draw a Sun,” an exciting and easy summer art project that will ignite kids’ creativity and bring the warmth of the sun to their artistic endeavors.
This tutorial is specifically designed for children aged 6 and beyond, providing step-by-step instructions on how to create a simple yet captivating sun design, complete with rolling waves and a majestic palm tree silhouette.
In this project, we will not only explore the techniques of drawing, but we will also dive into the world of colors.
Specifically, we will focus on the interplay of warm and cool colors using watercolor paints. Your child will learn how to blend vibrant shades to capture the essence of a sunny day.
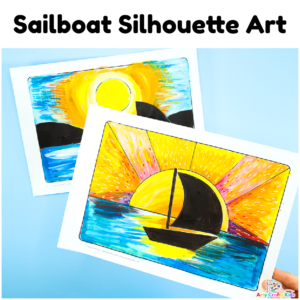
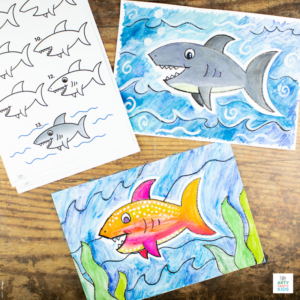
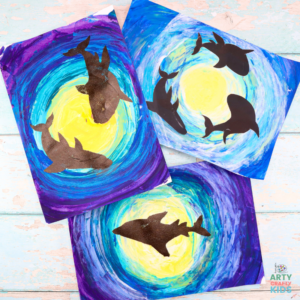
To further explore the topic of Summer Art with your Arty Crafty Kids, take a look at our beautiful sailboat Summer art idea and scrape painted swimming sharks tutorial.
How to Make Summer Art with the How to Draw a Sun Step-by-Step Tutorial:
Our how to draw tutorial utilizes the ‘flow drawing technique’. This is a method of drawing that encourages children not to aim for perfect lines and shapes but to instead engage with their natural flow by drawing in a rhythmical way – often repeating lines over and over to help define lines.
This technique allows children to draw and engage in art in a much freer way, incorporating a mindful approach to the process.
Materials:
- White Card Stock or Mix-Media Paper/ Watercolor Paper
- A Black and White Crayon or Oil Pastel
- Watercolor Paint
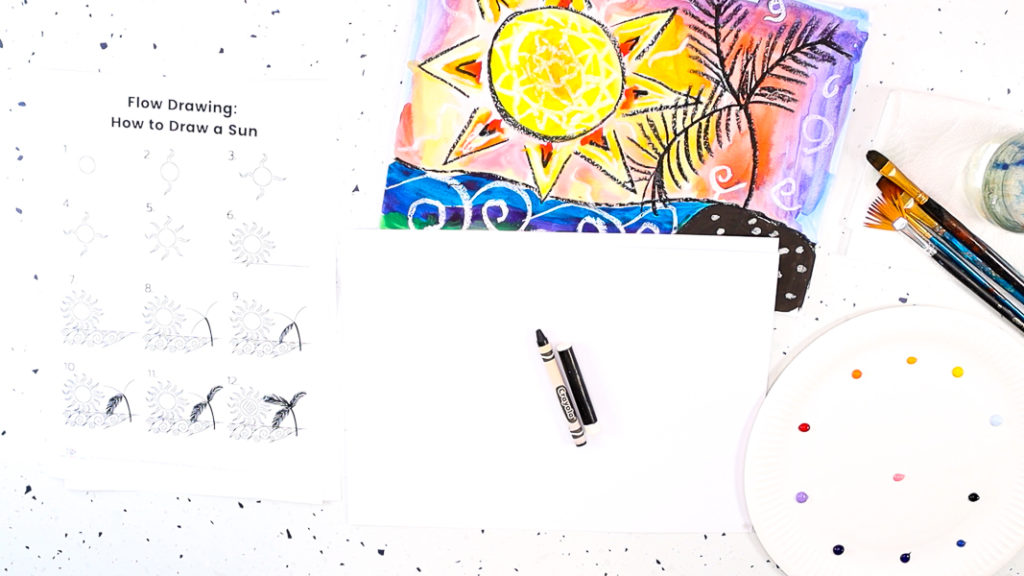
Download the How to Draw a Sun Step-By-Step Tutorial:
The How to Draw a Sun Step-by-Step Printable and Outline is available
to members of the Arty Crafty Kids club.
Members will need to log in to access the templates:
Not a Member?

Watch How Easy the Sun is to Draw!
The Watercolor Resist Technique:
The magic of resist materials: crayons and oil pastels can truly enhance watercolor art, adding a stunning visual effect, depth and texture to artwork.
And the best bit? It’s a super easy technique to use and kids love it!
The wax-based crayons or oil pastels create a barrier on the paper, repelling the watercolor paint and preserving the drawn design underneath.
This creates a beautiful contrast between the vibrant watercolors and the untouched areas, resulting in a captivating interplay of colors and textures.
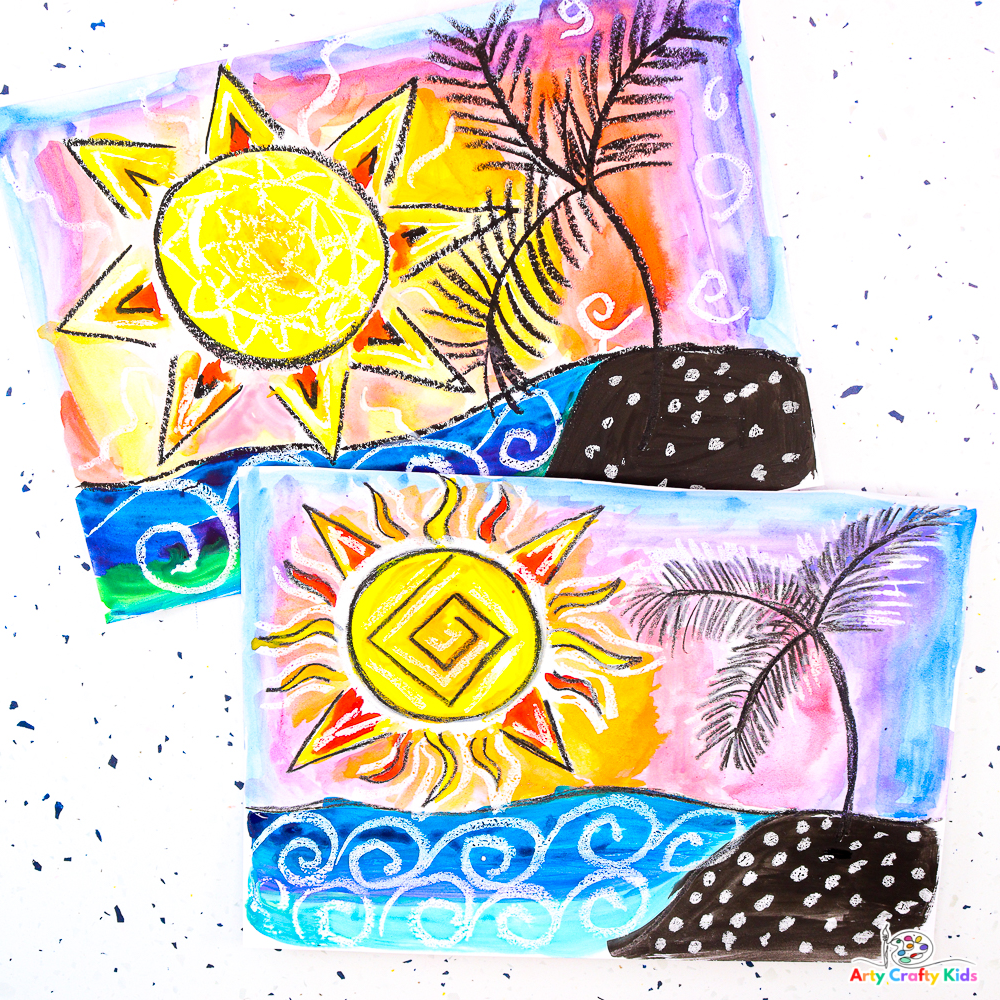
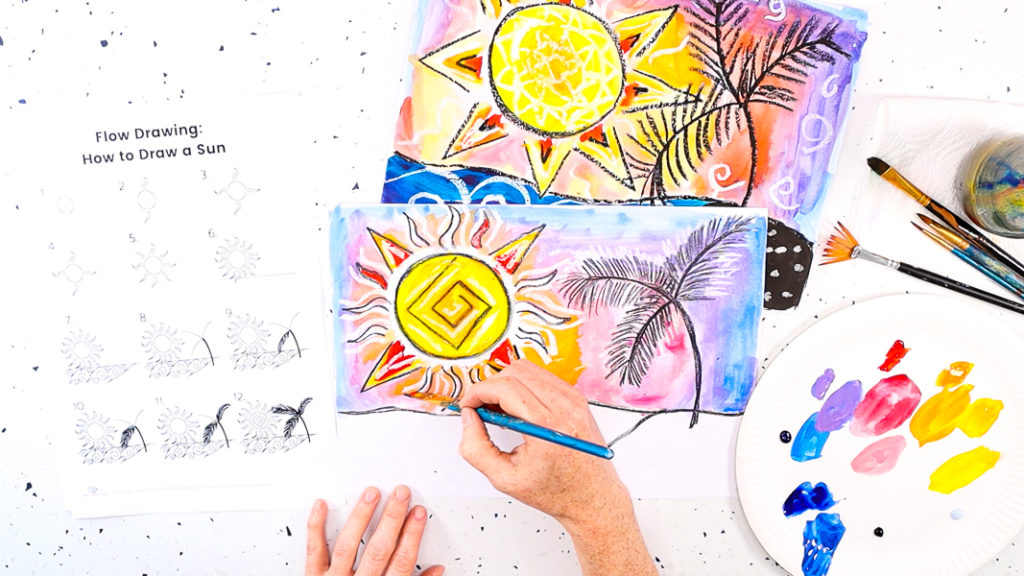
Let’s create some Summer Art!
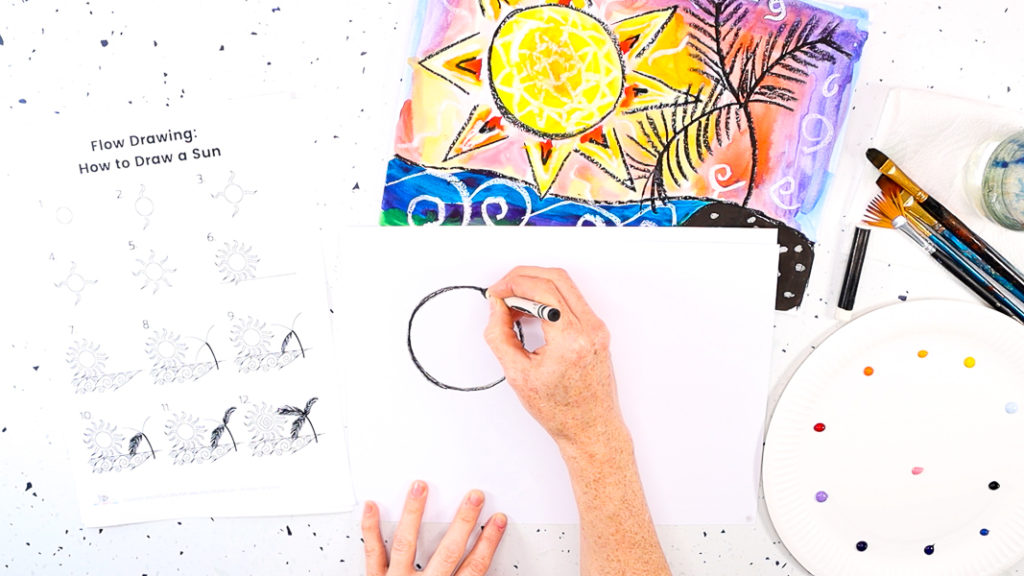
Step 1: To form the ‘sun’ shape, start by drawing a large circle.
In the spirit of flow drawing and to encourage your Arty Crafty Kids to engage with their own rhythm; repeat the circular shape over and over to enhance and define the shape. This will create a sense of ‘flow’ to their drawing technique, which can built upon throughout the tutorial.
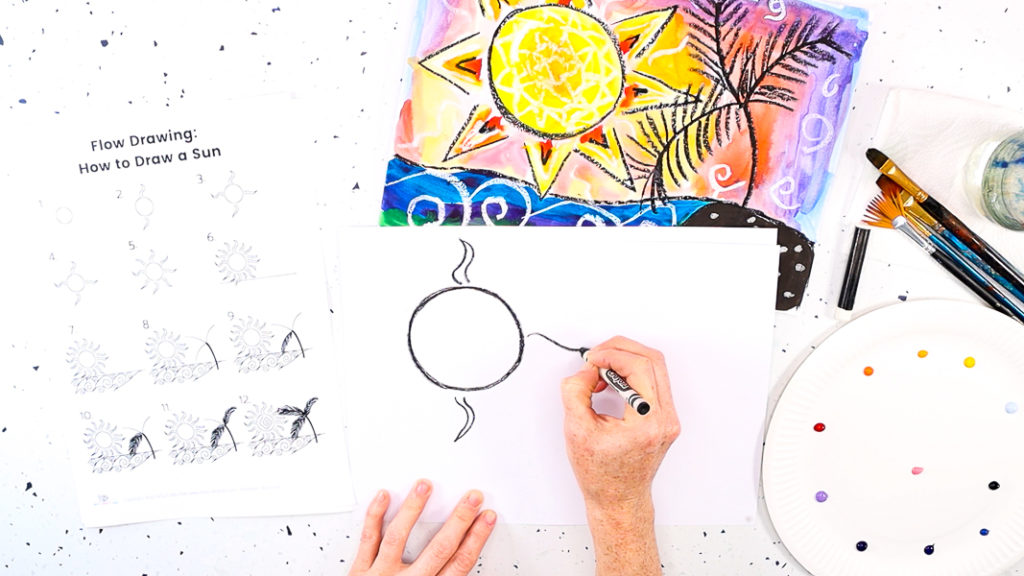
Step 2: Draw the first four rays of the sun.
Like a clock, draw the 12 and 6 o’clock positions first and then 3 and 9 o’clock positions. While the rays will be uneven in shape, there will be a sense of symmetry to the sun design.
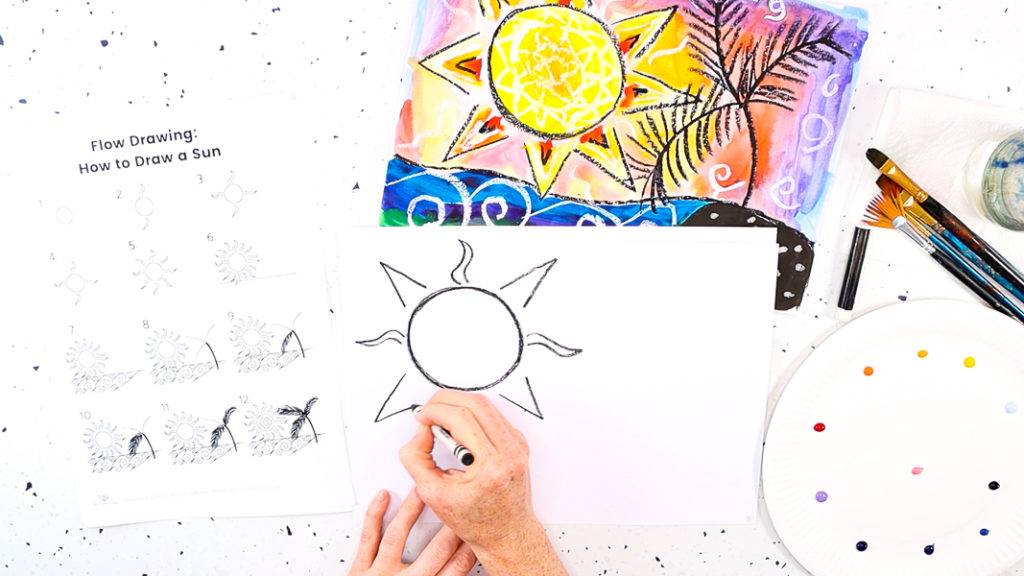
Step 3: Draw the ‘in-between’ rays.
The rays can take the form of any shape or length. Their differing shapes and patterns will make for an interesting looking sun!
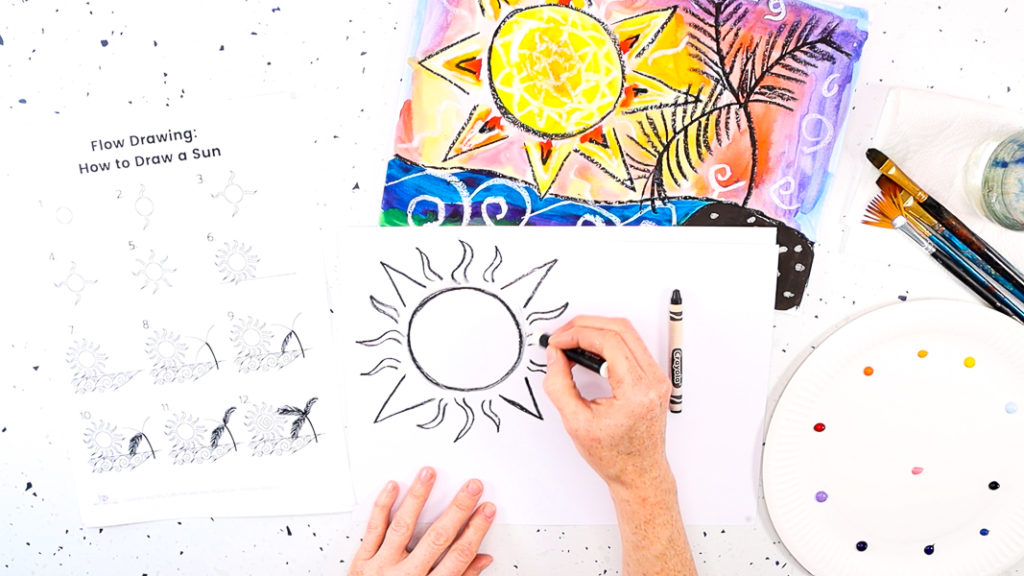
Step 4: Draw a collection of white lines to the sun design.
Crayons or oil pastels can be used to outline the sun itself, the sun’s rays, the palm tree silhouette, and other intricate details.
By pressing firmly on the paper, your child can draw additional defined lines and shapes that will resist the watercolor paint and appear like magic when the paint washes over.
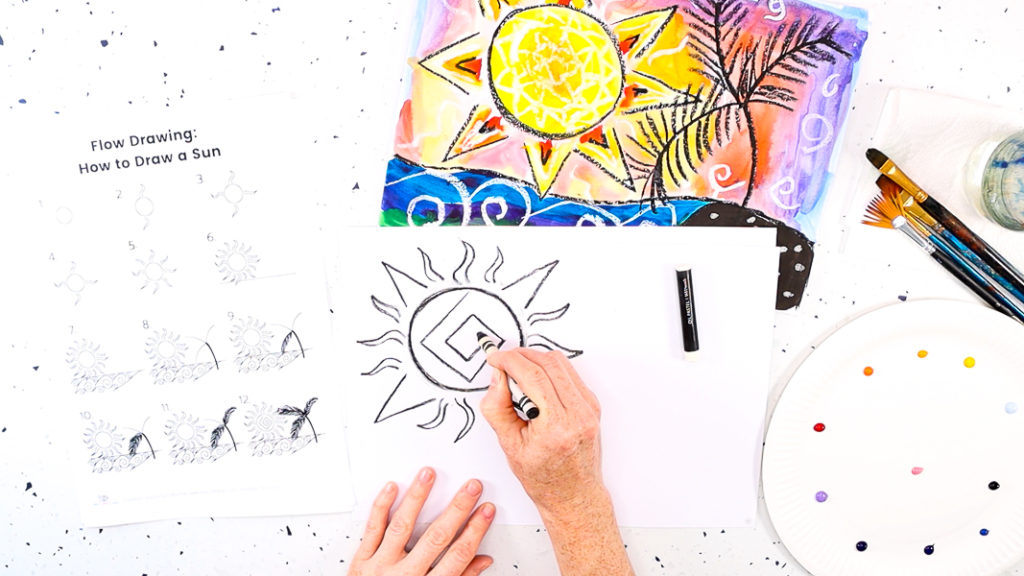
Step 5: Using a combination of black and white crayons/oil pastels to draw a pattern within the sun.
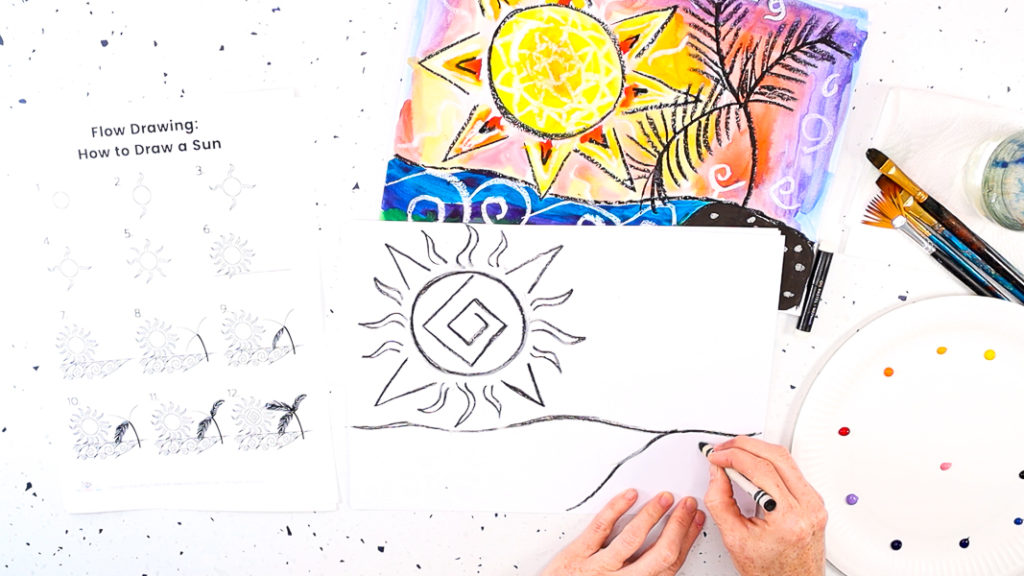
Step 6: Draw a wavy line across the sheet of paper to separate the sun from the sea.
Step 7: Next, draw a small mound, where the sea will meet land – the home of our to-be-drawn palm tree silhouette.
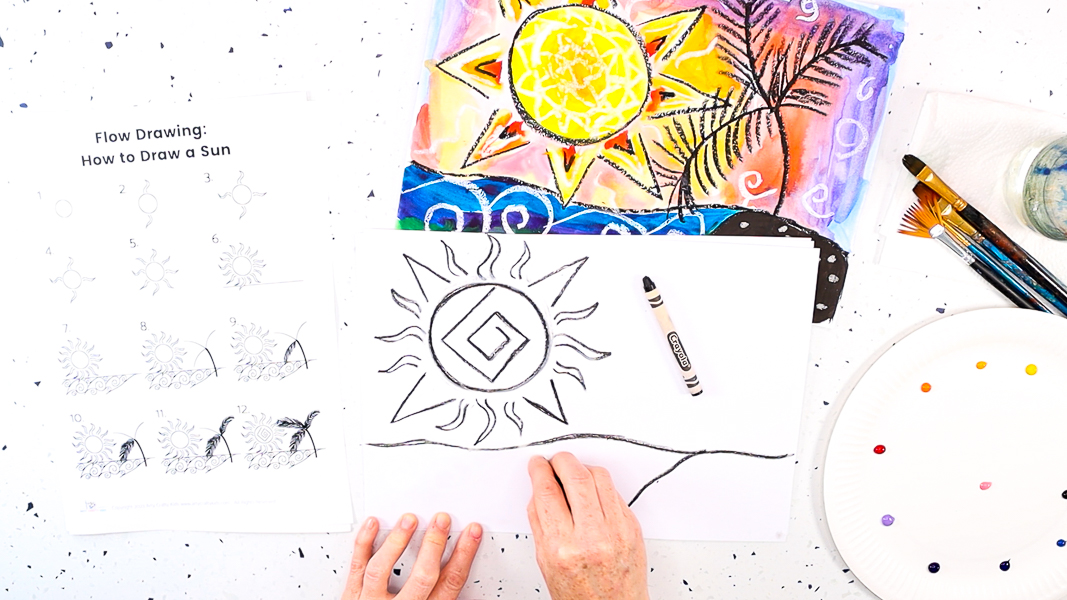
Step 8: Using a white crayon or oil pastel, draw a series of swirls within the sea area.
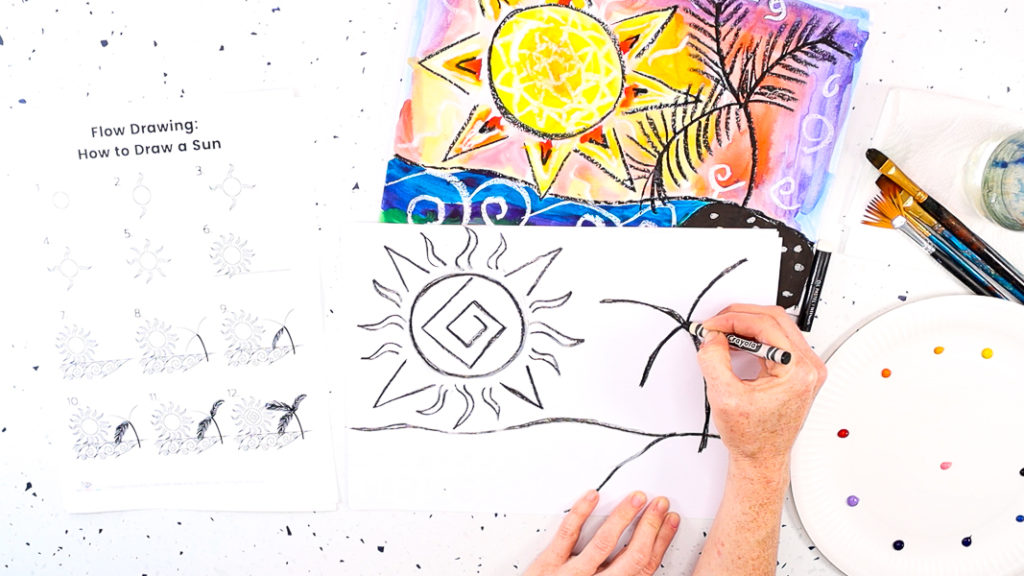
Step 9: Draw four adjoining black lines to create the basic structure of the palm tree.
Repeat the lines a few times to add thickness and definition.
Step 10: Draw a collection of close straight lines off each palm tree branch.
Have a little fun and draw the lines with a little speed!
With the sun, sea and palm tree drawn, it’s time to take this project to the next level!
Let’s Introduce Watercolors to this
Summer Art Project!
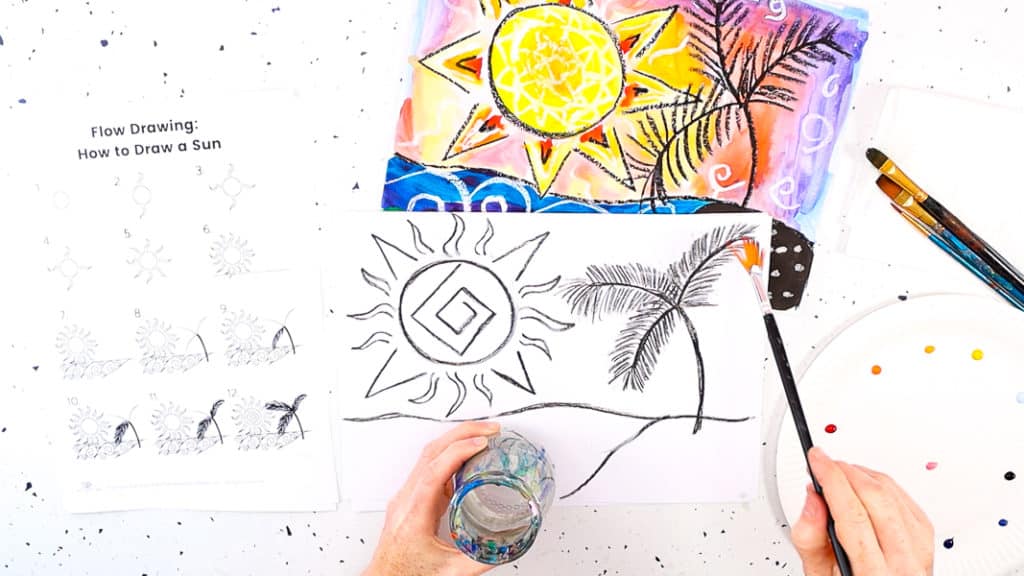
Step 1: Brush a layer of water across the sky area and then add blue watercolor paint to the sky’s border.
To help blend and create a vibrant sky, use the wet-on-wet technique within the sky area i.e. the paint is applied to a layer of clear water.
This will help the colors flow within the layer of water and create a lovely whispery effect on paper. With the addition of further colors, the paint will travel within the water and naturally blend with little effort.
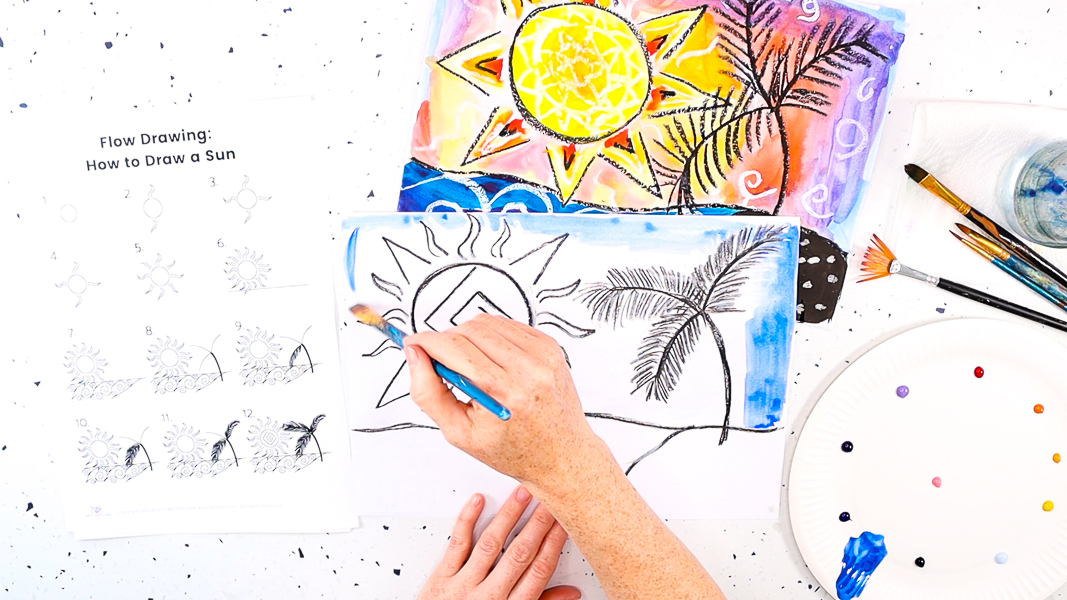
Step 2: Continue layering paint to the sky, gradually transitioning cool to warm colors as the brush strokes near the horizon and sun.
The cool layered shades of blue and purple capture the fading light of the sun and deepening hues of twilight.
Arty Crafty Kids can experiment with gentle strokes of red, orange, and yellow near the horizon line and sun; mimicking the vibrant hues of the setting sun.
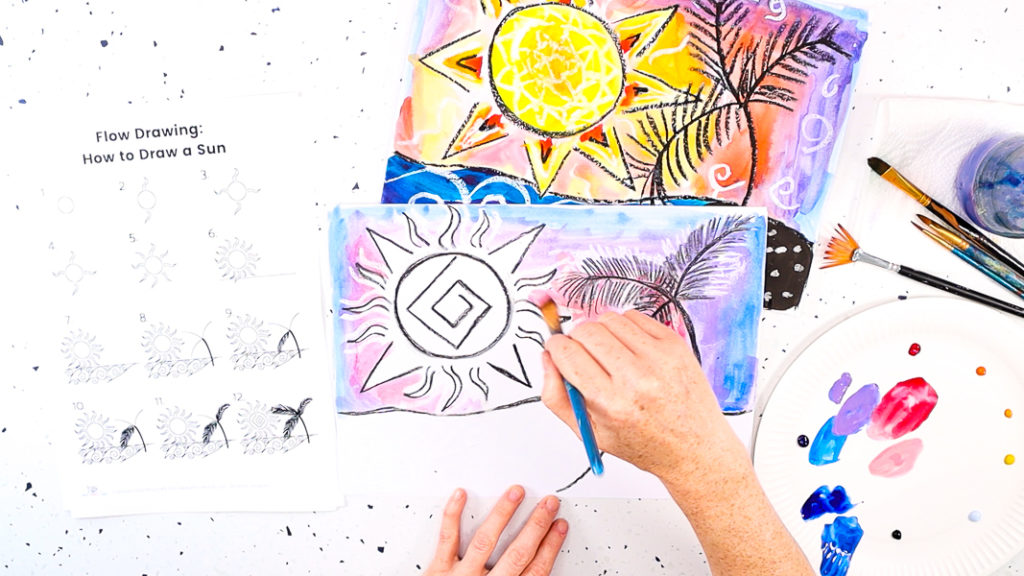
Step 3: Paint the sun in vibrant shades of yellow, orange and red.
To enhance the color, do not dampen the areas of the sun, instead apply a small amount of the water to the desired colored paint and apply directly to the sun.
Arty Crafty Kids will notice that less water leads to brighter colors and the paint becomes a little trickier to spread.
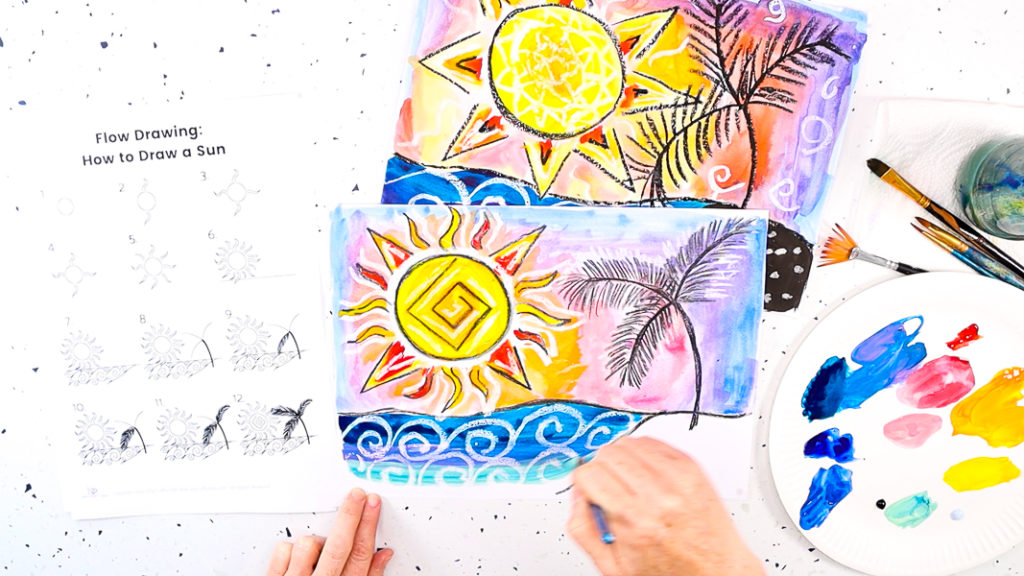
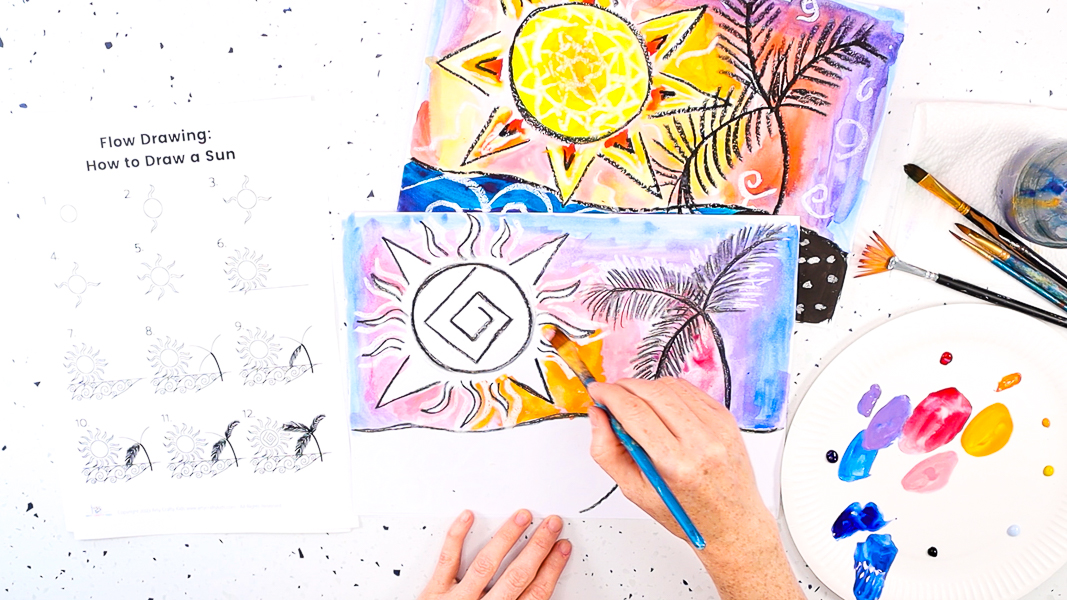
Step 4: Spread cool shades of blue, purple and green across the sea and reveal the magical swirling waves!
Step 5: For fun, add some resist detailing to the island silhouette and then paint black.
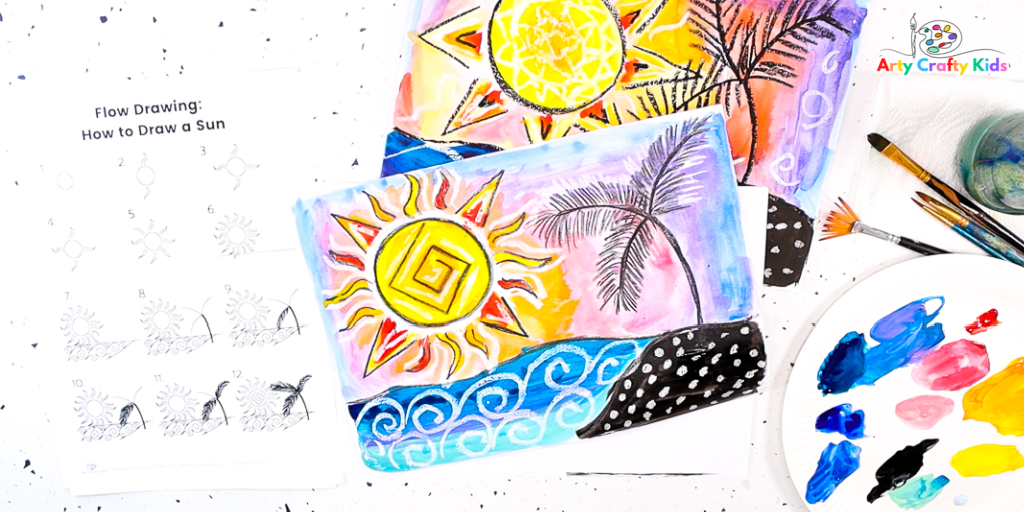
“How to Draw a Sun” is a delightful and easy summer art project suitable for children of all ages.
By the end of this tutorial, children with learn how to draw a sun, capturing its radiance and vitality on paper.
Through the exploration of various watercolor techniques, they will have discovered how to create depth, texture, and beautiful gradients in their artwork, bringing their sun design to life.
Additionally, the use of resist materials will have opened up a world of artistic fun effects, allowing children to experiment and express their creativity.
This tutorial offers a wonderful opportunity for children to develop their artistic abilities, explore the magic of colors, and create their own captivating sun artwork.
More Summer Art projects for Kids:
In this collection of summer themed art projects, children of all ages will discover new ways to express themselves through various mediums, techniques, and themes inspired by the vibrant season.
From painting ocean animals to designing tropical sunsets, each project is designed to ignite their imagination, cultivate their artistic skills, and celebrate the joy and beauty of summer.