

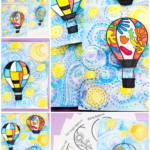


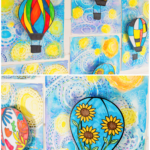

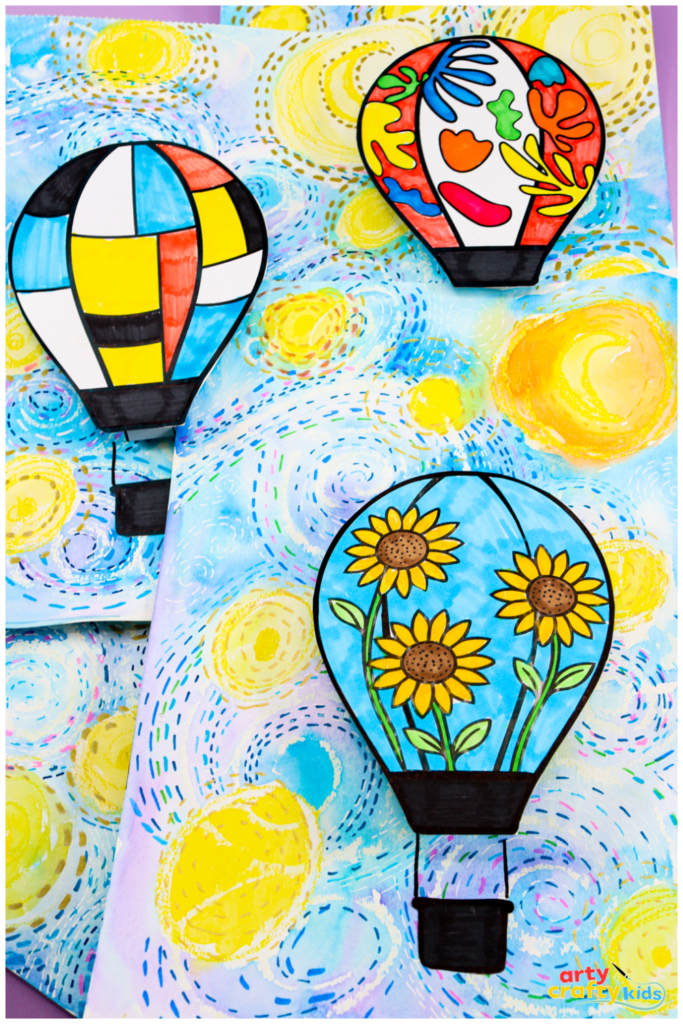
This Van Gogh’s Starry Night Hot Air Balloon Art Project for Kids is a project like no other. Young artists can create their very own balloon fiesta while exploring and having fun with the art styles of famous artists like Picasso, Matisse, Mondrian, and, of course, Van Gogh himself.
It’s a playful and exploratory hot air balloon craft that invites kids to merge creativity and experimentation as they design unique balloon art inspired by some of the world’s most famous artists.
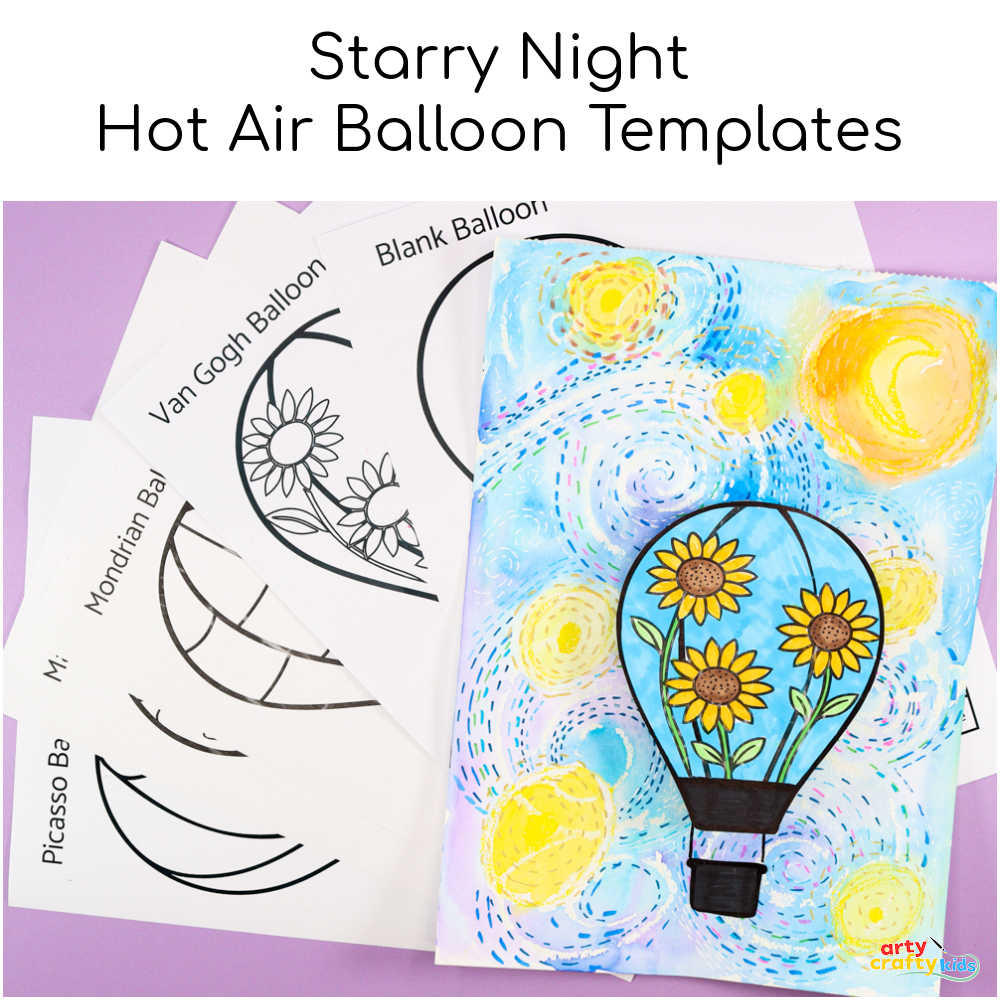
With printables and a blank template included, young artists are free to interpret, mix, and reinvent classic styles, creating a magical hot air balloon festival that dances across their own imaginative, starry skies.
How to Make Van Gogh’s Starry Night Art & Hot Air Balloon Craft
Materials:
- Watercolor/ Mixed-Media Paper or White Cardstock
- Watercolor Paint
- White, Yellow & Orange Oil Pastels/ White Crayons
- Marker Pens
- Acrylic White Pen
- Glue Stick
- Scissors
- Pencil
- Hot Air Balloon Templates (members will need to log in to access the templates).
Not a Member?
The template bundle includes artist-inspired balloons featuring Mondrian, Matisse, Picasso, and Van Gogh for kids to color, plus two blank balloons to explore their creativity and design their own unique hot air balloons.
Join the Arty Crafty Kids club to access the Hot Air Balloon Templates and 100s more Art and Craft templates, How to Draw Guides, and Coloring Pages.

Enjoy even more Van Gogh projects in our members’ area!
Check out our Van Gogh Mixed Media Sunflowers, Starry Night Finger Painting Art, and Van Gogh’s Blossom Tree Art – each one a unique way to explore this inspiring artist’s work.
Let’s Create Van Gogh’s Starry Night
Introduction to Starry Night
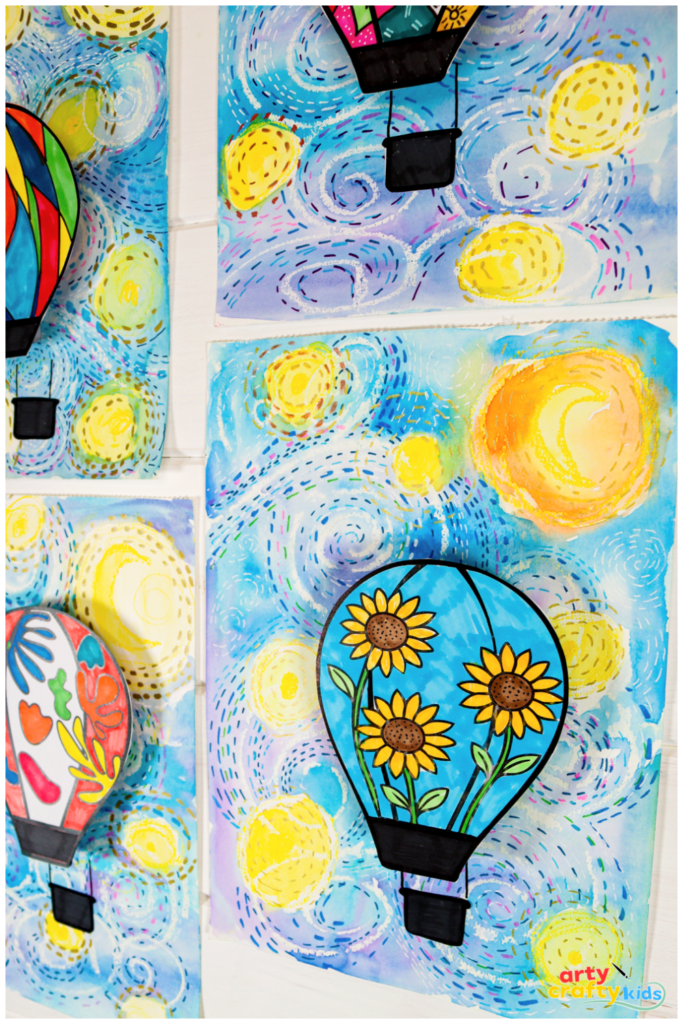
Before diving into the hot air balloon craft, let’s explore Van Gogh’s Starry Night. This iconic painting is known for its swirling skies, vibrant colors, and expressive brushstrokes -perfect inspiration for our creative adventure!
Learning Objectives:
- Experiment with resist art by layering oil pastels or crayons with watercolor paint to create eye-catching textures.
- Explore watercolor techniques like blending, layering, and creating washes to achieve different effects.
- Develop an appreciation for Vincent van Gogh’s unique art style and learn how he used movement and color to bring his art to life.
- Encourage creative expression by combining different artistic influences and techniques in one fun project.
- Explore how mixed media—like combining oil pastels with watercolors and layered marker pen details—can add depth, texture, and interest to your artwork.
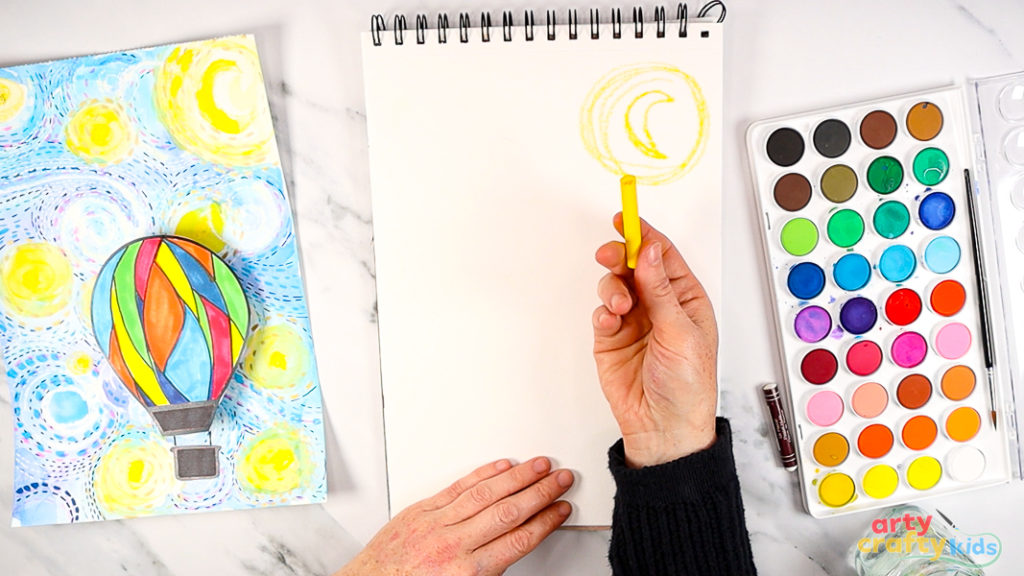
Step 1: Use an oil pastel or wax crayon to draw the moon and stars.
Begin by using a yellow oil pastel or wax crayon to sketch the moon and stars onto your white paper. Think of the swirling skies of Van Gogh’s Starry Night as inspiration – big crescent moons, bright shining stars, and little orbits of light.

This is your chance to experiment, so fill the page with circles, swirls, and any shapes that bring your night sky to life!
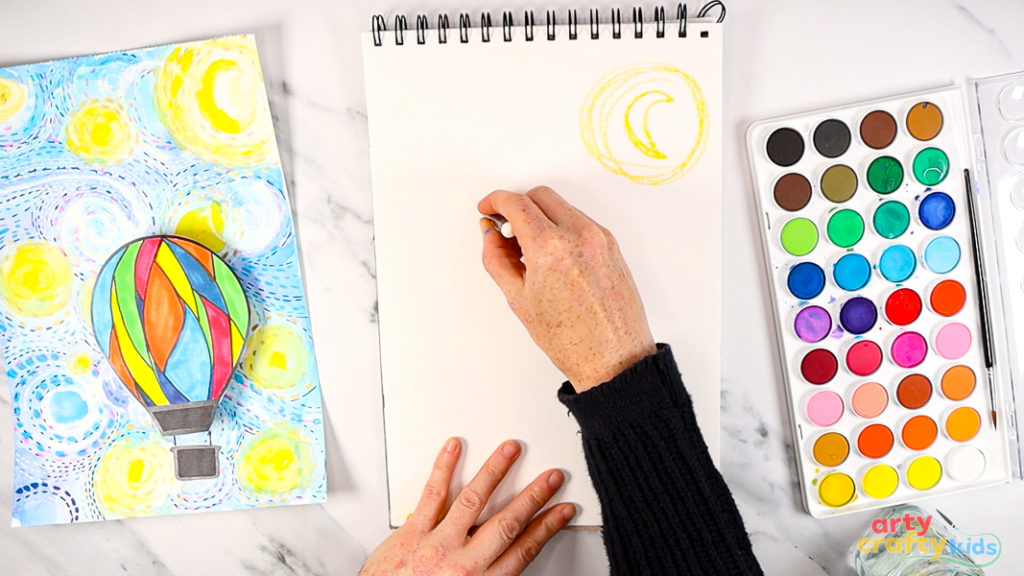
Step 2: Use a white oil pastel or crayon to draw swirly patterns.
Next, take a white oil pastel or crayon and add some playful swirly patterns all over your page. Let your creativity flow – draw big, swooping lines, little loops, and any swirls you like.
This step adds texture and a magical, starry-night feel to your artwork, just like Van Gogh’s famous painting.
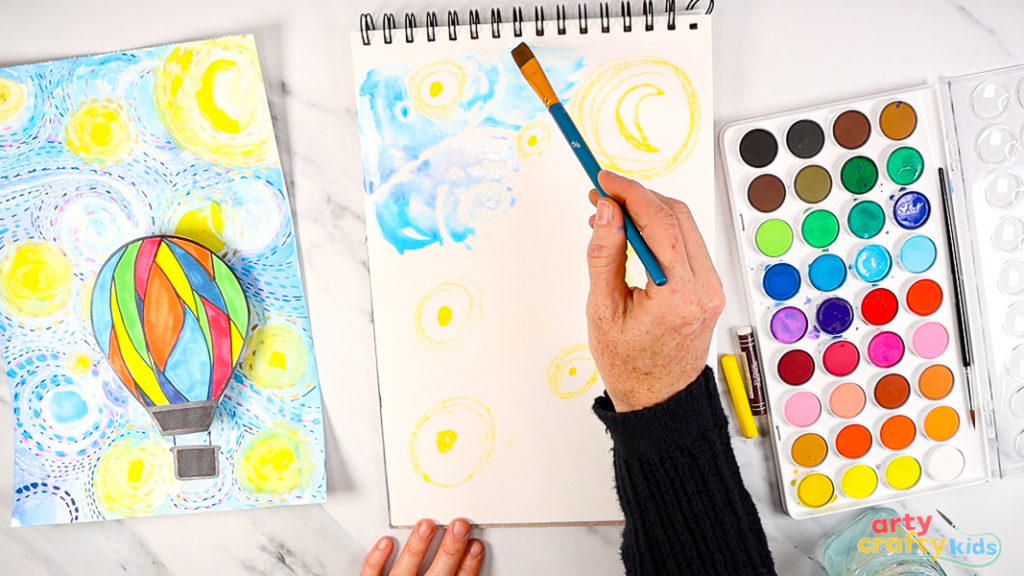
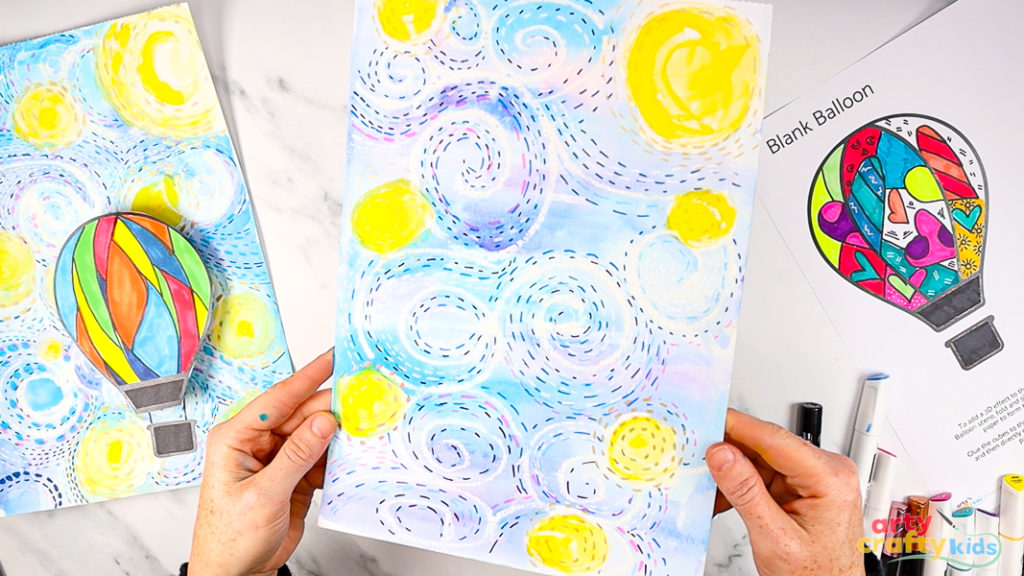
Step 3: Use the wet-on-wet watercolor technique to paint Starry Night.
Dip your brush into clean water and lightly brush it across the page where you would like to add some color.
While the paper is still wet, load your brush with watercolor paint and gently apply it over the areas you’ve dampened.
Watch how the colors blend, swirl, and spread – just like Van Gogh’s dreamy night sky!
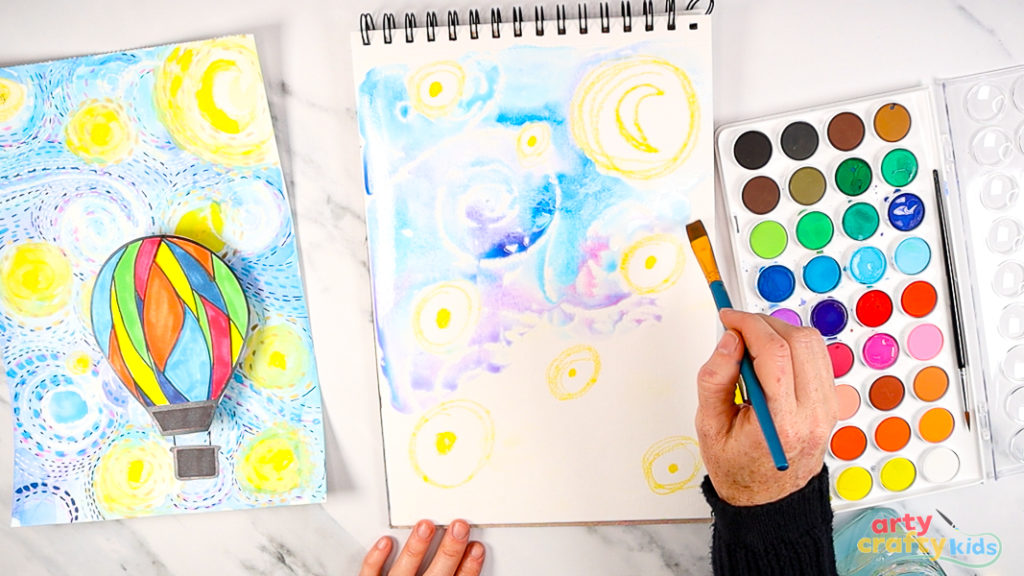
Play with different shades of blue, a touch of purple, or even a hint of pink to make your background truly your own.

As the paint settles, you’ll see your swirls magically reveal themselves, adding a beautiful resist effect that captures the dynamic movement and texture of Van Gogh’s Starry Night.
This step is all about experimenting and having fun with resist art, bringing your night sky to life with layers of color and personality.
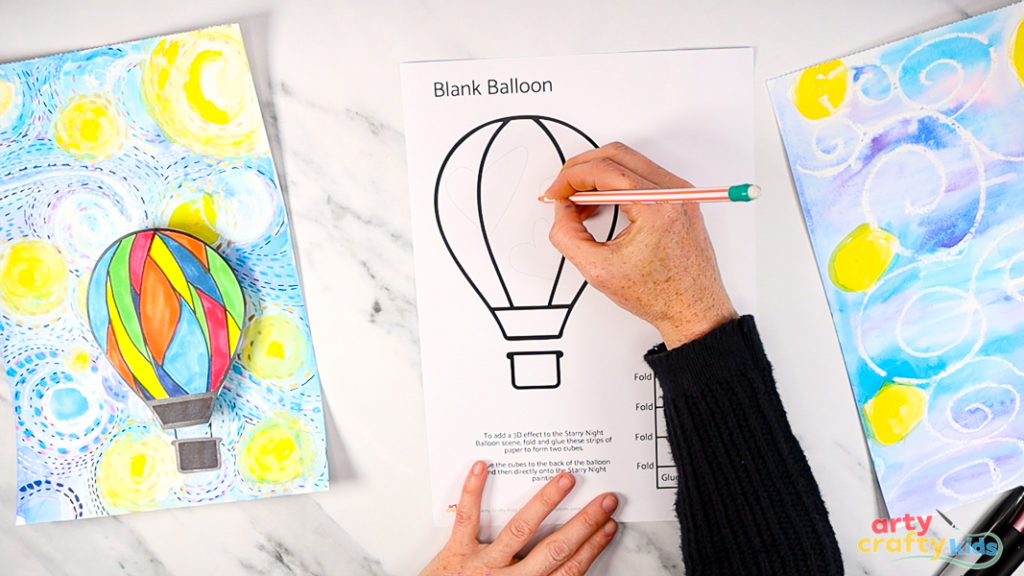
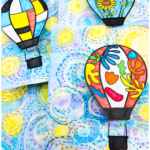
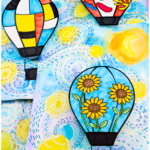
Step 4: Design a hot air balloon.
While the Starry Night painting dries, choose one of our balloon coloring templates or grab a pencil and sketch out your design.
You could draw inspiration from a famous artist – like our Romero Britto Hearts balloon – or dream up something unique!

Once you’ve finished your design, bring it to life with your favorite coloring materials.
You could use colored pencils, markers, or paints – whatever you love best!

To make it pop even more, trace over the details with a black marker pen for bold, eye-catching lines.
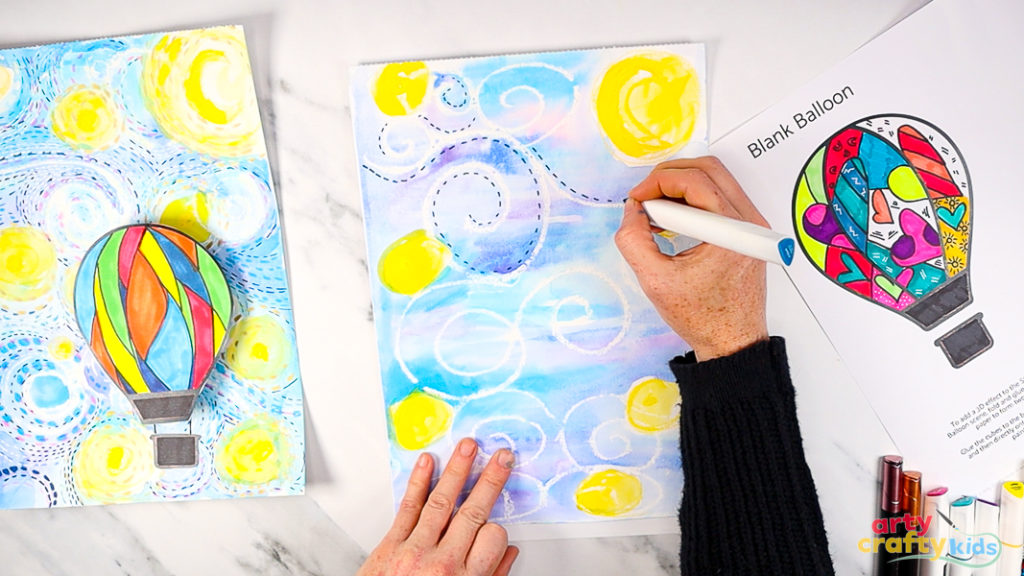
Step 5: Use a marker pen to draw dashed lines around the swirls.
Next, take a blue marker pen and add dashed lines around the swirling patterns you made earlier.
These simple lines really help bring out a sense of movement, just like Van Gogh loved to show in his Starry Night.
This step is also a great way to explore mixed media, adding detail and texture with both watercolors and markers. Have fun with it and watch how the dashed lines make your night sky come alive!
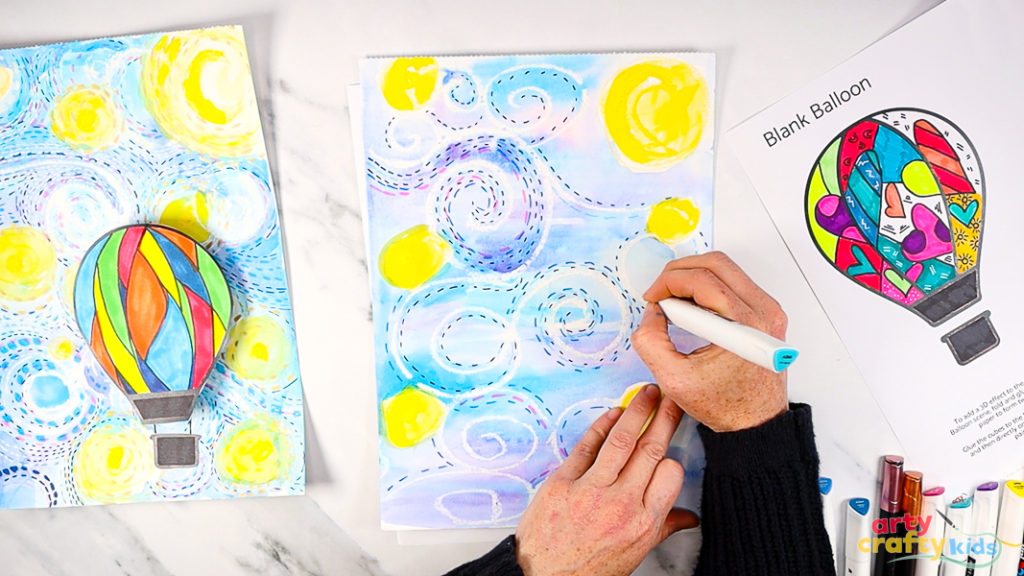
Use different colored markers to layer and build the dashed lines. Try using different sizes – some thin, some thicker – and mix in different shades of similar colors for added depth and dimension.
If you have an acrylic white marker pen, add that too!
This is a fun way to play with color and texture, adding even more movement and interest to your starry night sky!

Use bronze, orange, or yellow markers to draw circles around the stars and moon.
This adds a warm glow to your night sky.
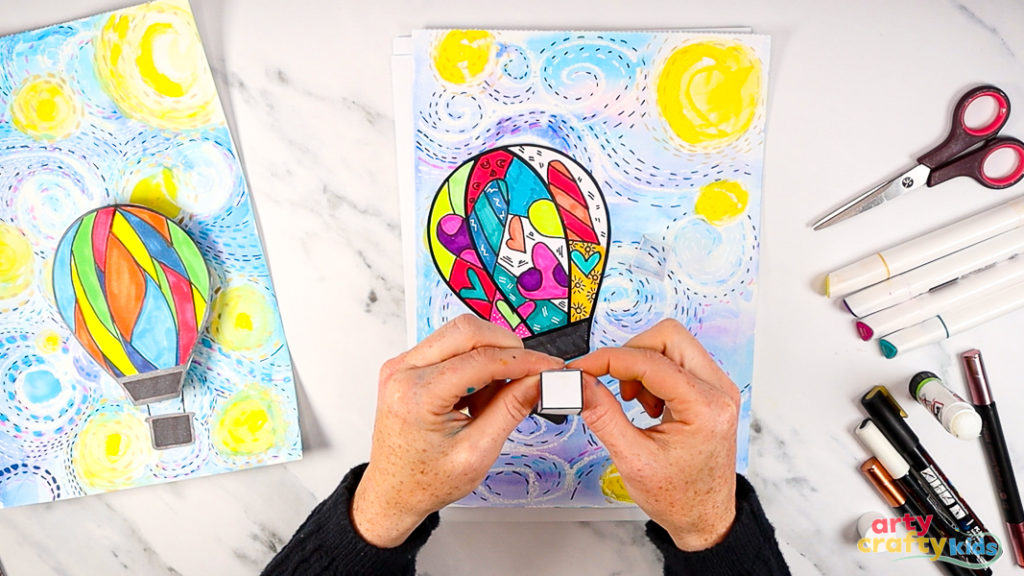
Step 6: Cut out the hot air balloon and additional elements.
Carefully cut out your hot air balloon design, along with any extra elements you’d like to include.
Then, follow the template instructions to fold the strips into two cubes – this will add a fun, 3D effect.

Step 7: Affix the cubes to the hot air balloon.
Turn your hot air balloon design over and stick the cubes to the back, using plenty of glue to make sure they’re firmly attached.

Step 8: Affix the hot air balloon to the Starry Night painting.
Now for the finishing touch! Carefully glue your 3D hot air balloon onto your Starry Night painting.
This step brings everything together, combining your colorful balloon with the swirling sky.
And that’s it – our Van Gogh’s Starry Night Hot Air Balloon Art Project for Kids is complete!
Through resist art, watercolor techniques, and mixed media, we’ve explored the swirling skies of Van Gogh’s masterpiece while adding our own creative twist with hot air balloons.
I hope this project has sparked plenty of imagination, fun, and a deeper appreciation for art. Keep experimenting and making it your own – there’s no end to the magic you can create!


