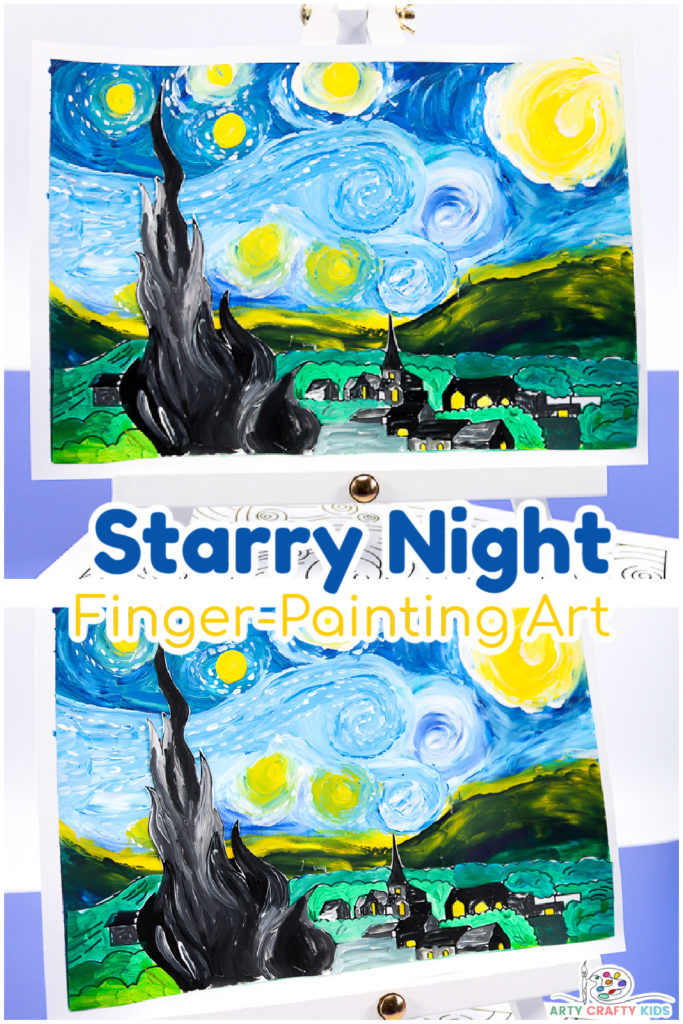
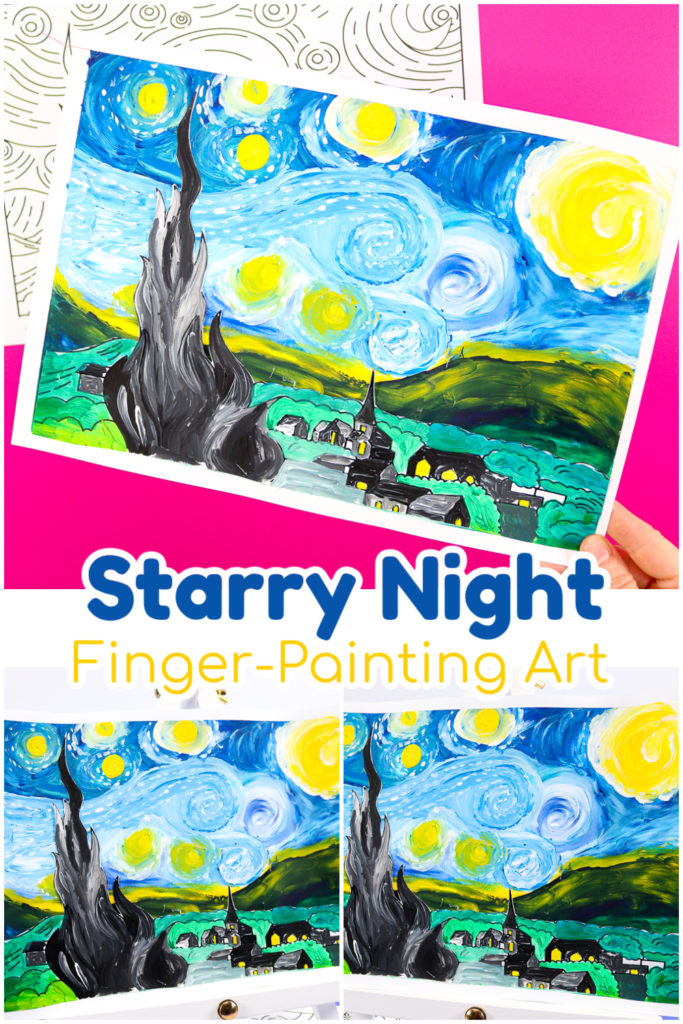
Our Starry Night Finger-Painting Art for Kids tutorial will teach children how to use their finger tips to create their very own Vincent Van Gogh inspired painting.
“I don’t know anything with certainty, but seeing the stars makes me dream.” Vincent van Gogh
This finger-painting Starry Night art, inspired by Van Gogh is a fun and tactile art project for children, who will explore the key elements of Van Gogh’s use of color, movement and texture through touch.
Vincent Van Gogh – Quick Facts
- Vincent Willem van Gogh was born on March 30th, 1853 in Zundert, Netherlands.
- He’s a post-impressionist painter and within 10 years, he creating more than 2000 works of art. Despite his fame, he only sold one painting within his lifetime.
- Van Gogh did not start painting until his late 20’s and was largely self taught. He did not receive any formal training until 4 months before his death.
- He cut off his own ear!
- Van Gogh’s most famous painting – The Starry Night – was painted in an asylum and is a product of his imagination.
Related Posts:
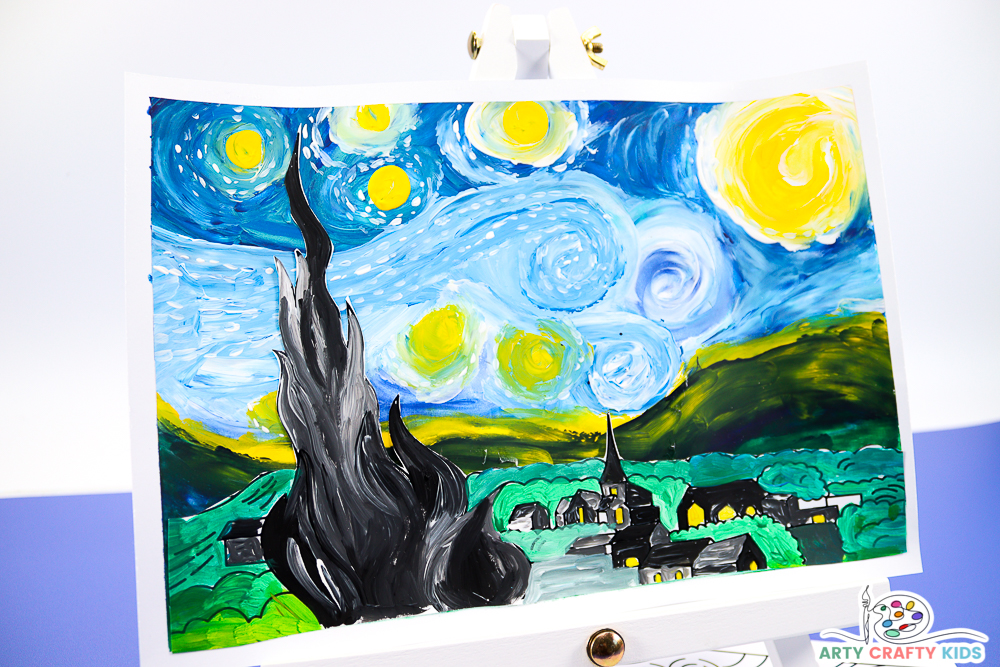
Starry Night Finger Painting for Kids:
Painting is a great way to get kids interested in art, and foster creativity. In this post, we explore an easy craft idea that will allow your kids to recreate Starry Night with their fingers!
— Photo by ArenaCreative
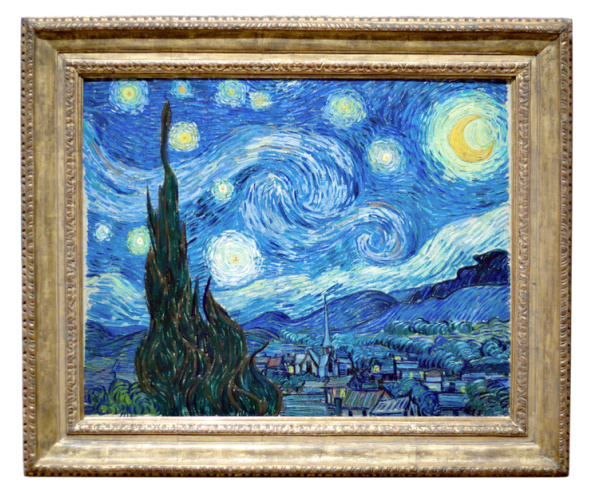
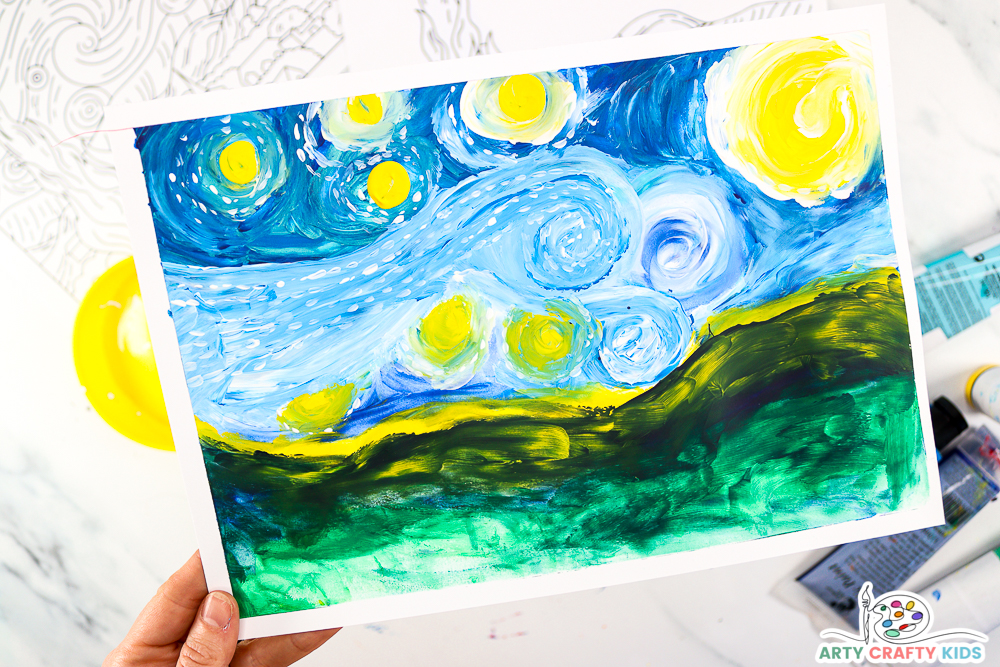
Van Gogh’s Starry Night is dominated by the blue sky and the contrasting, attention grabbing, bright yellow moon. The sky takes up more than two thirds of the painting and the depicted movement created through small brush strokes masterfully engages the viewer’s eye.
Our finger-painting art inspired by Starry Night aims to connect Arty Crafty Kids with Van Gogh’s use of color, movement and texture; two significant elements of design.
Starry Night Finger-painting for Preschoolers. Kindergarten and EYFS (Early Years Foundation Stage)
Our finger-painted version of Starry Night is entirely process led and while the paint can be moved into specific shapes and placements, for the youngest children, it’s about playing with the paint and getting a feel for how it moves.
– How can they make swirls?
– What happens to the colors?
– What does yellow and blue make?
At this stage, children will develop an understanding of complementary colors i.e the dark blue helps the yellow to stand out, and then use this awareness in the composition of their art.
Starry Night Finger-painting for 1st , 2nd Grade and Beyond
The painting may become more defined and purposeful, with the composition consisting of the many of the key features in Van Gogh’s Starry Night.
Children may may use the printable elements to create the village contrast OR design their imaginary village.
Materials:
- Card Stock or Mixed Media Paper
- Paint
- Pencil
- Artist Tape
- A Fine Tipped Paintbrush
- Scissors
- Glue Stick
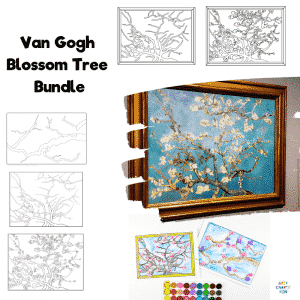
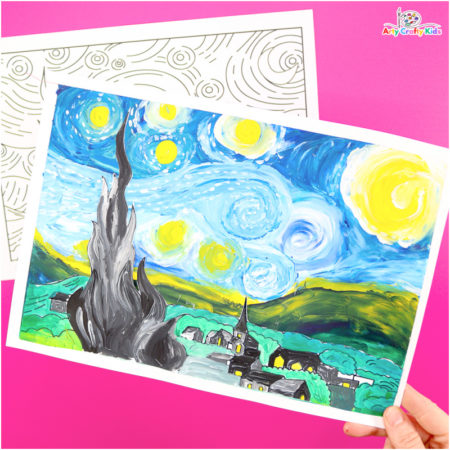
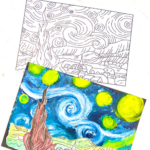
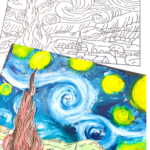
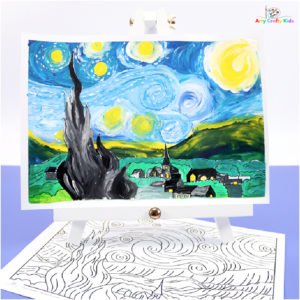
Download the Starry Night Coloring Page and Finger-Painting Template:
The Van Gogh Bundle features a complete Starry Night Coloring Page and a separate village element with a blank sky.
The village template can be completed with an array of mediums with children drawing their night sky scene directly onto the template. Alternatively, it may be colored, cut and stuck to a painted background (as demonstrated in this tutorial).
The templates are available to members of the Arty Crafty Kids club.
Members will need to log in to the Arty Crafty Kids Club to access the templates:
Not A Member?

Watch the Finger-Painting Tutorial:
Step-by-Step Vincent Van Gogh Inspired Starry Night Finger-Painting:
First, prepare the canvas by taping a piece of card stock or mixed media paper to a table top or a paint safe surface.
The tape is particularly useful in the process of finger-painting and will prevent excess mess venturing outside of of the canvas.
Once removed, it will also create a lovely border!
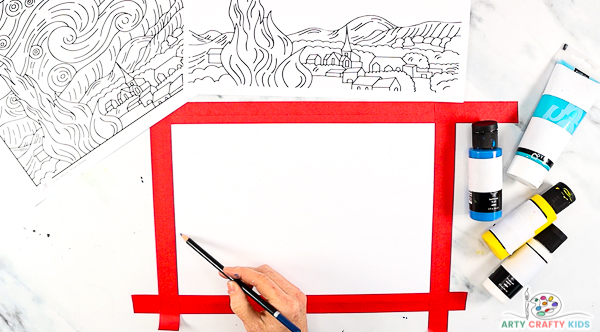
Roughly Outline Starry Night
Use a pencil to draw some flowing lines and markers for stars, the moon and the “dream-like” night-time swirls that feature in The Starry Night.
Arty Crafty Kids may use The Starry Night coloring page as a guide for their lines or go with the flow and create their own.
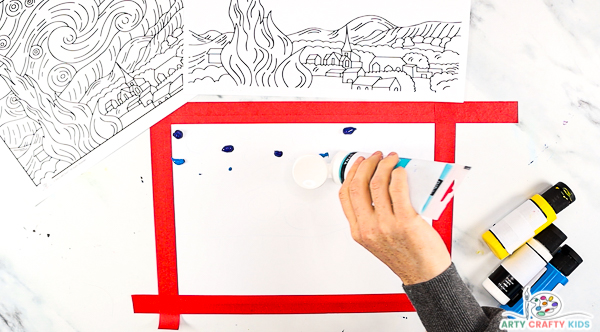
Apply Generous Amounts of Blue Paint
Van Gogh’s Starry Night is dominated by tonal blues and this is where our finger painting art process will begin.
Select two or three shades of blue and apply the paint in small blobs directly to the sheet. Alternatively, transfer a blob of paint with a paintbrush from a mixing palette.
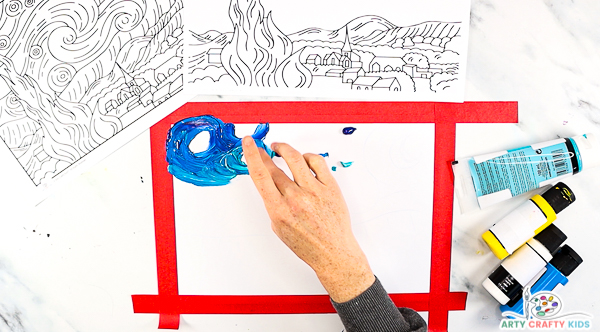
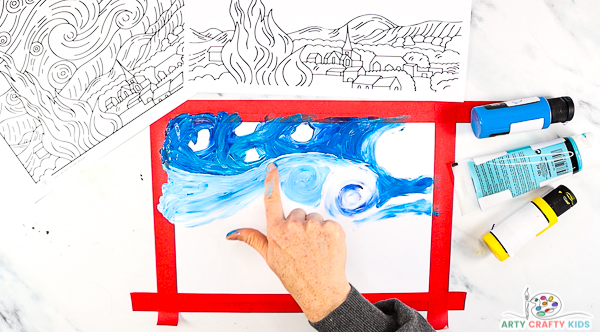
Blend the Blues with Fingers
Next, use a finger to blend the blues.
Blend the paint with exaggerated swirls around the marked out stars. This is a lovely way to experience that sense of movement portrayed in Starry Night.
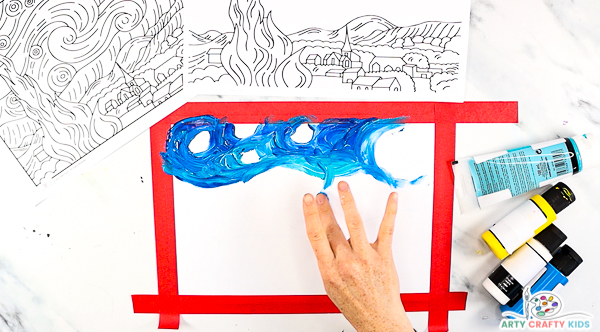
Blend Lighter Shades
Add a light shade of blue, blending and layering with the darker swirls.
Van Gogh used blue to depict the night sky in varying degrees of starlight, with the dark blue swirling around the stars and the lighter shades illuminating a flowing cloud formation that spreads across the sky.
In total, the night sky features at least 21 different shades of blue – How many shades of blue can your Arty Crafty Kids find?
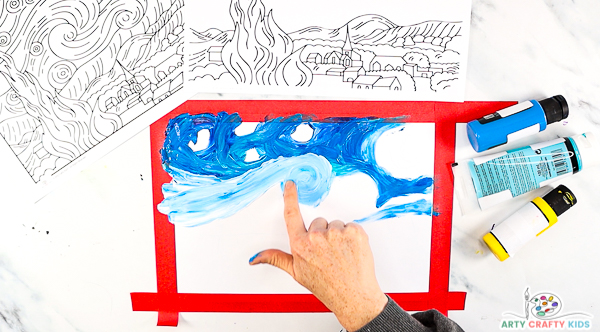
Spread a Line of White with the Finger
Next, add a single blob of blue and a blob of white paint either side of the blue on the far left hand side.
Use the fingers to blend the blue and white to form a swirl that presents as a terrific gust of wind. To see this motion in action, refer to the video tutorial above.
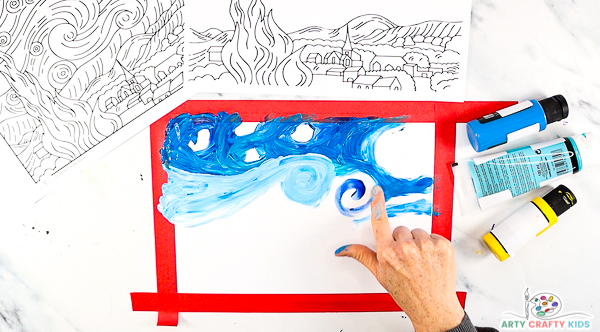
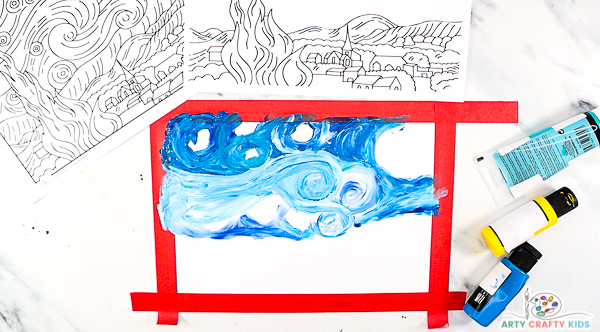
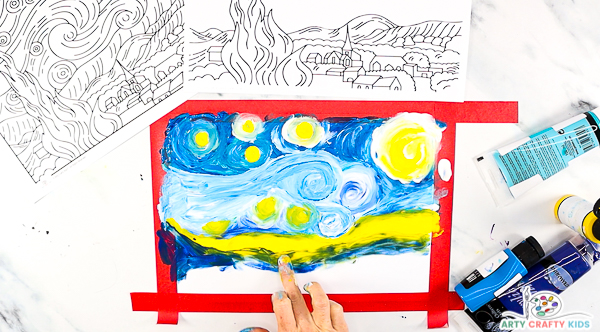
Finger Paint More White and Blended Swirls
Use white and blue to create a series of defined swirls that spread across the night sky.
The swirls are used to guide the viewer’s eye around the painting, adding a sense of movement that sharply contrasts with the stillness and quiet of the village below.
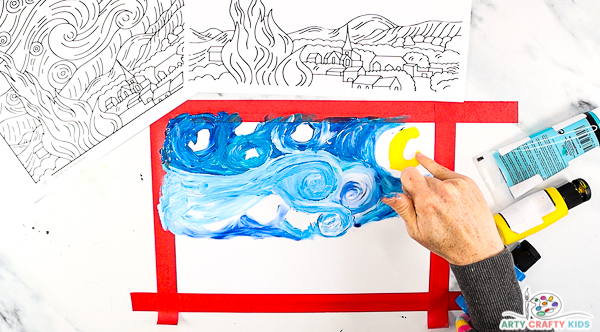
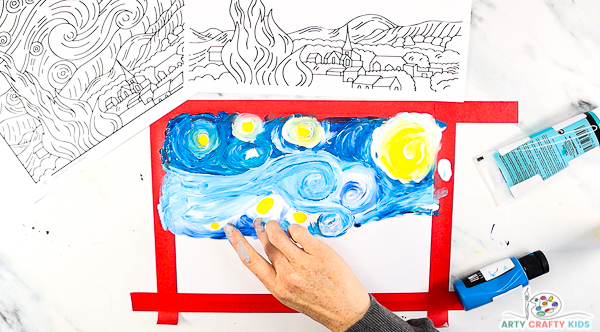
Finger Paint a Large Moon and Circular Star
Use a blob of yellow paint to create a crescent moon shape and then dip the finger into the excess paint to fill the empty round circles with round yellow stars.
In The Starry Night, Van Gogh used a heavily loaded brush and palette knife to create thick layers of paint, adding significant texture to the painting.
The finger-painting art process creates a similar effect and offers a tactile experience to enhance children’s understanding of this key element. By using their fingers to create layers, movement and shapes, they will organically develop an awareness of texture, color and spatial relationships.
Add a Layer of Yellow and then Blue
Add a layer of yellow and blend with a layer of dark blue; this helps to depict the beginnings of the dark blue hills that are illuminated by a small spread of light.
Yellow and blue make green, a color that’s embedded within Starry Night’s sky and forms as a natural graduation of color with the contrasting blue and yellow.
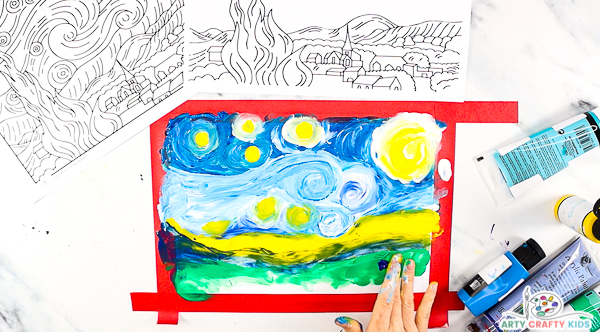
Spread a Layer of Green Paint
Next, fill the remaining white space with a mix of green and blue paint. This area will become the background of the village.
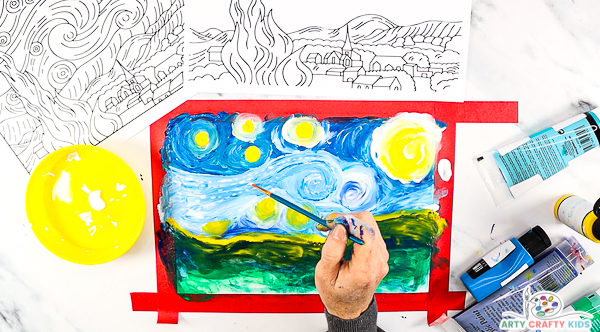
Add a Series of White Short Sharp Lines
Use a paint brush to create a series of short sharp lines that enhance the swirls and circular shapes of the stars.
Van Gogh painted Starry Night with various horizontal, vertical, diagonal and curved lines that came together to form one continuous flow.
Adding this element to our already well formed background will give Arty Crafty Kids an insight into Van Gogh’s original painting technique. It also creates a beautiful contrast against the blended and textured night sky.
Leave The Starry Night Painting to Dry
Leave the painting to dry and once dry, carefully remove the surrounding masking tape to the reveal the white borders.
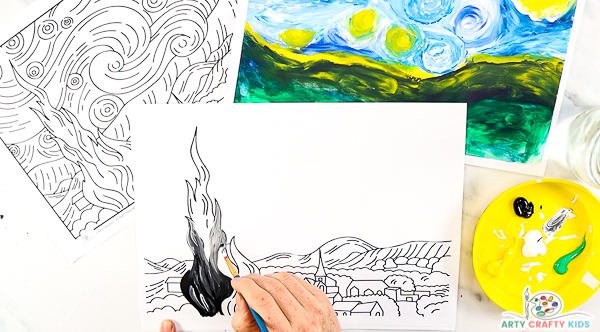
Paint the Village
Using a paintbrush, fill the village scene with color.
The dark spiral cypress tree dominates the village scene and in Starry Night is painted in dark shades of brown, green and black. We’ve painted ours in mono to enhance the contrast against the sky.
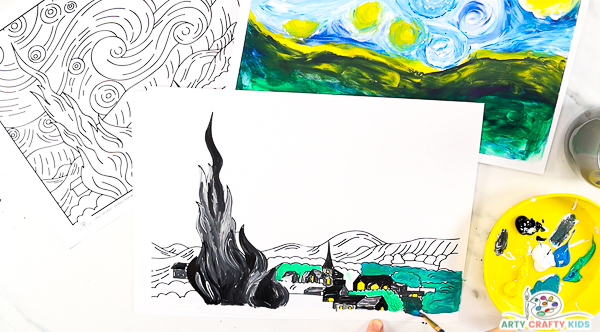
Next, paint the village.
The village in Starry Night is painted with grays, browns and blues, with the buildings outlined in black.
It’s worth remembering that Van Gogh’s village is entirely fictitious and serves as a window into his imagination. As such, there are no limitations on how Arty Crafty Kids paint their villages – my own children added rainbow colors!
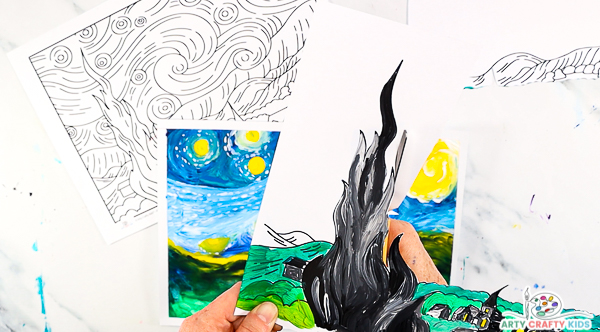
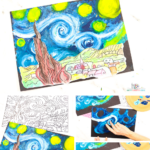
Cut out the Village
Once the village is complete, leave it to dry and then cut out the painted area.
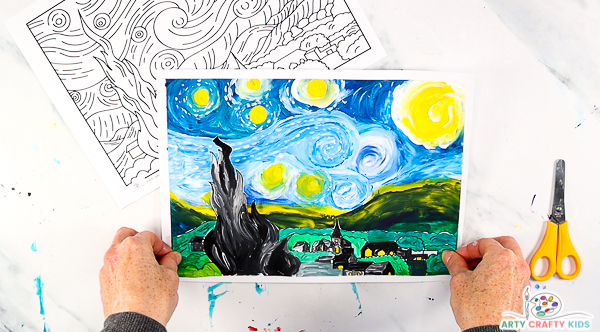
Glue the Village Scene to Starry Night
To complete the Starry Night Finger-Painting Art inspired by Van Gogh, glue the village area to the base of the painting.
I hope your children enjoy the experience of creating their very own finger-painted Starry Night and have come away with a deeper understanding of the key elements that make Van Gogh’s painting so special.