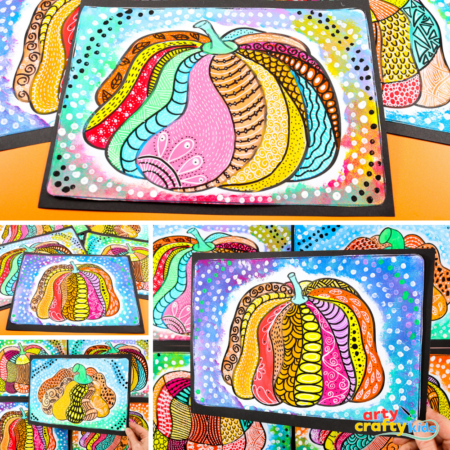
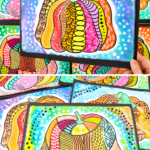

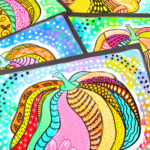
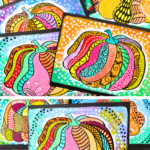


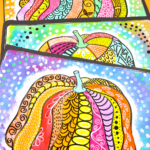


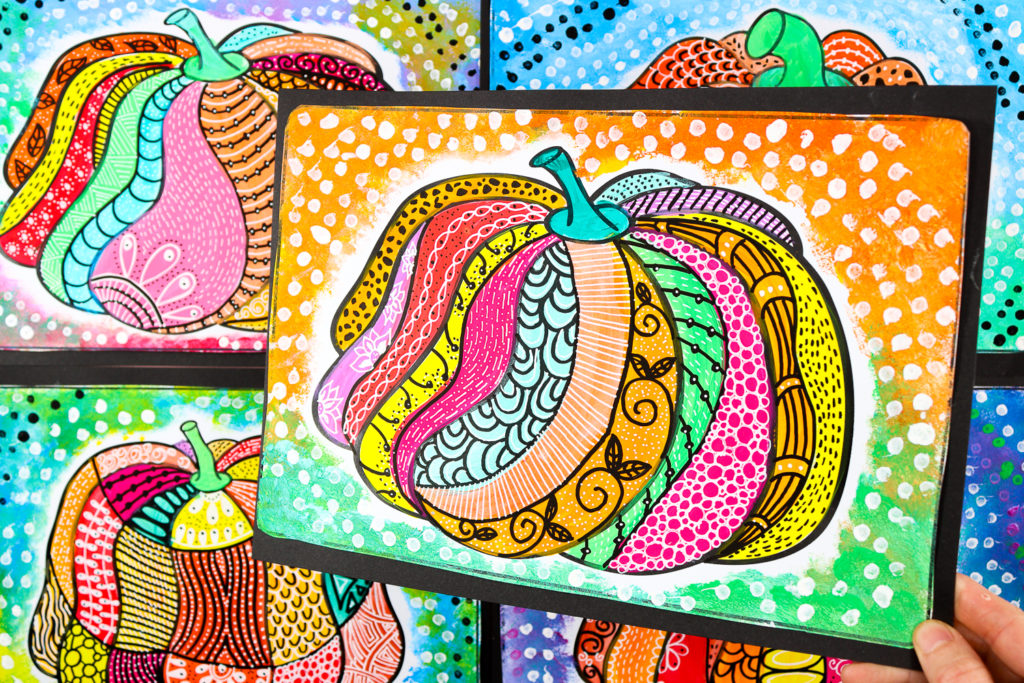
If you’re looking for a fun, creative, and easy fall art project for kids, these Pattern Pumpkins are perfect! Inspired by zentangle and doodle art, this activity combines bold shapes, bright colors, and repeating patterns to create a playful take on the classic pumpkin.
This project follows the same creative process as our popular Fall Leaf Painting for Kids – Pattern Art Project, giving children another chance to explore patterns in a seasonal theme.
For an extra creative twist, kids could take design inspiration from our Kusama-inspired dot pumpkins, try their hand at drawing their own pumpkin, or even transform their patterned pumpkin into a Halloween design by adding Jack-o’-Lantern features.
Children will love experimenting with different designs to fill their pumpkins, and the results are always unique!
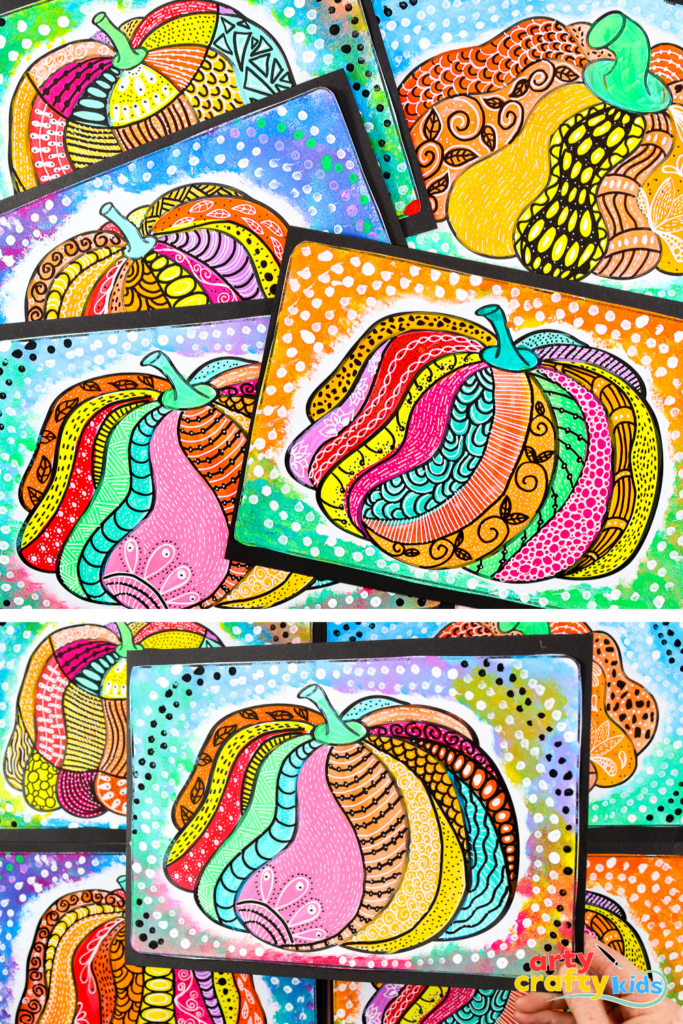
This project is simple enough for younger children to enjoy, while also offering older kids the chance to explore more detailed and intricate patterns.
It’s a wonderful way to celebrate Autumn, whether for Halloween, harvest, or Thanksgiving.
How to Make Pattern Pumpkins – Easy Fall Art for Kids
Materials:
- White Card Stock
- Paint
- Acylic Paint
- Marker Pens
- Pencil
- Q-tip
- Sponge
- Pumpkin Templates (members will need to login to access the templates).
Not a Member?
Join the Arty Crafty Kids club to access the Pumpkin Templates and 100s more Art and Craft templates, How to Draw Guides, and Coloring Pages.

Step-by-Step: Fall Pattern Pumpkin Art Project

Step 1: Use a pencil to divide the pumpkin segments.
Use a pencil to divide the pumpkin into segments lightly.
Younger children may prefer keeping the sections larger, making it easier to fill with bold, simple designs.
Older children can break the sections down into smaller areas, giving them more space for detailed patterns and a wider variety of doodles.
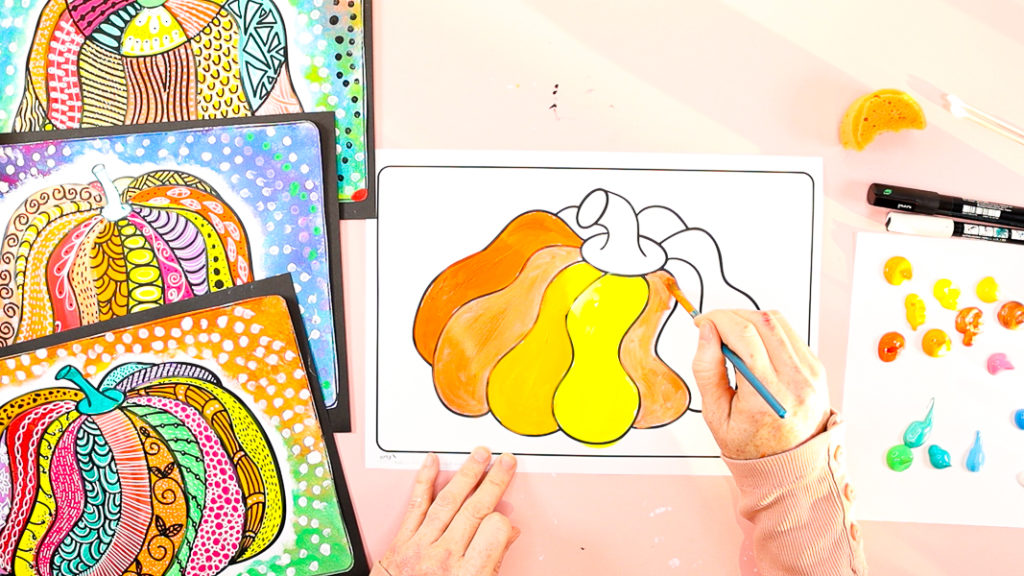
Step 2: Paint the pumpkin.
Begin painting ( or using a favorite medium) each segment of the pumpkin.
For a traditional fall look, try using analogous colors such as yellows, oranges, and warm reds to capture the classic pumpkin feel.

For a more abstract approach, experiment with unexpected color combinations – mix in blues, purples, pinks, or even neon shades for a bold and modern twist.

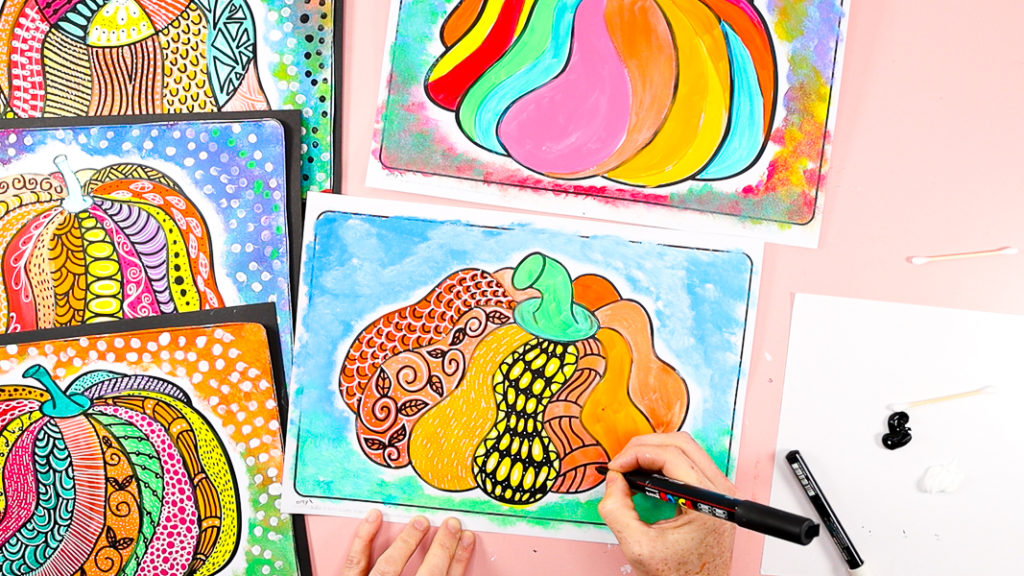
Step 3: Paint the background.
Using a sponge, gently blend colors around the pumpkin to create soft, gradient-like textures.
For extra impact, choose contrasting shades that will make the pumpkin stand out.

Or, paint a natural setting with blue for the sky and green for the ground.
Step 4: Define the pumpkin segments and begin doodling.
Once the paint is dry, use a black marker to outline each pumpkin segment and clearly define the shapes.

Next, begin filling the sections with doodles and patterns.
Encourage children to try a mix of lines, swirls, dots, zig-zags, leaves, and other simple motifs.
Each segment can have its own design, making the pumpkin look bold and full of personality.
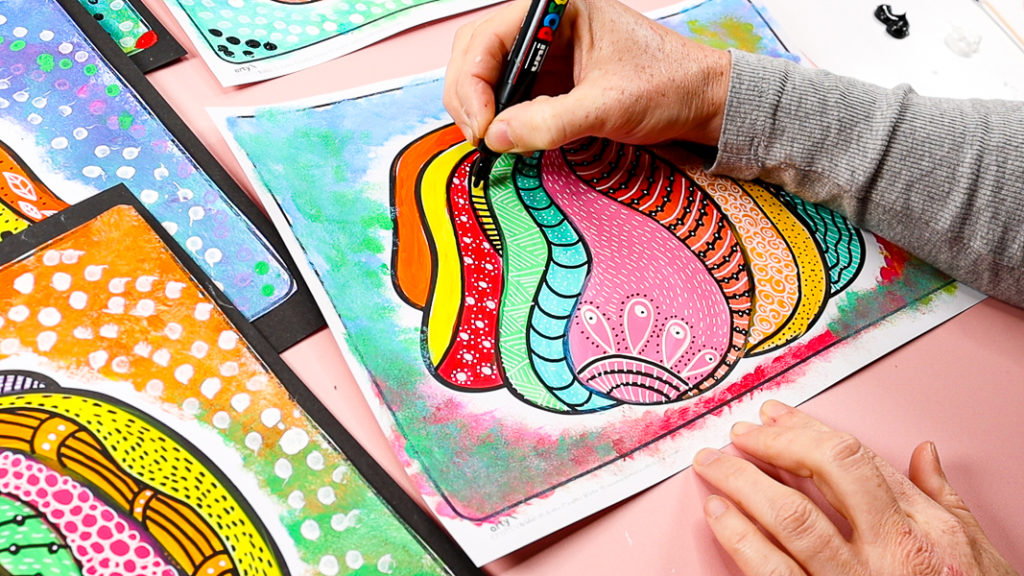
Remind kids that there’s no “right” way to doodle – this step is all about experimenting and letting their creativity flow!
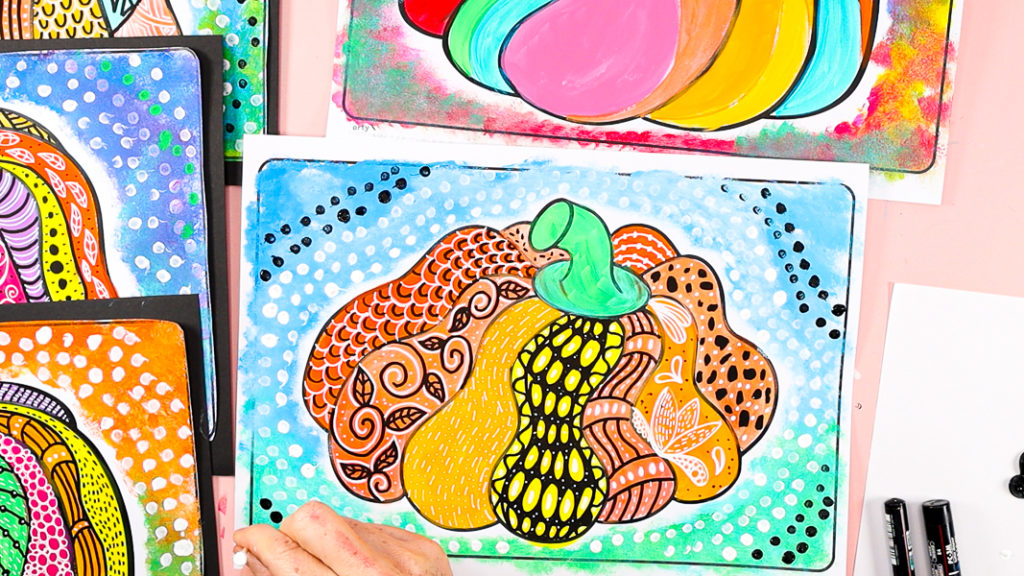
Step 5: Add the final touches.
For the finishing touch, add dots to the background using a Q-tip, markers, or even the end of a paintbrush.
Children can experiment with different sizes and colors of dots, layering them to create depth and texture. The dots give the artwork a playful, dynamic feel and help the pumpkin stand out beautifully against the background.
This final step ties the whole piece together, making each pumpkin look vibrant and full of energy!
The Pumpkin Pattern Art Tutorial is Complete
This Pumpkin Pattern Art project is more than just a fun seasonal activity – it’s packed with opportunities for learning and creative growth.
As children draw, paint, and doodle, they’re strengthening their fine motor skills and building confidence with hand control.
The process of repeating shapes and lines helps them recognize and explore patterns, while experimenting with color – whether through analogous autumn shades or bold abstract palettes – introduces them to key ideas in color theory.
What I love most about this project is how open-ended it is. Every pumpkin turns out unique, giving children the freedom to express themselves and celebrate their own creativity.
The mindful nature of doodling encourages focus and calm, and tying the project to pumpkins makes it a wonderful way to connect with autumn traditions, from harvest to Halloween to Thanksgiving. The end result is always vibrant, full of personality, and a joy to put on display.

I hope your children love creating their own Pattern Pumpkins! Don’t forget to download the printable templates – they make it easy to get started and give kids a strong base to explore their creativity.
I would love to see how your pumpkins turn out, so if you share them on social media, be sure to tag Arty Crafty Kids. It’s always such a joy to see the wonderful ideas and personality children put into their art.