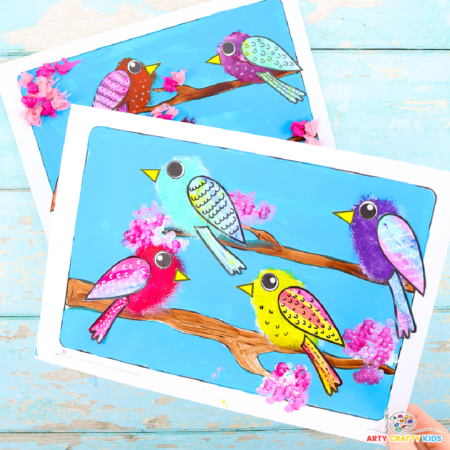

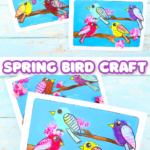
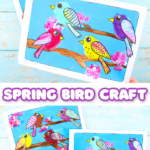
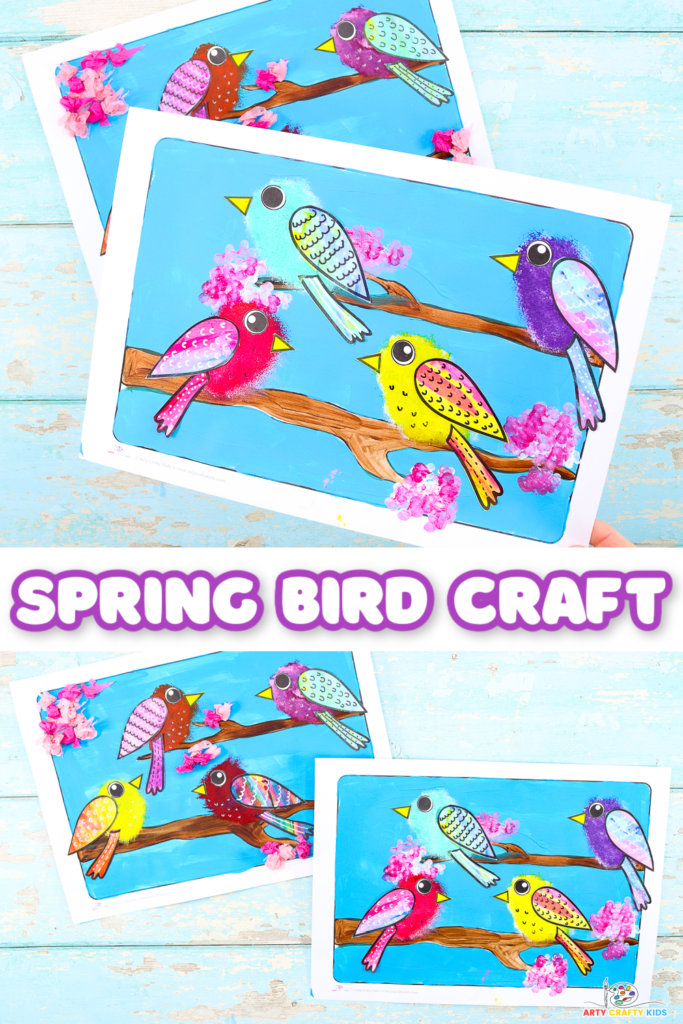
Welcome the season of Spring with this fun and easy-to-make Spring Tree and Bird Craft for kids.
In this art and craft project, kids will learn how to use not just one or two, but three engaging painting techniques to make birds and blossoms for the Spring tree branches.
Complete with bird and tree templates, the simplicity of this Spring craft idea makes it suitable for kids of all ages, which is great if you’re looking for an afternoon project to do with your kids at home or are looking for a do-able arty crafty lesson within the classroom.
Older kids could take the project a step further and learn how to draw their own birds.
How to Make the Birds on a Spring Branch Craft
Inspired by our Winter Bird and Birch Tree Painting idea, this simple art and craft idea adds a springtime feel to what’s already been a really popular idea with kids!
Materials
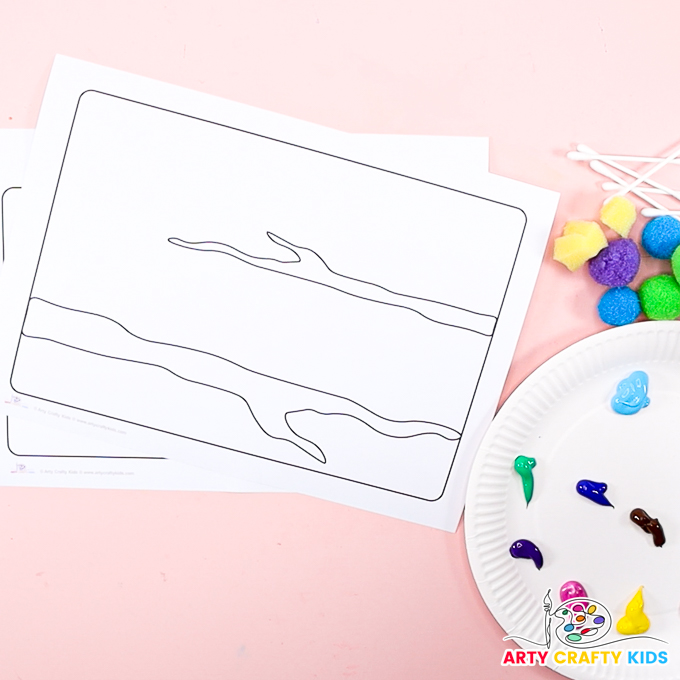
- White Card Stock for Printing
- Acrylic Paint
- Q-tips
- Sponge or Pom-Poms
- Scape Card Stock
- Black Marker Pen
- White Acrylic Pen (optional)
- Scissors
- Glue Stick
- Paintbrush
- Spring Tree and Bird Template (members will need to login to access the template).
Not a Member?
Join the Arty Crafty Kids club to access the Spring Tree and Bird Template and 1000’s more Art and Craft templates, How to Draw Guides and Coloring Pages.

Step-by-Step for the Spring Tree and Bird Craft
The Spring Tree and Bird Craft encompasses a few fun and simple painting techniques, including sponge, q-tip, and scrape painting!
As such, the instructions are organized into four simple sections to guide you effortlessly through the process; ensuring that drying time is factored in.
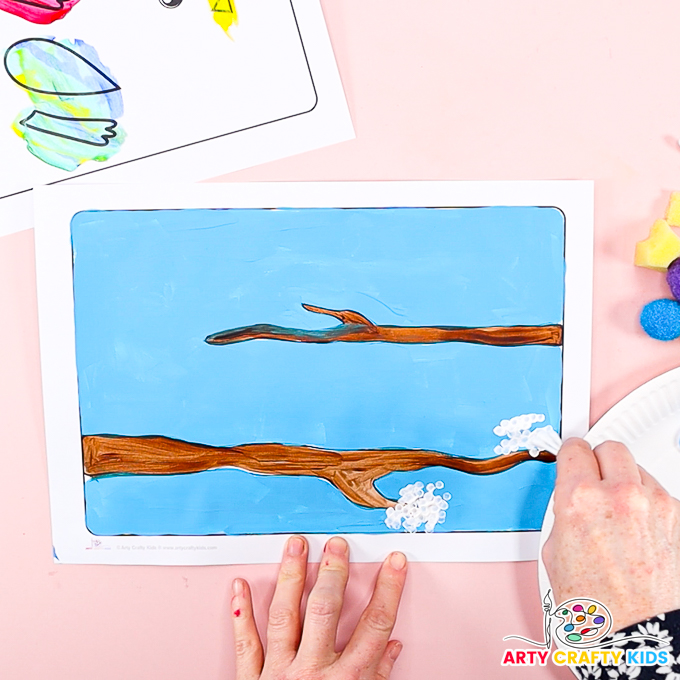
1. How to Paint a Spring Tree with Cherry Blossom

Step 1: Paint the sky and tree branches.
While we have opted for a plain blue background, Arty Crafty Kids could get creative by painting a sun and clouds, a sunset (similar to our bird silhouette art idea) or create a twinkly night sky.
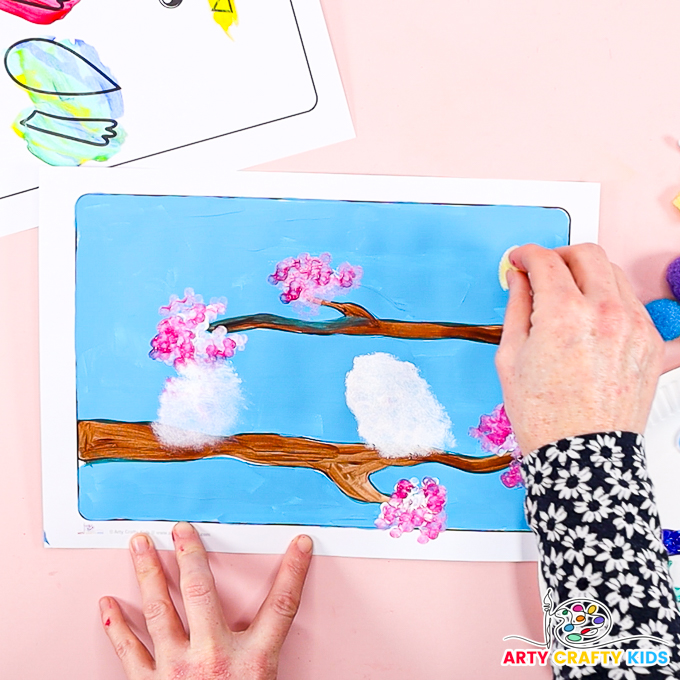
Step 2: Paint the blossoms.
Q-tips are like magic wands for painting, and they’re super easy for kids to use, even preschoolers!
With just a bunch of Q-tips and some paint, they can create a stunning blossom effect on their trees.
Just dip the Q-tips in paint and dab them onto the branches. It’s as easy as that, and the result is a tree full of blooming blossoms.
To begin, simply cluster together 4 or 5 eco-friendly Q-tips by either holding them tightly or securing them with a tie.
Next, dip the clustered Q-tips into white paint, then begin printing onto the tree branches.

Next, add a layer of pink onto the white blossom areas.
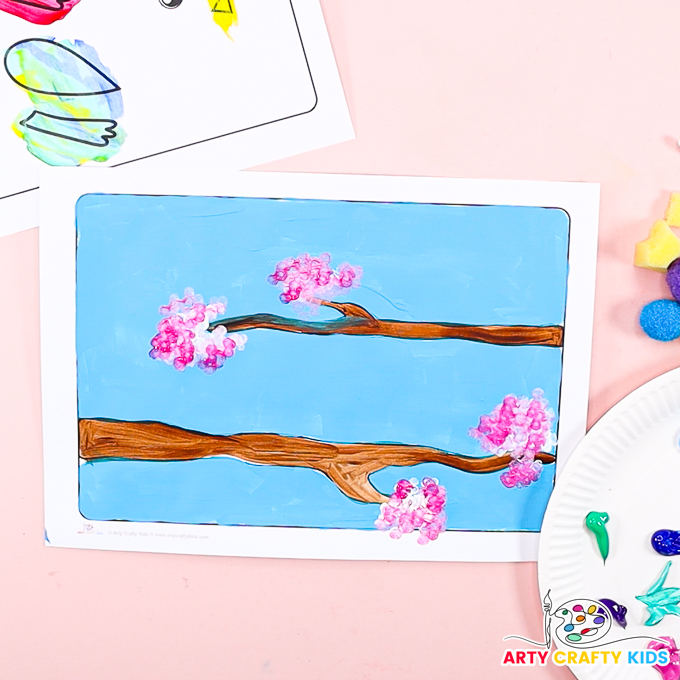
Print a 3rd layer of dark pink blossoms and leave the Spring tree to dry.
2. Scrape Painting the Bird Template
Our birds are made using scrape painting, a fun technique where kids spread colorful paints across paper with scraping tools.
They start by applying different paint shades with brushes or squeeze bottles.
Once the surface is covered, they can use items like old credit cards or plastic combs to gently scrape and reveal the layers of color underneath.
This hands-on process lets them explore and create unique artworks that showcase their own style and imagination.
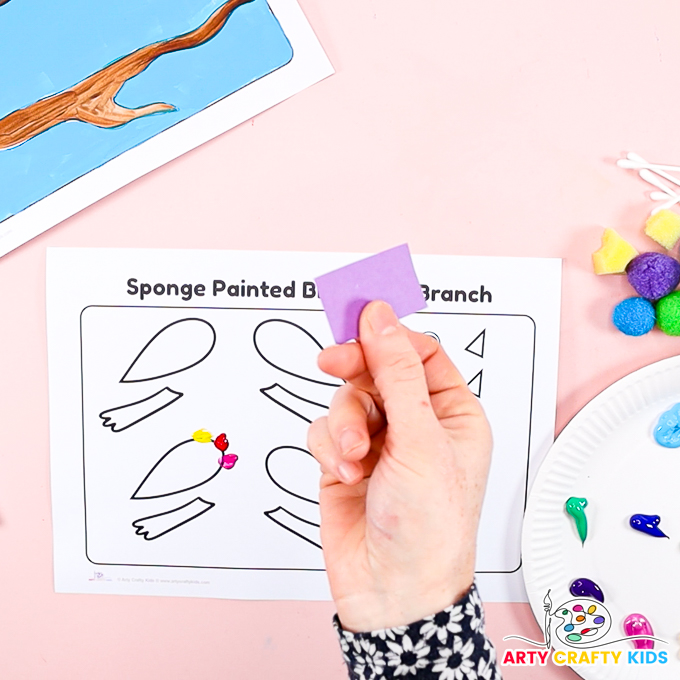
Step 1: Prepare the work space.
Find an old piece of scrap card stock and cut it into lots of smaller pieces.
Next, use a paintbrush to add 2 or 3 colors to the top of one of the bird elements.
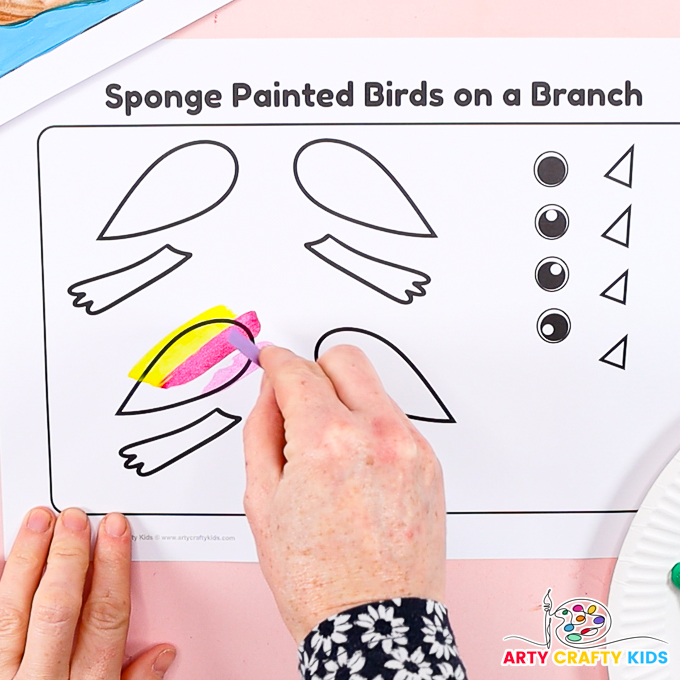
Step 2: Scape the paint.
In one motion, scape the card stock over the paint and spread it evenly across the bird element.
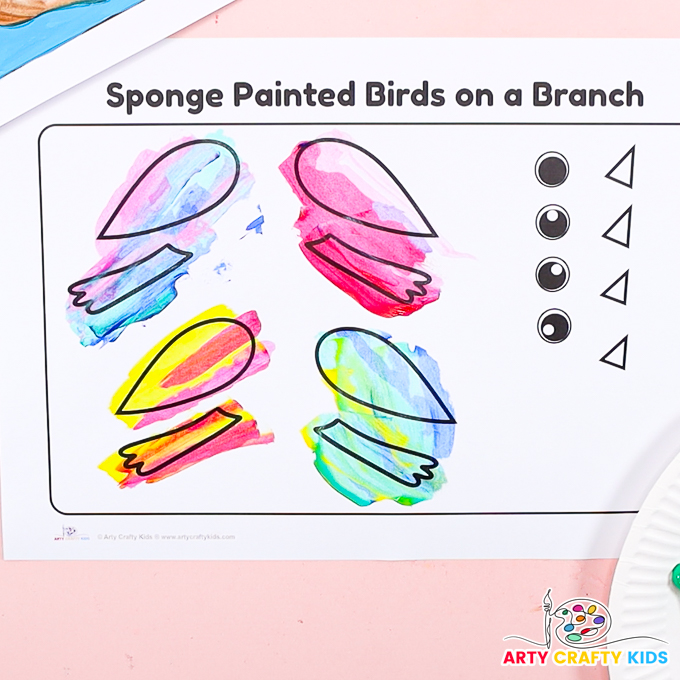
Experiment with different color combinations as you scape paint across all the bird elements, then set them aside to dry.
Since scape painting thins the paint, the birds shouldn’t need too much time to dry
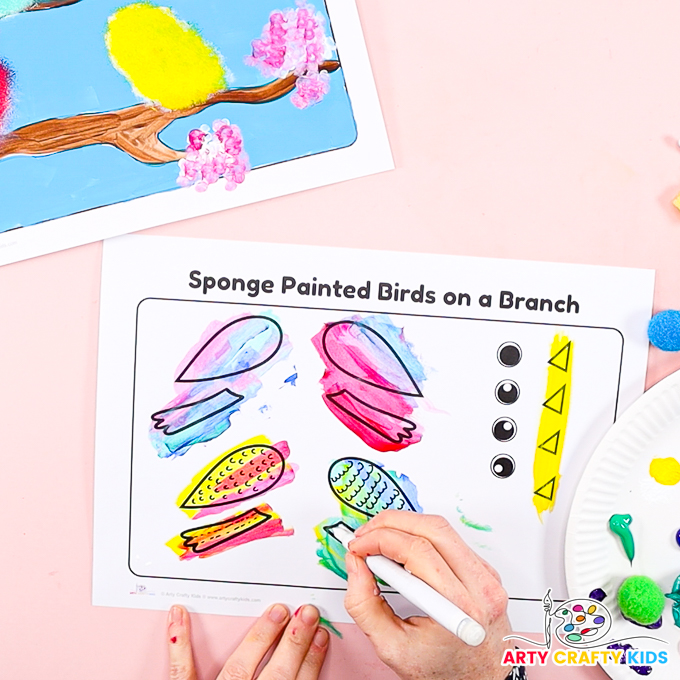
Step 3: Draw feathery detailing onto the birds.
Use a white acrylic marker pen or a black sharpie to add some feathery detailing to the wings and body of the bird.
This can be little rainbow arches or simple white dotted lines. This detailing adds a folk art quality to the artwork.
3. Sponge Painted Birds
Similar to our sponge painted owl craft, these little birds are also painted with a sponge!
Sponge painting is great for kids and preschoolers because it lets them be creative with colors and textures while also improving their motor skills and sensory exploration.
They can learn about mixing colors and how things fit together spatially while having fun and being independent with their art.
Step 1: Dip a sponge into paint and print!
Dip a small piece of cut up sponge or a pom-pom into some white paint and print 2 oval shapes onto each tree branch.
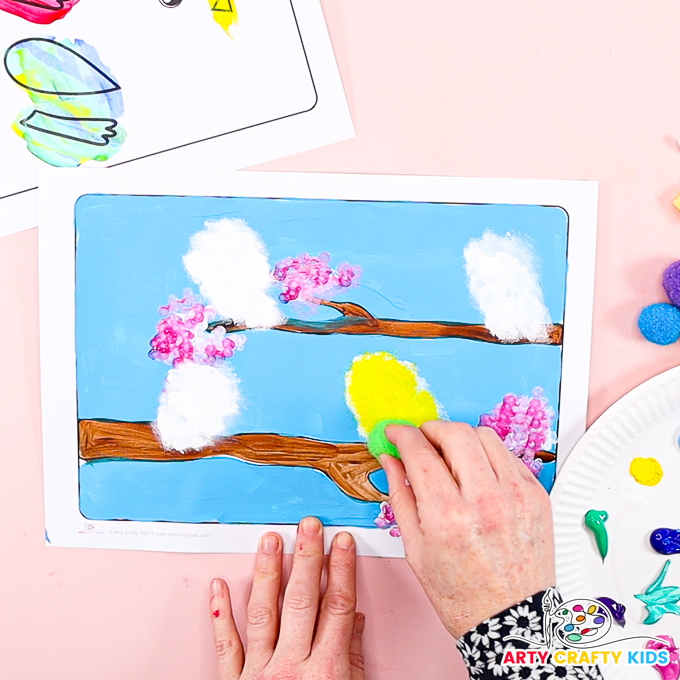
Step 2: Sponge paint over the white areas.
Now, choose a color to sponge paint over the white section.
The white serves as a base coat for the desired bird color, ensuring it stands out vividly against the blue background.
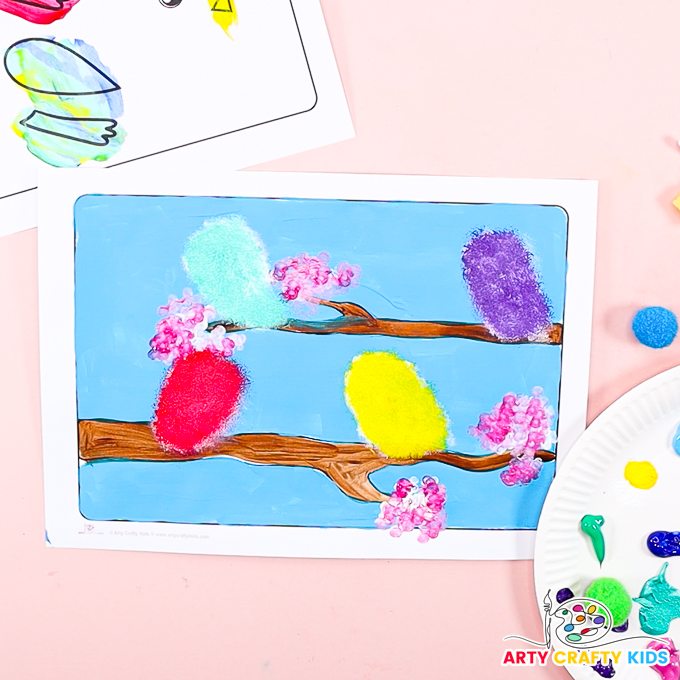
Step 3: Color all 4 birds on a Spring tree branch.
To mix things up, consider using a different color for each bird. This adds variety and lets you get creative with your artwork, making each bird unique and vibrant.
4. Completing the Spring Tree and Bird Craft
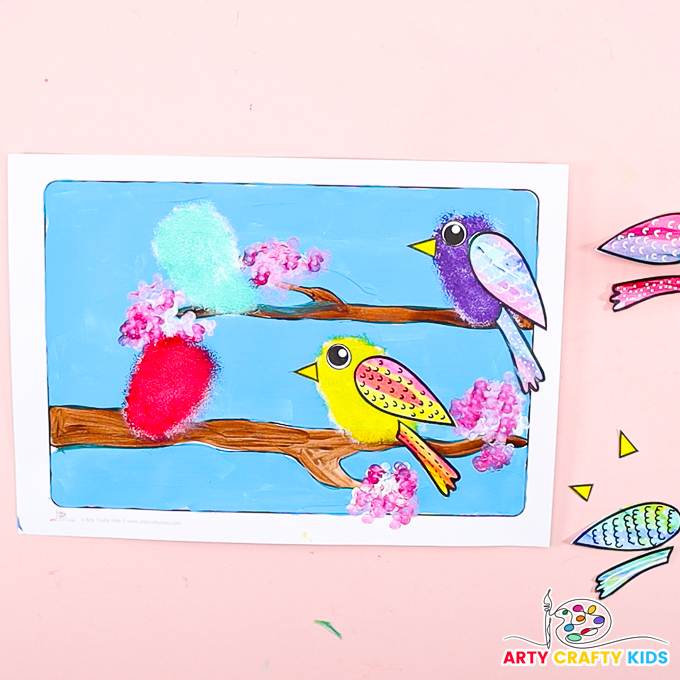
Step 1: Cut out the bird elements.
Carefully cut out the birds wings, tails, eyes and beaks from the template. Then, start glueing the elements onto the sponge-painted bird bodies.
Step 2: Glue all the bird elements onto their sponge-painted bodies.
Mix and match the colorful wings and tails onto the sponge-painted birds, and once all the pieces are affixed, the bird craft is complete!

I hope your Arty Crafty Kids enjoy creating their very own Spring Tree and Bird Craft.
For more art and craft fun with the birds, take a look at our popular rocking bird craft and yarn wrapped bird.