
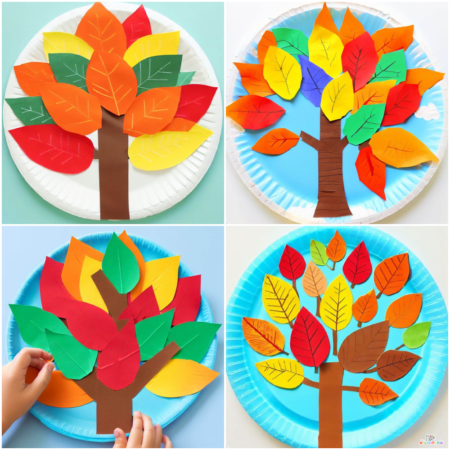
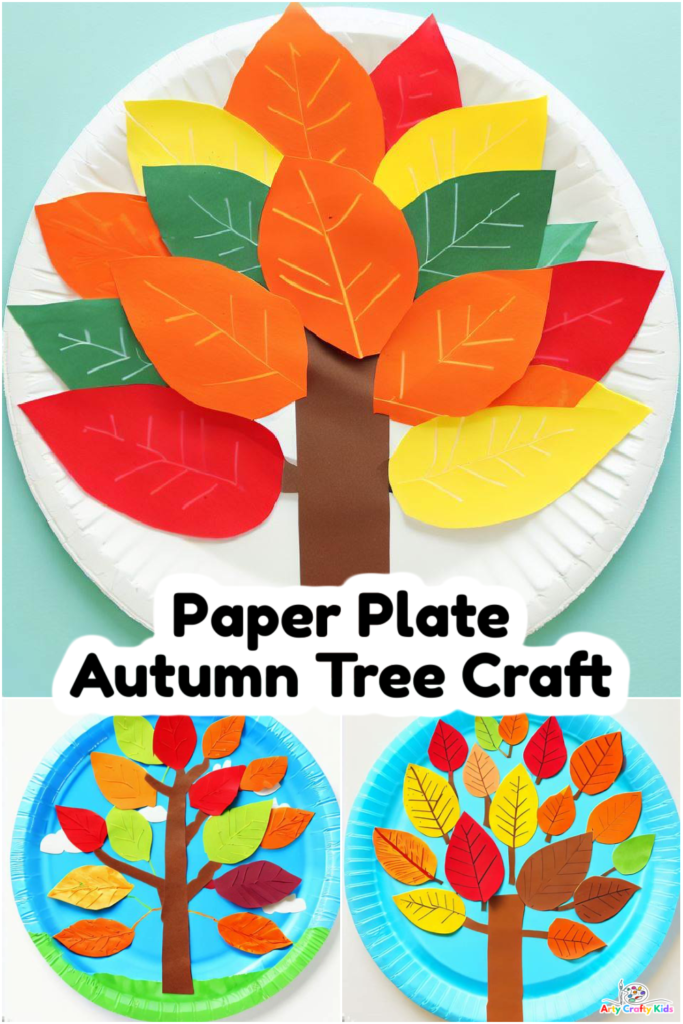
Searching for a simple autumn craft suitable for your preschooler? This lovely Paper Plate Autumn Tree Craft is wonderful for kids of various ages, with a special appeal to the little ones!
This easy fall craft utilizes the ever versatile paper plate and materials commonly found at home, making it a convenient and enjoyable project for both kids and parents alike.
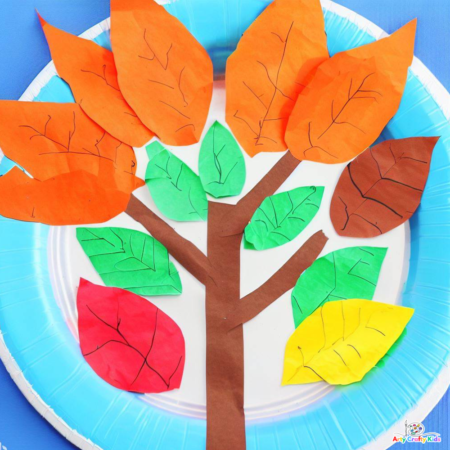
Kids have the chance to add their personal touch to the Autumn tree craft by designing their own tree, leaves, and background. This creative freedom empowers them to recreate their own interpretation of the natural world around them.
For more simple Autumn crafts for your Arty Crafty Kids, take a look at our classic Autumn Handprint Tree, Autumn Leaf Printing.
And for something a little more challenging, our Autumn Paper Leaf Wreath and Paper Leaf Autumn Doodle Art are great choices!
How to Make the Paper Plate Autumn Tree Craft:
Materials you will need:
- Paper plate
- Blue Paint
- Brown construction paper or cardstock
- Yellow, orange, red, and green construction paper
- Scissors
- Glue or glue stick
- Pencil
- Colored markers or crayons
Step-by-Step Guide to How to Make a Paper Plate Autumn Tree:
Step 1: Prepare Materials
Gather all the necessary materials on a clean and organized workspace. Ensure that the kids have access to scissors, glue, and the colored paper.

Step 2: Paint the Paper Plate Blue
Create a backdrop the for the Paper Autumn Tree, this may be a simple blue background to the reflect the sky or with added green grass, a sun and white clouds.
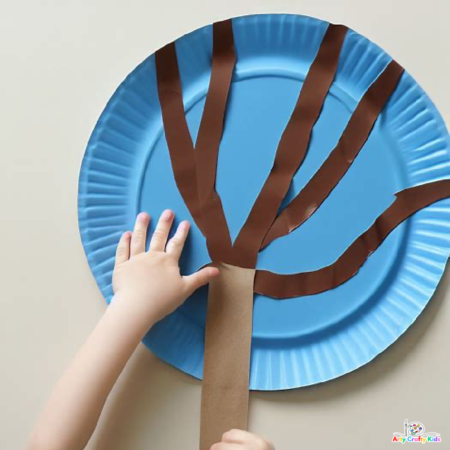
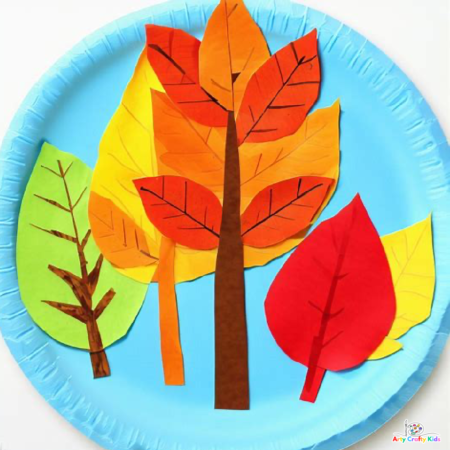
Step 3: Create the Tree Trunk and Branches
Take the brown construction paper or cardstock and cut it into thin strips. These strips will be used to form the tree trunk and branches.
Arrange the brown strips vertically on the lower part of the blue paper plate to create the trunk and branches of the tree. Glue them down securely. Vary the lengths and angles of the strips to make the tree look more natural.
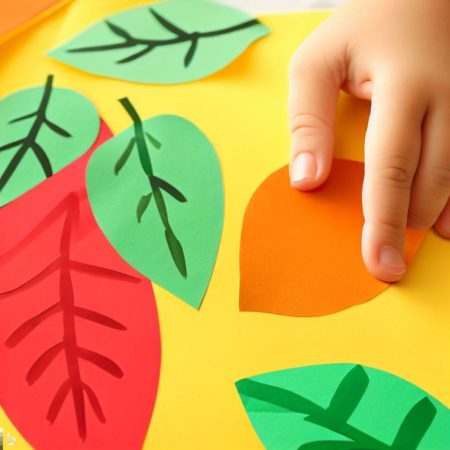
Step 4: Make the Paper Leaves
Using the yellow, orange, red, and green construction paper, help the children draw leaf shapes of various sizes. You can use stencils or freehand drawing for this step.
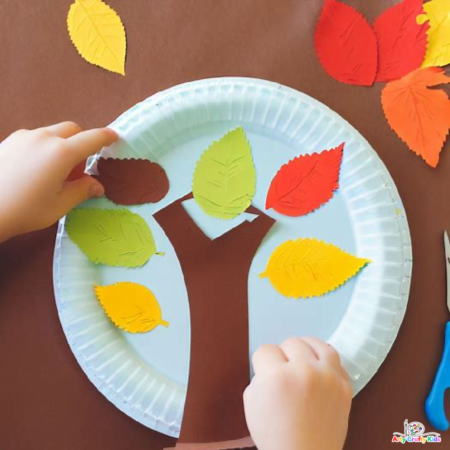
Once the leaves are drawn, use colored markers or crayons to add stems to each leaf in a contrasting color. For example, if a leaf is yellow, draw its stem in brown or green.
After the stems are drawn, let the kids cut out the leaves carefully using scissors. This can be a fun and creative activity in itself.
Step 5: Arrange and Glue Leaves onto the Tree
Allow the children to arrange the cut-out leaves on the branches of the tree. Encourage them to mix and match colors for a vibrant autumn effect.
Before gluing, suggest that they lay out the leaves in a way that balances the colors and creates a visually pleasing arrangement.
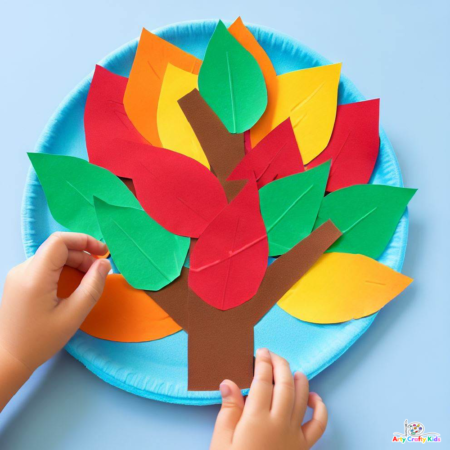
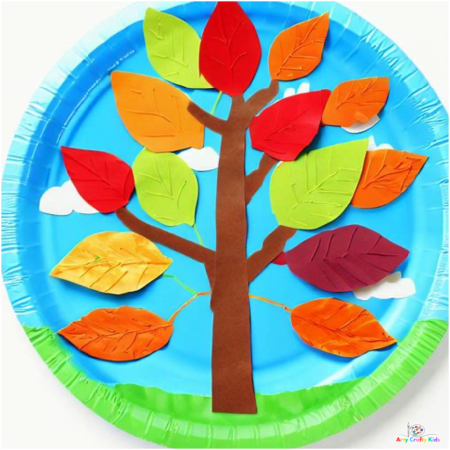
Step 6: Glue the Leaves
Once the kids are satisfied with the leaf arrangement, guide them to glue each leaf onto the branches.
Apply a small amount of glue or glue stick to the back of each leaf’s stem and press it onto the tree branches.
Step 7: Display or Share
The Paper Plate Autumn Tree craft is now complete! It can be displayed on a wall, bulletin board, or even framed.
Encourage the children to share their creation with family members or friends and explain the process they followed to make their autumn tree.
Final Thoughts
Creating a Paper Plate Autumn Tree craft is an engaging and educational activity that allows kids to explore their creativity while learning about autumn and the changing colors of leaves. This craft not only helps develop fine motor skills but also promotes imagination and artistic expression.