
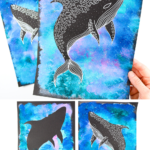
This Whale Shark Silhouette Painting is a simple, high-impact ocean-themed art project for kids. Using just a few materials, children will explore color, contrast, and shape through sponge painting and silhouette work.
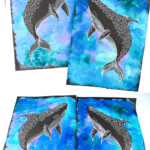
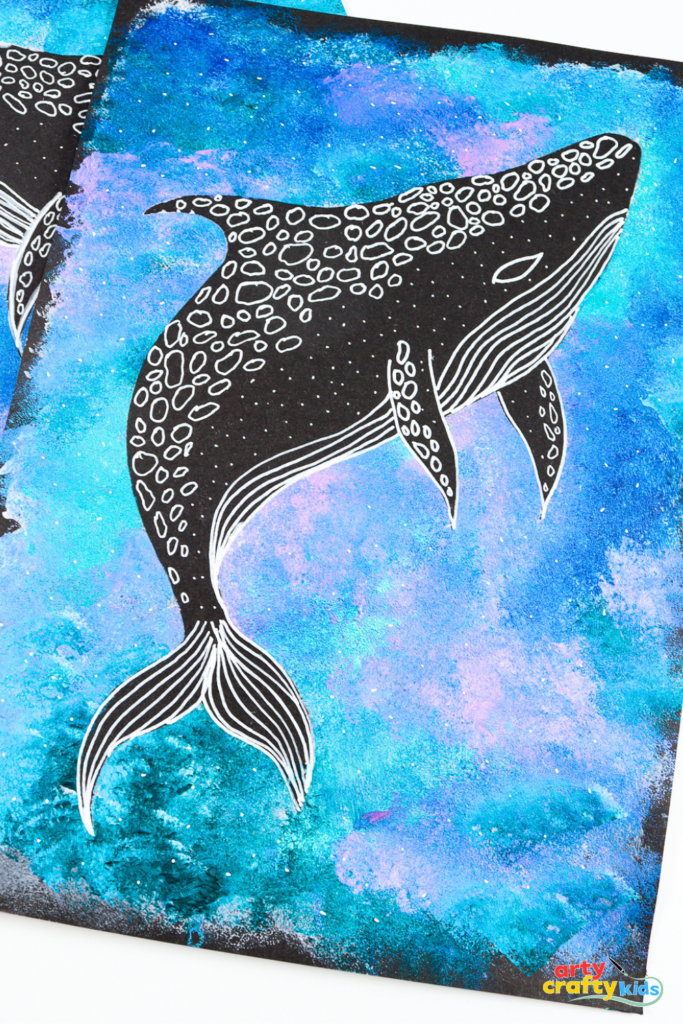
The painted background forms the foundation, with its layered blue, turquoise, and purple tones giving the impression of an underwater scene. On top, a bold black whale shark silhouette becomes the focal point. Children can choose to leave the silhouette as a solid shape or add fine line detailing with a white pen to mimic the whale shark’s distinctive markings.
This art project is both effective and accessible, making it a great choice for home or classroom settings.
If your children enjoy working with shape and contrast, you might like to explore more of our silhouette art projects.
Each one follows a similar easy process, using sponge painting or blended backgrounds with bold black silhouettes.
Take a look at our Polar Bear Silhouette Painting, Sunset Dinosaur Silhouette Art, Autumn Silhouette Painting, Wolf Silhouette Painting, and Bunny Silhouette Painting for more ideas across different themes and seasons.
Or try painting a Whale Shark with watercolors!
How to Make a Whale Shark Silhouette Painting
This whale shark silhouette art project is suitable for kids of all ages. It can be easily adapted for preschoolers, older children, and even adults, making it a versatile ocean-themed art activity for home, classrooms, or group settings.
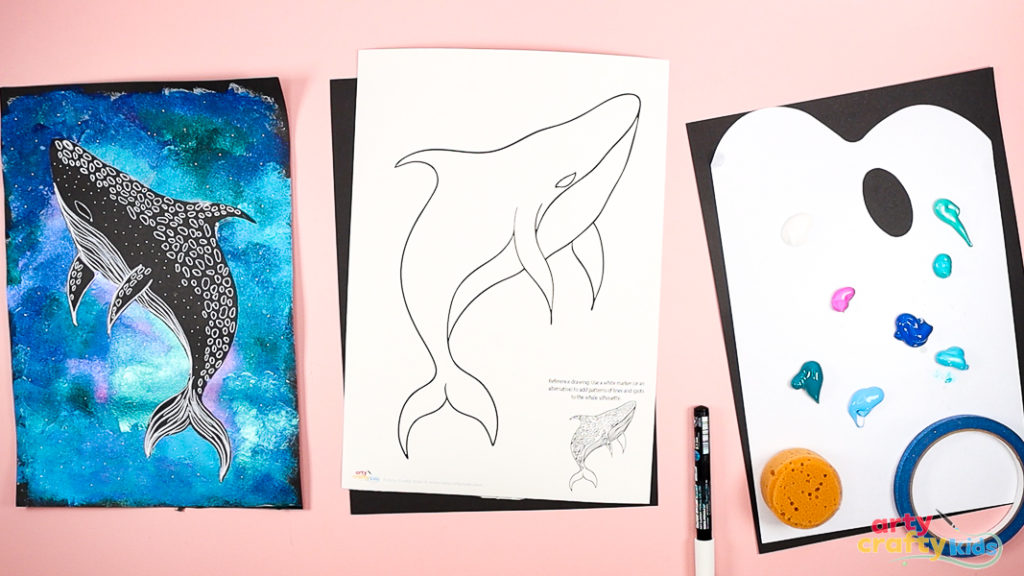
Materials
- Black card or heavy construction paper
- White gel pen or paint pen
- Blue, Purple, Pink & Green Paint (we used acrylics)
- Sponge or paintbrush
- Scissors
- Masking tape
- Whale Shark Silhouette Template (members will need to login to access the templates).
Not a Member?
Join the Arty Crafty Kids club to access the Whale Shark Silhouette Template and 100s more Art and Craft templates, How to Draw Guides, and Coloring Pages.

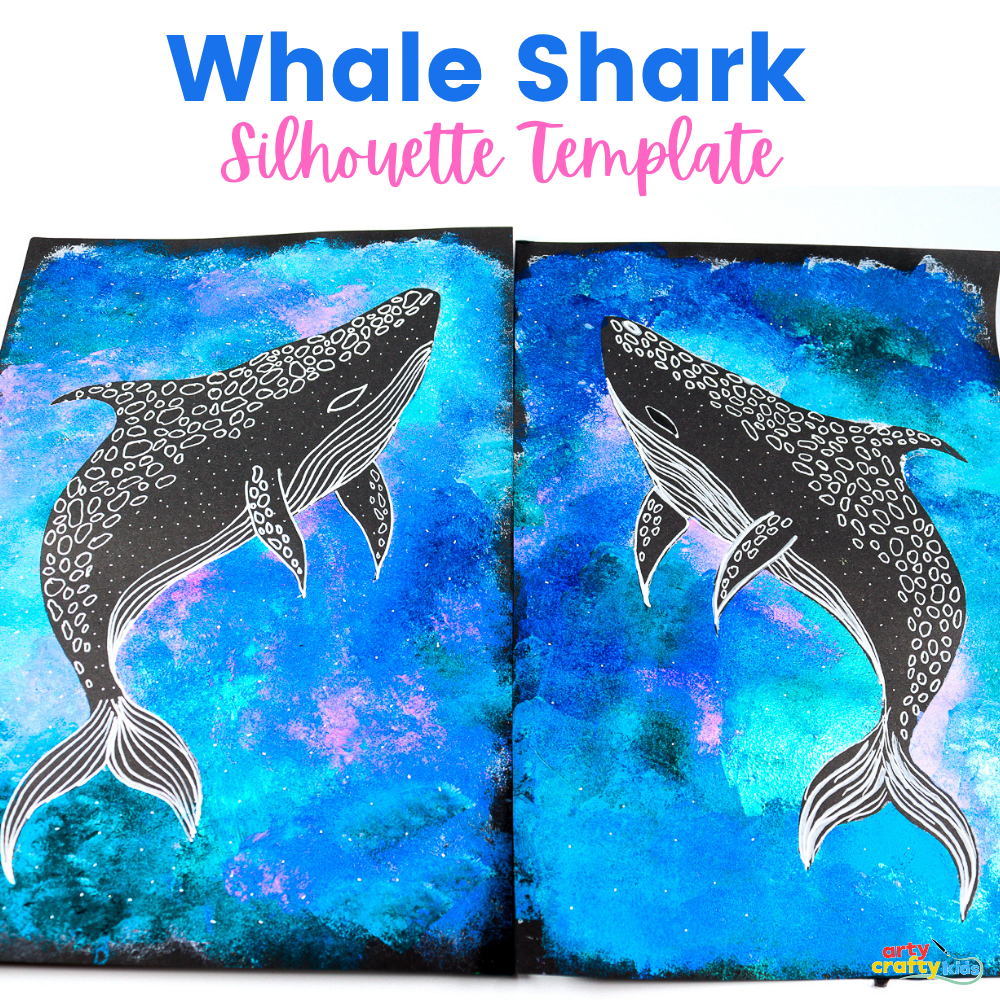
Whale Shark Silhouette Template
This printable Whale Shark Silhouette Template is perfect for kids’ art projects. Use it to create bold underwater scenes, add white line detailing, or explore contrast and shape. Ideal for classrooms, home education, or creative fun at home.
Step-by-Step Whale Shark Painting
Step 1: Cut Out and Position the Whale Shark Template
Carefully cut out the whale shark template and lightly secure it onto a sheet of black cardstock using small pieces of masking tape.
This will hold the template in place while you work on the background.
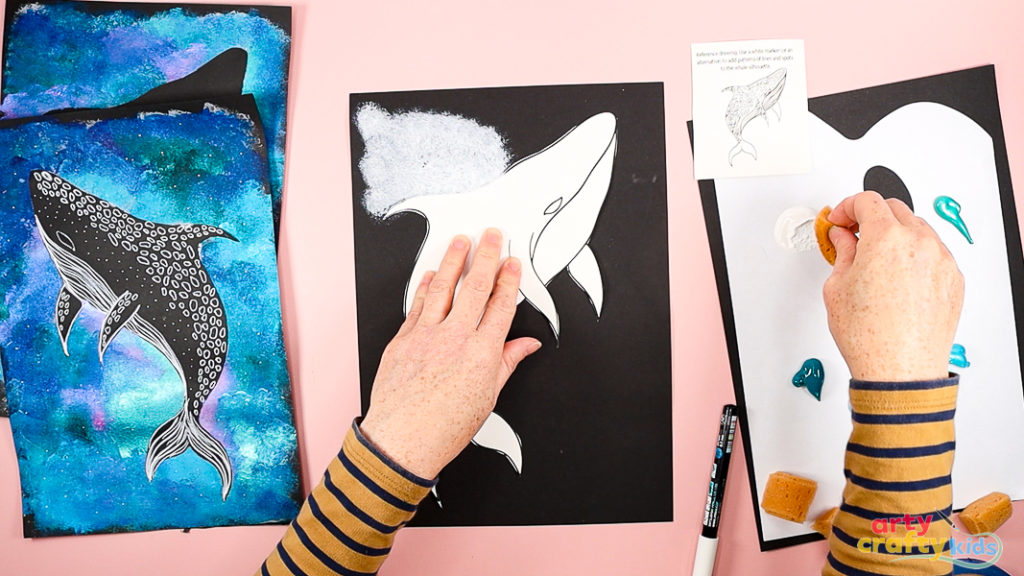
Step 2: Use a sponge to begin painting around the Whale Shark
To make the colors pop against the black background, start by applying a thin layer of white paint around the Whale Shark shape using a sponge.
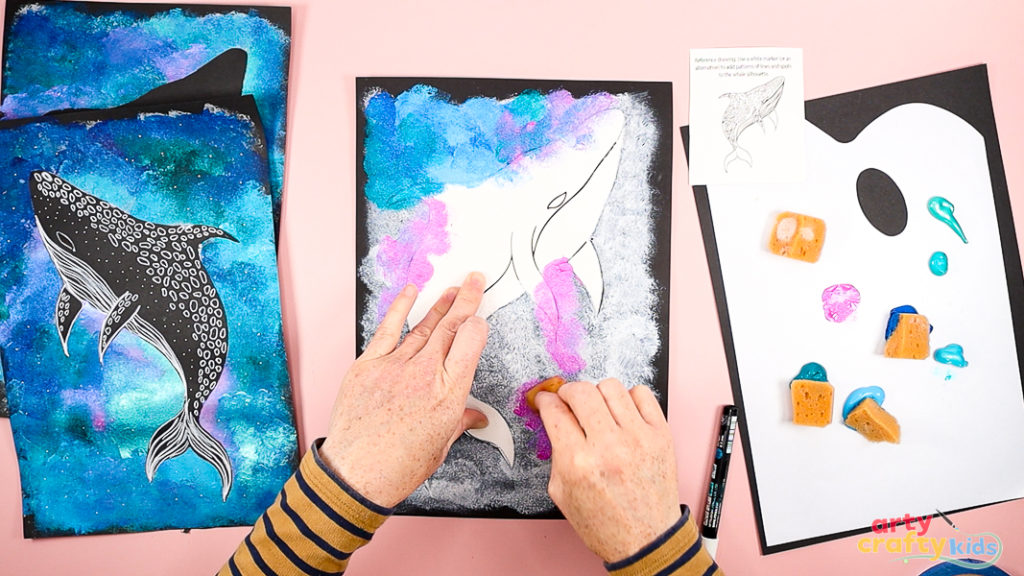
Step 3: Layer bold colors around the Whale Shark
Begin by applying different shades of blue paint around the edges of the whale shark template.
Use a sponge or brush to gently dab and blend the colors outward, creating a soft, textured effect that mimics the movement and light of the ocean.
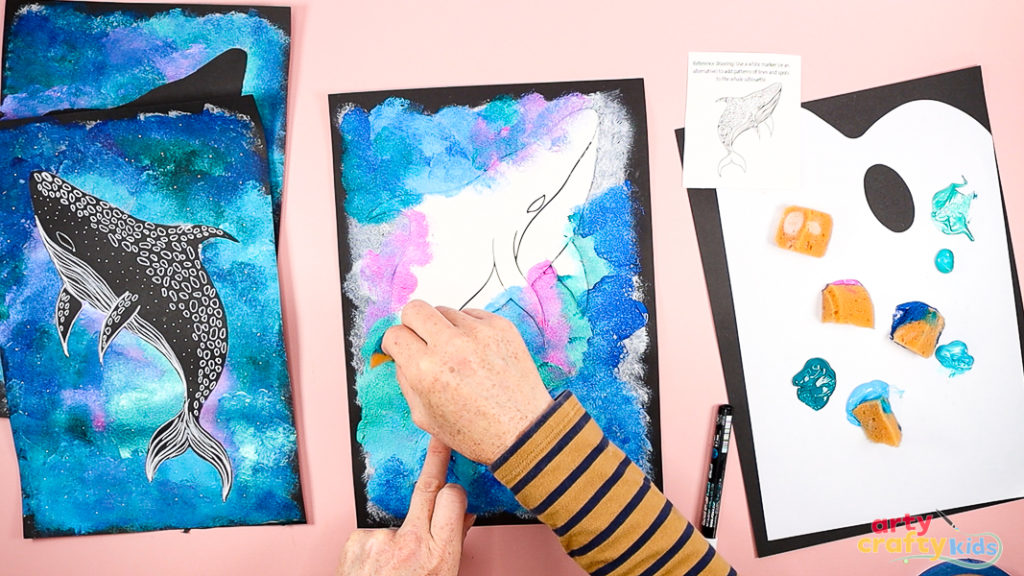
As you work your way around the silhouette, gradually introduce other cool tones such as turquoise and teal.
For added depth and interest, blend in small amounts of pink and purple. These additional colors will create a sense of light filtering through water, adding contrast and vibrancy to the overall piece.
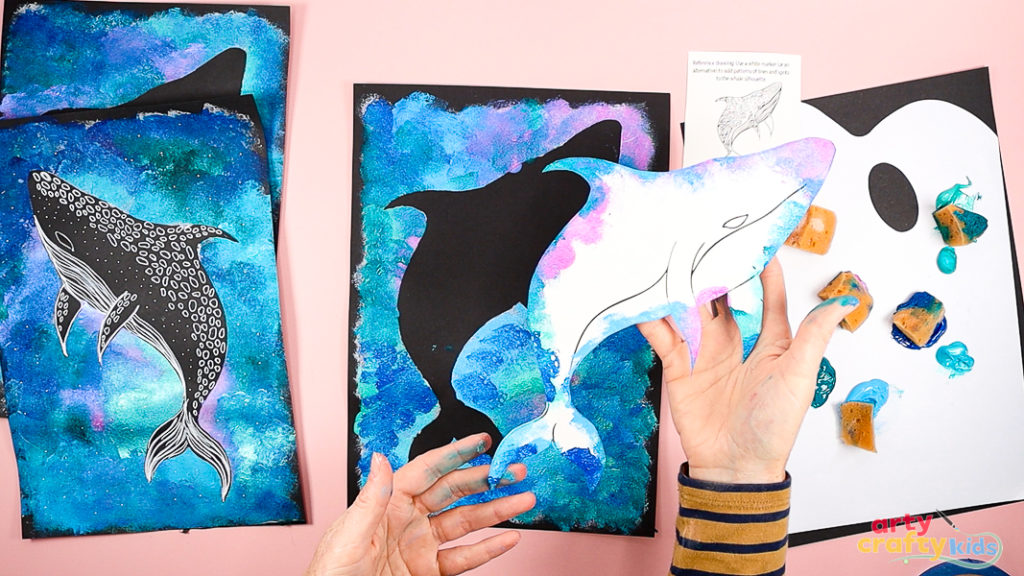
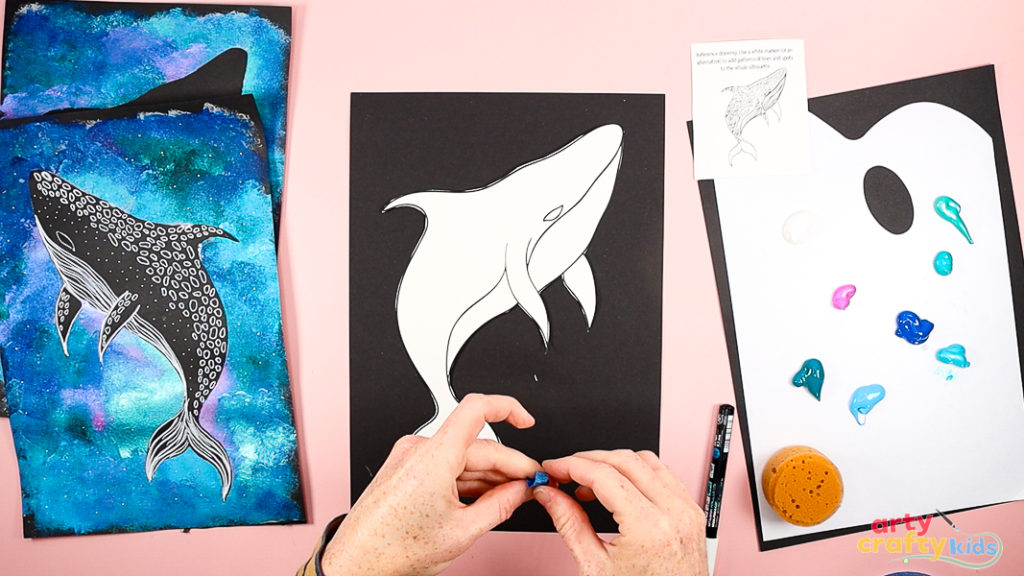
Step 4: Remove the Whale Shark Template to reveal the silhouette
Once the background is dry, carefully peel away the whale shark template to reveal the clean black silhouette underneath.
At this stage, the project could be complete. Many children will enjoy the simplicity and impact of the bold shape against the vibrant background.
There’s a real sense of magic in seeing the whale shark emerge so clearly from the colors.
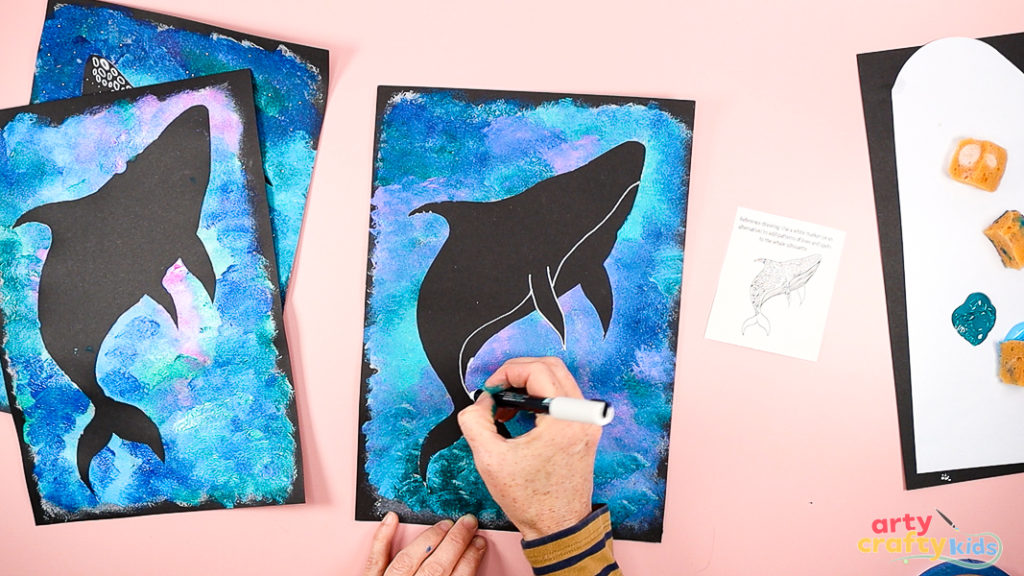
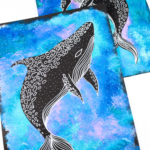
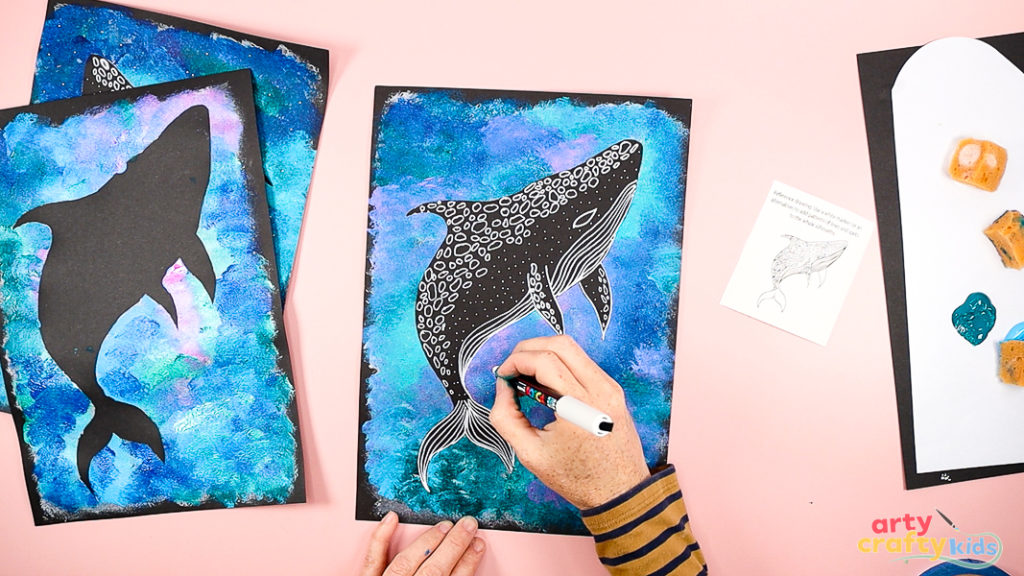
Step 5: Drawing the Whale Shark
To take the project a step further, children can begin adding details to their whale shark silhouette using a white gel pen or paint marker. We’ve provided an illustrated reference to support this step, which children can copy or use for inspiration.
Start by outlining the pectoral fins. This is a helpful way to break up the long curve that separates the whale shark’s upper body from its underside.
Next, draw two gentle, wavy lines on either side of the fins to define the stomach area. These lines help establish the whale shark’s structure and provide a guide for adding more detail, such as spot patterns or gill markings.
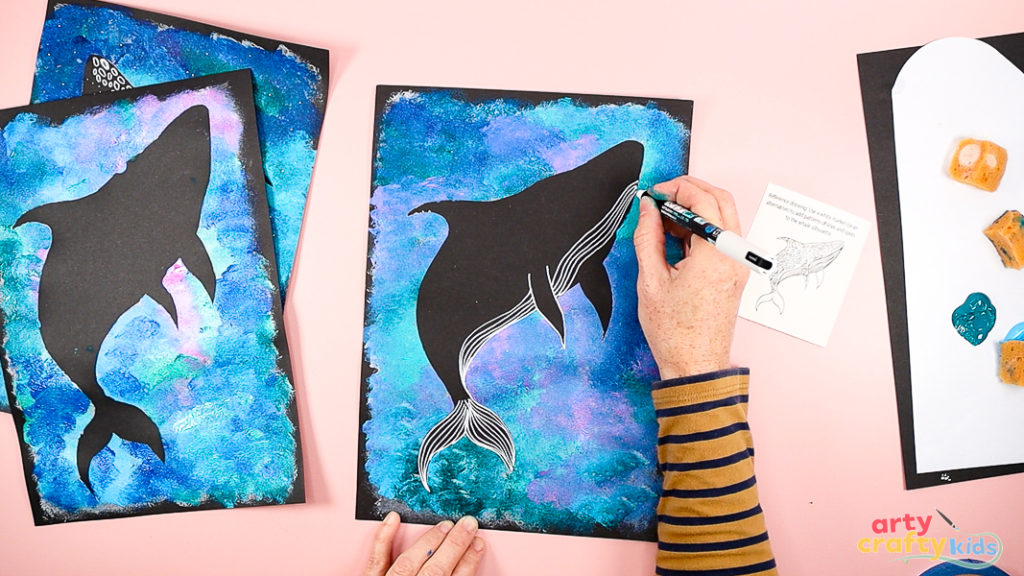
Next, fill the tail fins and underside with a series of closely spaced wavy lines.
These flowing lines help define the shape and add movement, giving the impression of texture and depth along the whale shark’s body.
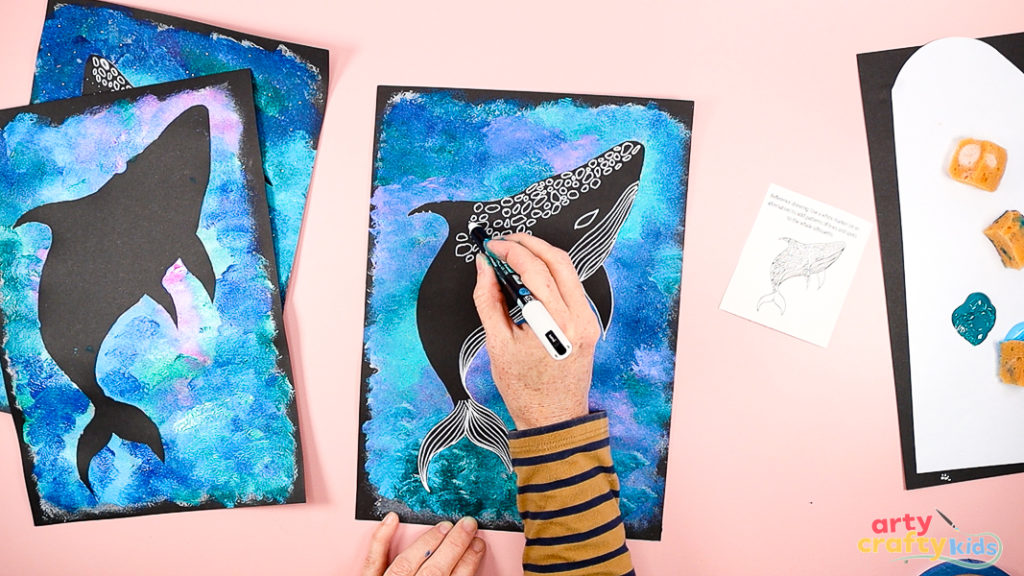
Step 6: Draw the Whale Shark’s eye and its distinctive spots
Use a white pen to draw a small circular shape for the eye.
Then, add the whale shark’s signature spots across the body and tail.
Vary the size and spacing, using our illustration as a guide.
These simple dots give the silhouette texture and character, making each piece unique.
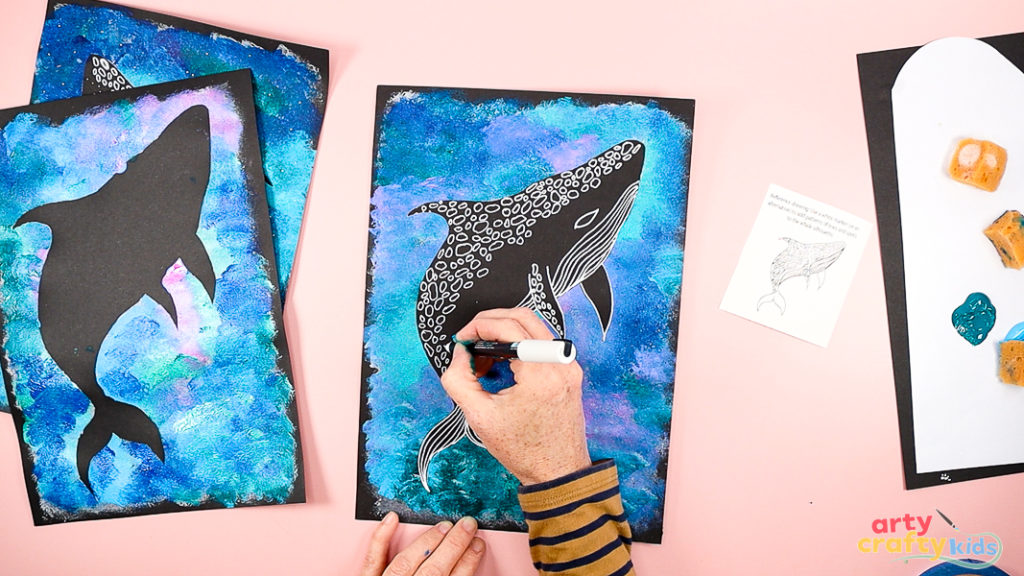
Step 7: Complete the Whale Shark Silhouette Painting with a few simple dots
To finish the artwork, add a few simple white dots around the whale shark silhouette.
These can represent bubbles, light reflections, or small particles in the water, helping to tie the silhouette into the painted background.
This final touch adds atmosphere without taking attention away from the whale shark, and it’s a lovely way for children to personalise their piece with just a few extra marks.
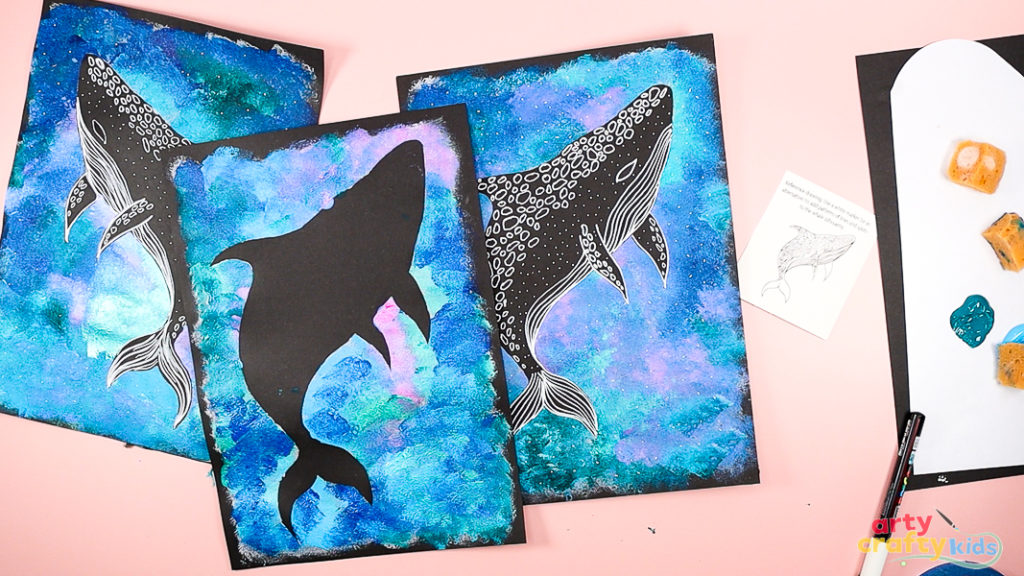
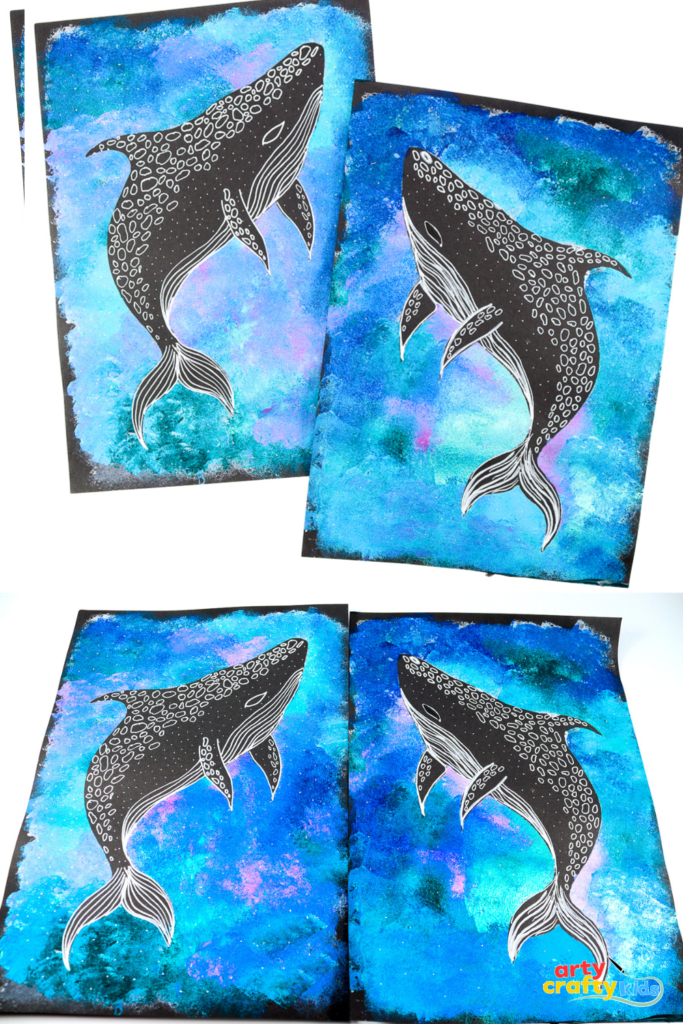
The Whale Shark Silhouette Painting tutorial complete
The Whale Shark Silhouette Painting is a great example of how simplicity and contrast can work together to create something really striking.
Whether the silhouette is left blank or filled with fine detailing, the end result will have strong visual impact. And with no complicated steps or techniques, it’s a project that children can complete with confidence.
Key Learning Points – Whale Shark Silhouette Painting
This simple yet effective whale shark art project gives children the chance to explore a wide range of artistic concepts through a fun and engaging ocean theme. Here are the key learning opportunities:
- Exploring Contrast: The bold black silhouette set against a vibrant, blended background helps children understand how contrast creates visual impact and draws attention to the subject.
- Working with Shape and Space: By focusing on a single shape and its position on the page, children begin to think about composition, positive and negative space, and focal points in art.
- Developing Fine Motor Skills: From cutting the silhouette to adding detailed patterns and lines, this project supports the development of control and coordination in drawing and mark-making.
- Layering Color and Texture: Using sponges or brushes to layer and blend paint introduces children to basic color mixing, texture, and background-building techniques.
- Creative Confidence and Choice: Children are encouraged to make decisions throughout – whether to leave the silhouette blank, add detailed markings, or experiment with colors in the background – allowing for expression and individuality.