


This Monet-inspired watercolor Water Lilies art project for kids is a gentle and engaging way to introduce young artists to the beauty of Impressionist painting.
It has been thoughtfully designed to suit a range of ages and abilities while capturing key elements of Claude Monet’s style, including his focus on light, reflection, and the soft layering of color.
Children will explore simple watercolor techniques such as wet on wet blending, dabbing to create texture, and building layers to add depth and movement.
Through these techniques, they will begin to understand how layering in watercolor enriches color and creates a sense of light.
The How to Draw and Paint project also encourages an understanding of composition by guiding children to consider the placement of lily pads, flowers, and reflections so that the viewer’s eye is drawn across the painting.
With flexible finishing options that include bold black outlines for clarity or soft pencil and crayon lines for a more painterly effect, this lesson supports creative decision-making while preserving the spirit of Monet.
Monet and Impressionism
Impressionism is a style of painting that began in France in the late 1800s. Instead of focusing on tiny details, Impressionist artists tried to capture how a moment felt — the colors, the light, and the atmosphere.
Key features of Impressionism:
- Visible brushstrokes that suggest shape and texture rather than perfect outlines
- Soft edges where colors blend into each other
- Layers of color to show changing light and reflection
- Everyday subjects like gardens, water, and city scenes painted in a fresh, lively way
Claude Monet, one of the most famous Impressionists, painted his water lily pond over and over again, each time exploring how sunlight, shadows, and reflections changed what he saw.
This art project lets children experience the same joy of discovery. They will explore how light dances on water, how colors blend in unexpected ways, and how a painting can capture a mood or moment without needing every detail.
How to Draw and Paint Monet-Inspired Watercolor Water Lilies:
Materials:
- Mixed-Media Paper or Watercolor Paper
- Watercolor Palette
- Pencil
- Crayon or Oil Pastel (optional)
- Black Marker Pen (optional)
- Flat Tipped Paintbrush
- Round Tipped Paintbrush
- How to Draw Step-by-Step Printable (members will need to log in to access the templates).
Not a Member?
Join the Arty Crafty Kids club to access the Monet Water Lilies How to Draw and Template and 100s more Art and Craft templates, How to Draw Guides, and Coloring Pages.


Monet-Inspired How to Draw Water Lilies Template
Create stunning Monet inspired water lilies with this easy-to-use printable template for kids. Perfect for classrooms, homeschool, or family art, the template includes simple outlines of the bridge, lily pads, and flowers, making it easy to explore watercolor techniques like blending, layering, and dabbing.
Adaptable for all ages, younger children can paint confidently within bold outlines, while older artists can use softer pencil lines for a more Impressionist style. A fun, hands-on way to learn about Monet and bring his famous water lily pond to life.
More Artist Inpsired Art Projects for Kids:
Get more from the membership and try these fun artist-inspired art ideas: Van Gogh Starry Night Hot Air Balloons, Matisse Butterflies, Van Gogh Sunflowers, and Pablo Picasso Faces.
How to Draw Monet-Inspired Water Lilies
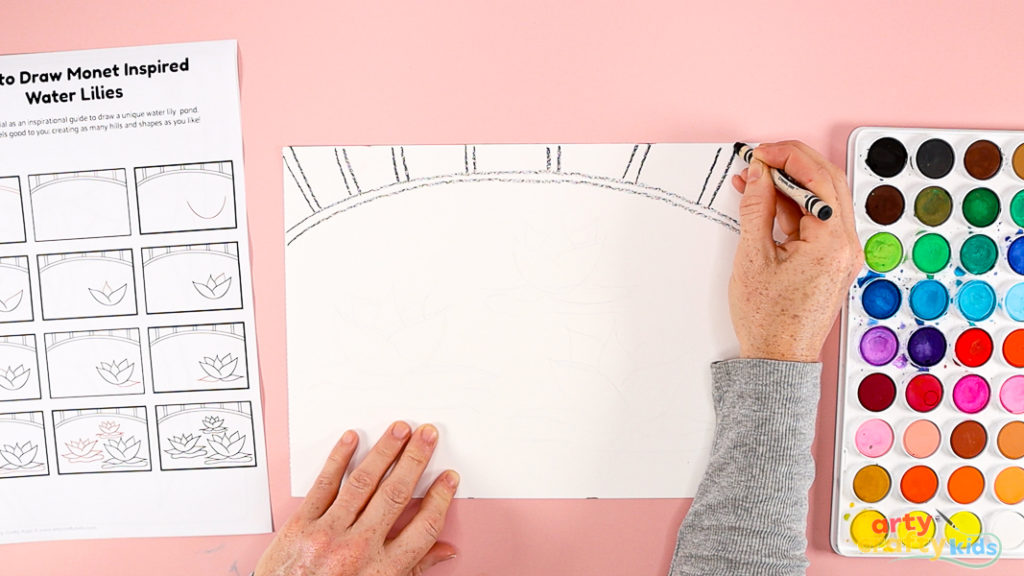
Step 1: Draw the bridge.
Begin by sketching the bridge that will arch gently over the pond. This will become the main structure in the composition and help guide the placement of your water lilies and lily pads.
You can choose to start with a pencil for a soft, erasable outline, or use a black crayon for bold lines and strong contrast. The black crayon is often a better option for younger children as it creates clear shapes to paint within and won’t smudge when wet watercolor is applied.
Place the bridge towards the upper third of the paper, leaving space for the pond below. Draw two parallel curved lines for the top and bottom of the bridge, then add a few short vertical lines between them to suggest railings. Keep your lines loose and flowing — they don’t have to be perfect.
Once the bridge is in place, children can begin to see how their scene will be arranged, making it easier to plan where to place the water lilies and reflections later in the process.
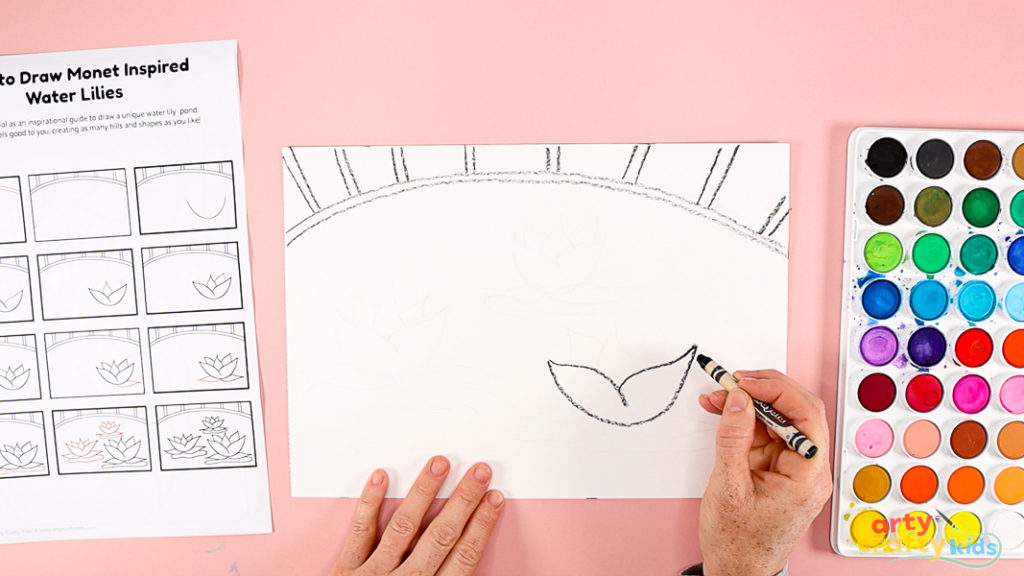
Step 2: Draw the water lilies.
Next, begin adding the water lilies to your pond.
Start with the largest lily near the bottom of the page. This will help create a sense of perspective, making it feel as though the lily is closest to the viewer.
Draw a single curved line to form the base of the flower. From each end of the curve, extend the lines downward and curve them out and then inward to meet at a point, creating two overlapping petals.
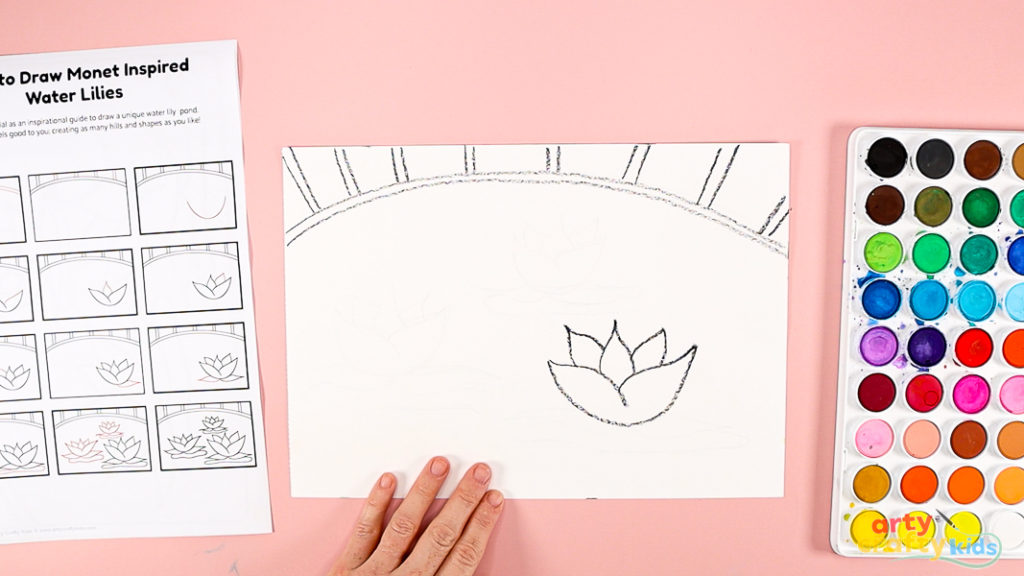
Step 3: Draw the remaining 3 petals of the main flower.
Now that the base of the flower is in place, it’s time to complete the main water lily.
Begin with the central vertical petal. This petal will help you position the rest of the flower and acts as a guide for balance.
From the top of the base curve, draw a tall, slightly pointed petal reaching upward in the center. Then add two more petals, one on each side of the central petal. These should angle outward slightly, following the curve of the lily pad below.
Keeping the central petal taller and the side petals shorter will add a simple but effective sense of perspective, making it appear as though you are looking down at the flower from above. The shape stays very easy to draw, but it creates the impression of depth and dimension.
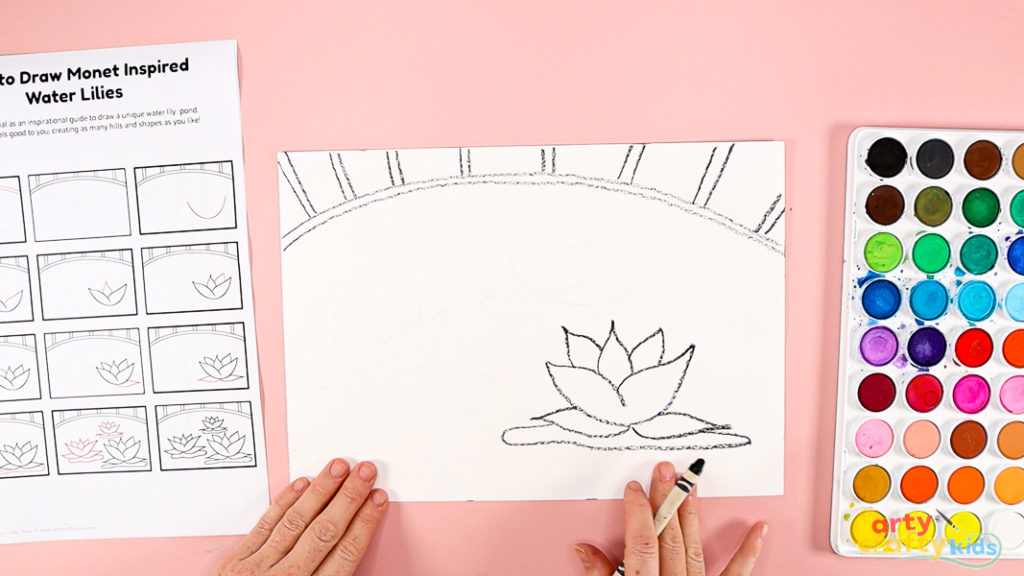
Step 4: Draw two more petals and the lily pad.
Next, add two more petals to complete the main flower. Position these on either side of the lower petals, extending outward as if the flower is sitting on them or gently opening from them. Keep the lines smooth and slightly curved so the petals feel soft and natural.
Once the petals are in place, draw the lily pad beneath the flower. Begin with a wide, oval shape, ensuring it sits comfortably under the base of the petals. Add a small curved notch to one side of the oval. This little detail is a simple way to make the lily pad look more realistic.
Placing the petals so they appear to rest on the lily pad will help anchor the flower in the scene and make it feel part of the pond rather than floating separately.
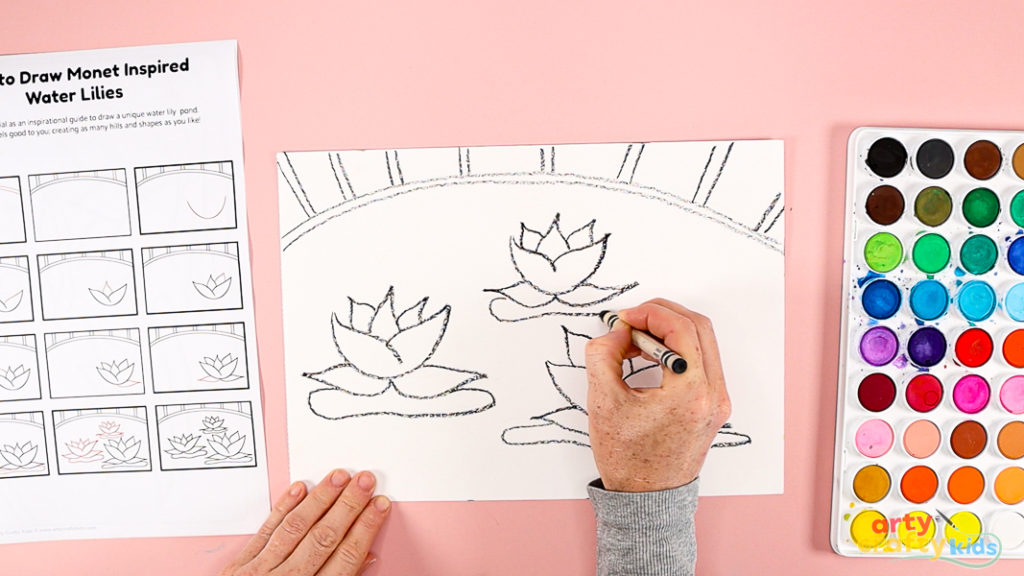
Step 5: Draw additional water lilies.
Add more water lilies across the pond, varying their size to create depth.
Larger flowers near the bottom of the page will feel closer, while smaller ones near the bridge will appear farther away.
Keep the petal shapes simple and change their angles slightly for variety.
How to Paint Monet-Inspired Watercolor Water Lilies
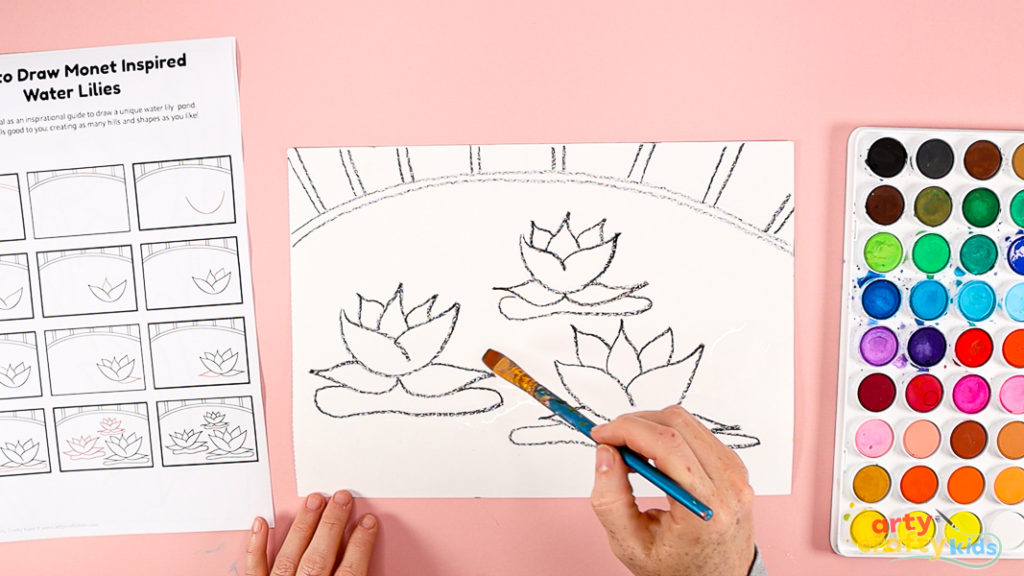
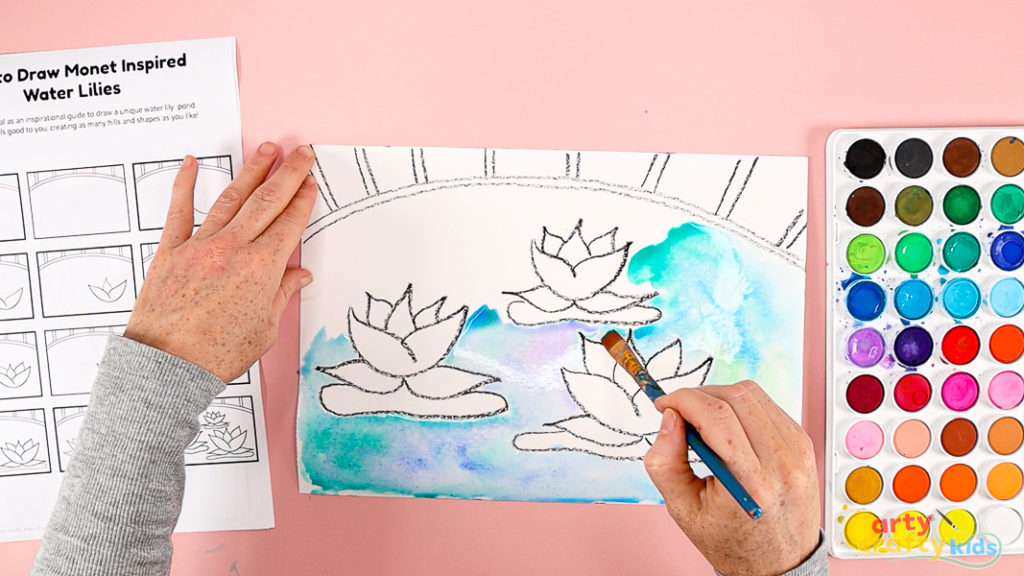
Step 1: Apply fresh water around the water lilies.
Using a clean brush, carefully paint fresh water onto the background areas of your paper, working around the shapes of the water lilies and lily pads.
This prepares the surface for the wet-on-wet watercolor technique, where colors blend softly into each other.
Keep the paper damp but not soaking, and avoid adding water inside the flowers so their colors stay bright and clear later.
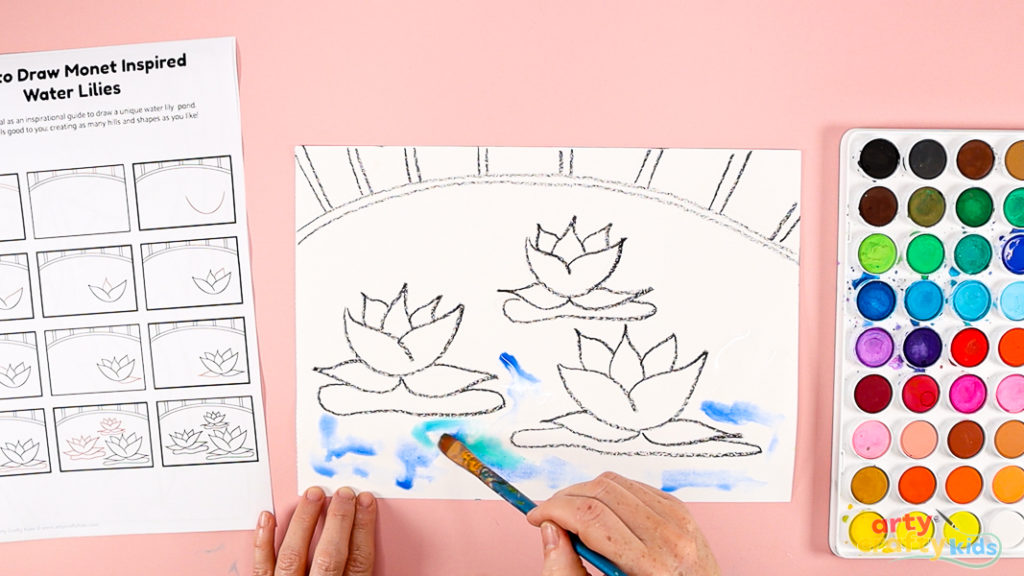
Step 2: Apply wet paint around the water lilies.
With the paper still damp, load your brush with a soft blue watercolor and begin painting around the water lilies and lily pads.
The wet surface will allow the color to spread gently, creating the smooth, flowing background of the pond.
Vary the intensity of the blue by adding more water to your brush in some areas, and let the color fade naturally towards the edges.
This gentle blending will capture the calm, reflective quality often seen in Monet’s paintings.
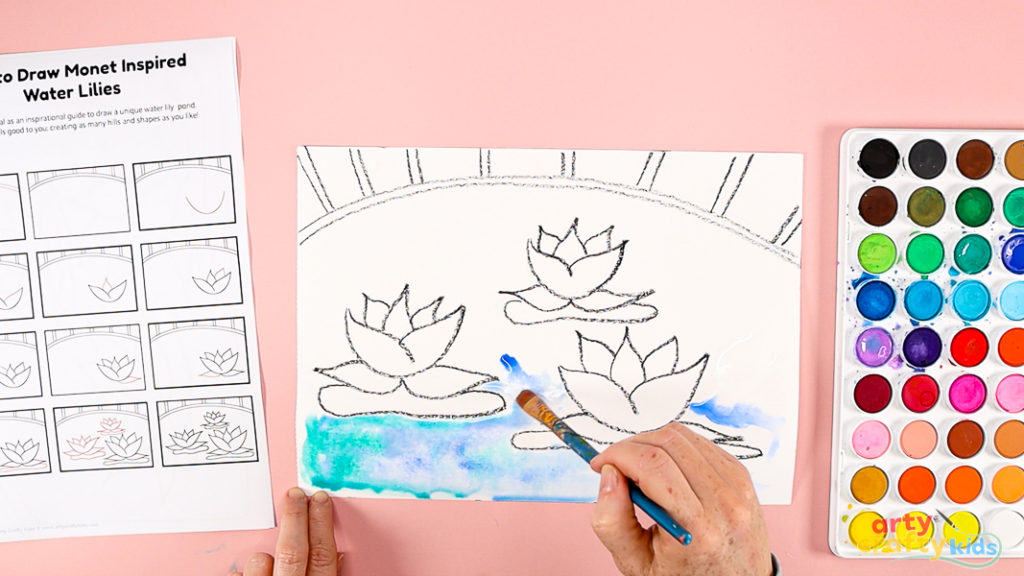
Step 3: Layer in greens for depth and movement.
While the blue paint is still damp, add soft strokes of green to the pond background.
Let the green mingle with the blue so the colors blend naturally, creating subtle variations that suggest ripples and reflections.
Use a mix of lighter and darker greens to give the water more depth.
Step 4: Add soft lilac and purples to the water.
Next, introduce soft lilac and gentle purple tones into the pond.
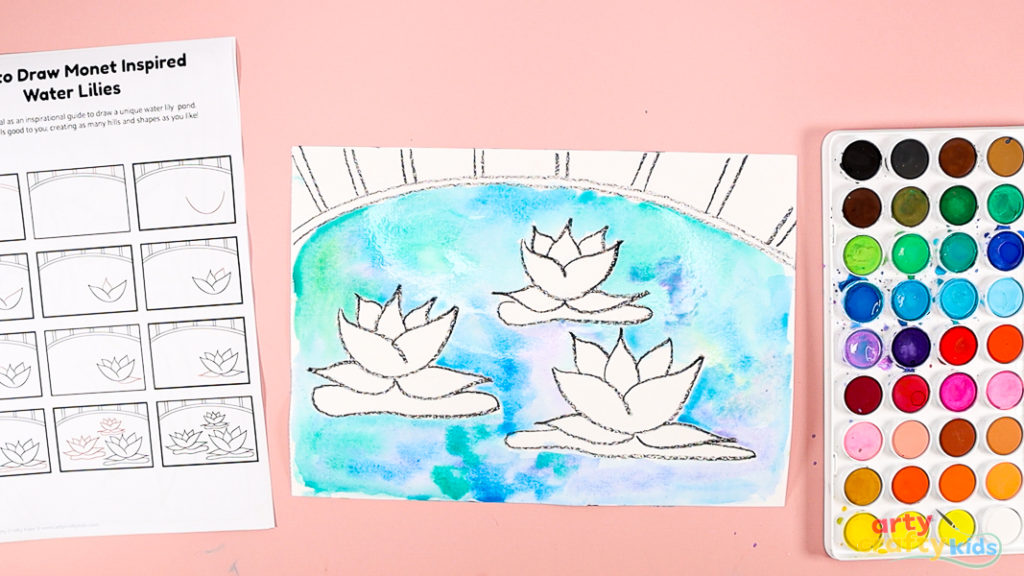
These colors will suggest the subtle reflections of the water lilies on the surface.
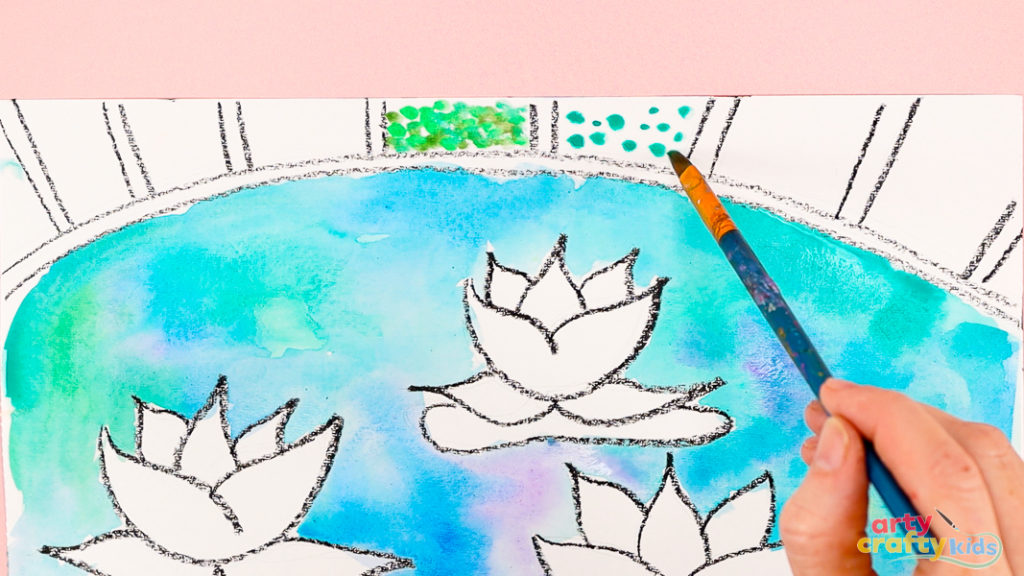
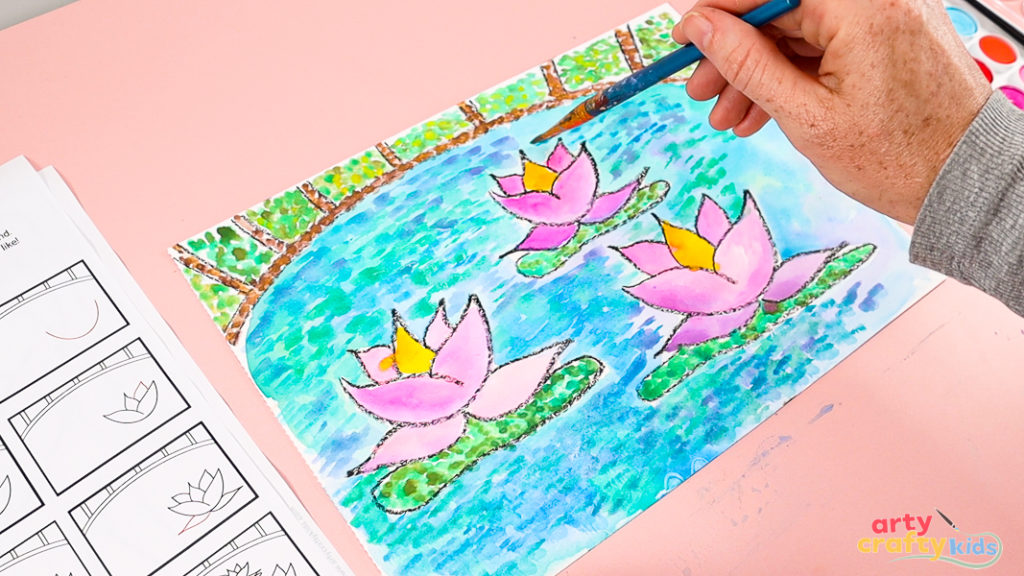
Step 5: Paint the foliage between the bridge railings.
Switch to a smaller brush and paint loose dabs of watercolor to suggest the foliage between the bridge railings.
Choose a mix of greens, adding touches of yellow-green for highlights and darker green for shadow.

Keep your brushstrokes short and uneven so the foliage feels soft and natural rather than carefully drawn.
The aim is to give the impression of leaves and plants without painting each one in detail, just as Monet would have done.
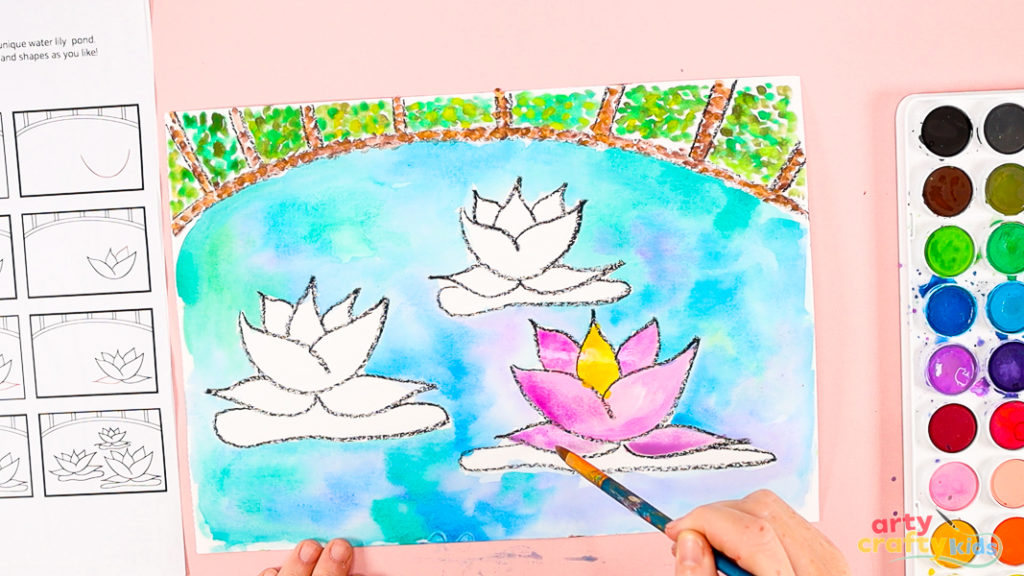
Step 6: Paint the water lilies.
Using the wet on dry technique, paint the water lilies with gentle, deliberate brushstrokes so the colors stay bright and crisp.
Start with soft pinks or purples for the petals, layering slightly deeper shades at the base to add depth.
Leave small areas of white or lighter color to suggest sunlight catching the edges.
Work carefully around each petal shape, keeping the strokes loose and fluid so the flowers feel light and delicate.
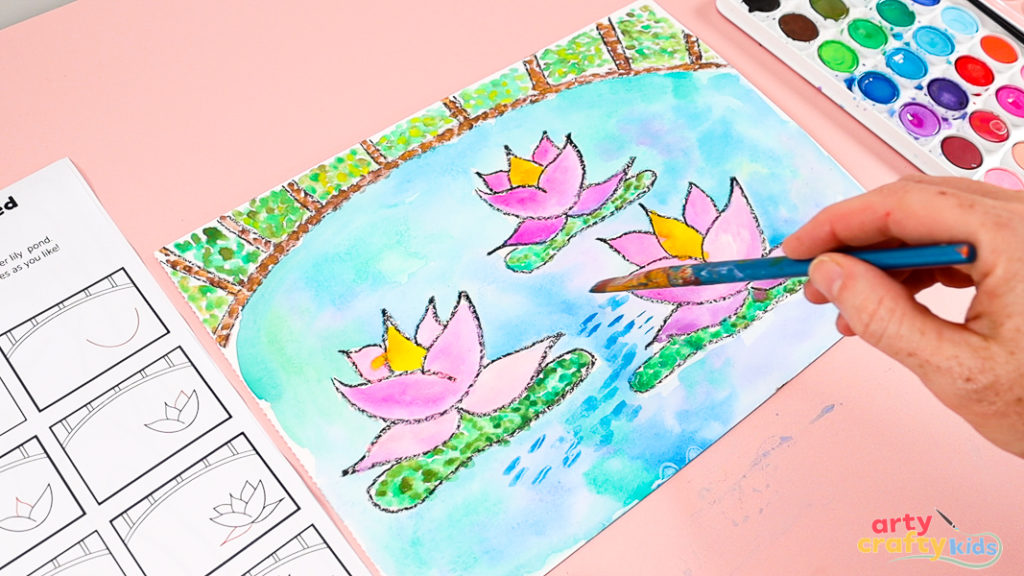
Step 7: Layer the watercolor to add texture and movement to the pond.
Using a flat brush, add simple straight dabs of blue across the pond surface. This layering will create subtle ripples and movement in the water.
Keep the brushstrokes light and spaced apart so they suggest reflections rather than solid shapes.

Once the blue is in place, you can add a few dabs in green or lilac to build variety and richness, echoing the shifting colors seen in Monet’s work.
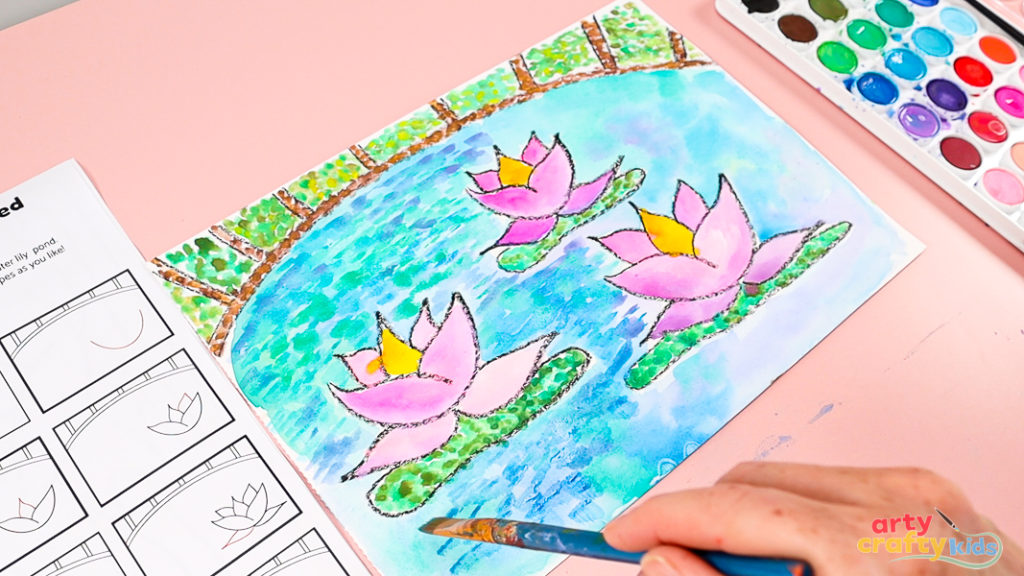
Continue filling the pond with dabs of blue, green, and lilac, using a flat brush. Vary the amount of water on your brush to create both soft, blended marks and more defined strokes.
This variation adds richness, texture, and a sense of movement to the water.
The mix of blurred and distinct dabs reflects the Impressionist style of Monet, where quick, visible brushstrokes captured light and color without focusing on exact detail.
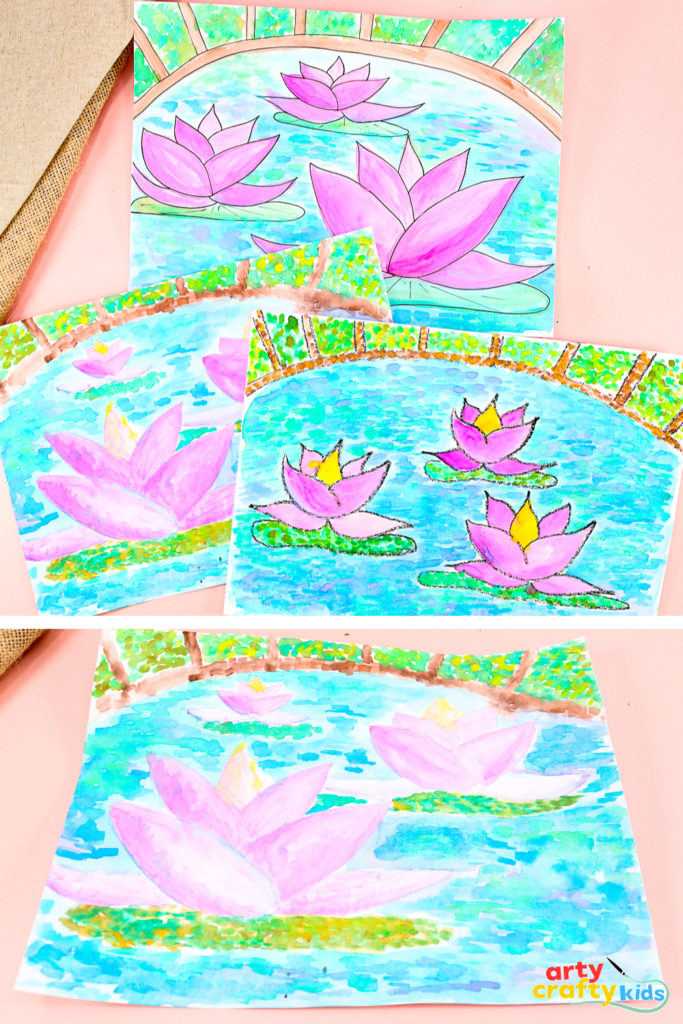
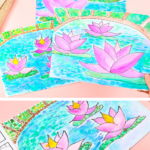
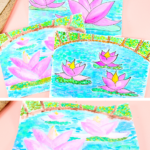
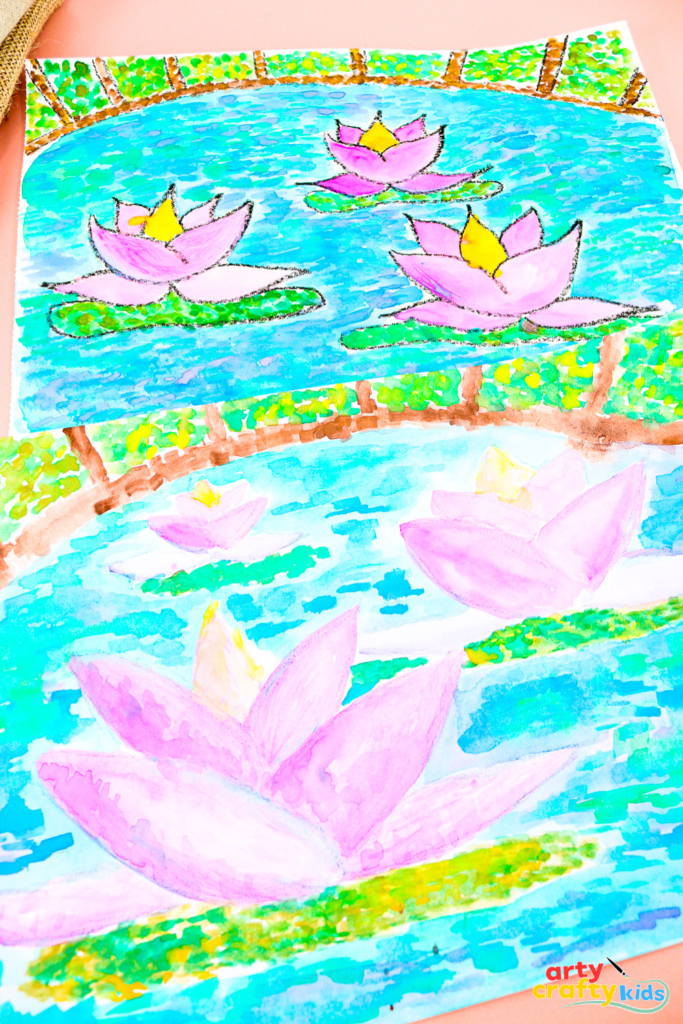
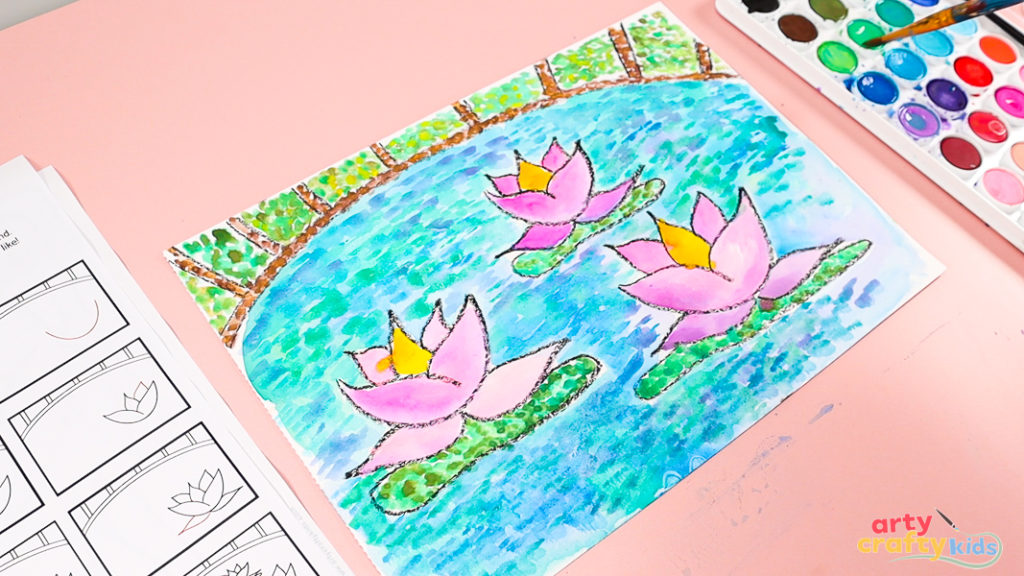
The Watercolor Water Lilies: Easy Monet Inspired Art Project is Complete
By completing this Watercolor Water Lilies art project, children will have explored two different approaches to finishing their artwork, each offering its own creative possibilities.
- Black outlines create clear, bold shapes and a strong sense of structure. This style is ideal for younger children or beginners, as it helps define the lilies and lily pads while still allowing expressive watercolor work. The contrast between the outline and the soft washes introduces children to combining detail with loose brushstrokes, a step toward understanding composition.
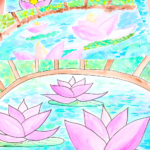
- Pencil or softly defined lines create a gentler, more fluid finish. This approach is closer to Monet’s Impressionist style, where form blends into the surrounding color and light becomes the focus. Older or more confident children can experiment with letting the paint define the shapes, learning to trust color placement and layering instead of relying on bold outlines.
Through both styles, children gain hands-on experience with:
- Impressionist techniques such as loose brushwork, dabbing for texture, and layering colors
- Understanding how light and reflection can be suggested through color rather than exact detail
- Building composition skills by varying the size and placement of lilies and lily pads for depth and balance
- Making creative choices about style and technique, learning that there is no single “right” way to approach a painting
In the end, children are not just copying a scene but stepping into the spirit of Monet’s work, using watercolor to capture a moment, a mood, and the beauty of light on water.


