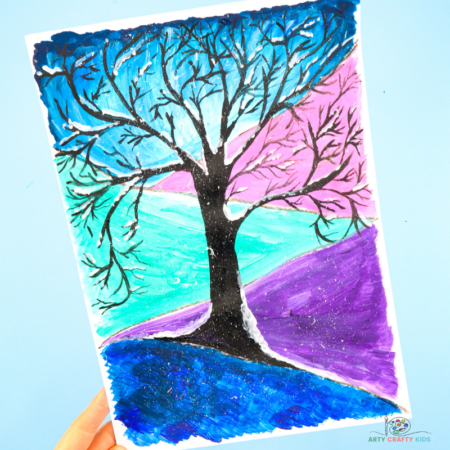
Snowy Winter Tree Art project for kids – This stunning silhouette Winter tree, set within an abstract Winter Wonderland scene is super easy to draw and paint, and can be recreated in just a few simple steps.
To make it easy for carers and educators to recreate this Winter art project at home or within the classroom, we have created a video tutorial, a step-by-step printable guide with a starter template and full written intructions with photo’s – so however your children learn best, we will have a resource to support their creativity.
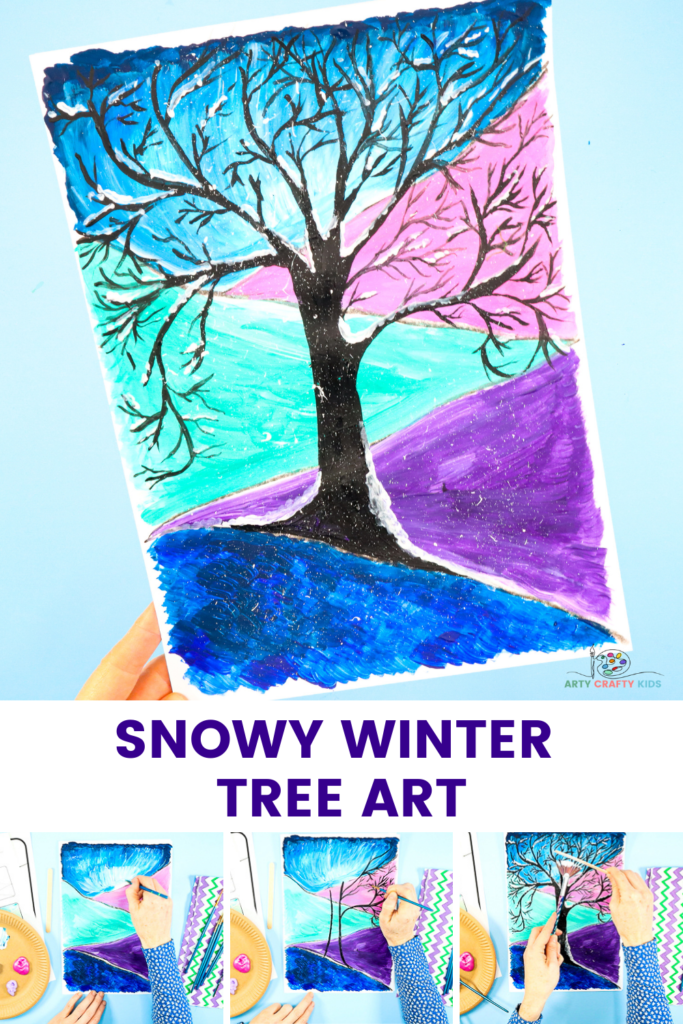
How to Make Snowy Winter Tree Art
Before Arty Crafty Kids dive into this art project, they should take a moment to observe the trees within their environment; assessing and acknowledging their peculiar and unique structures and shapes.
They should take note of how the trunk is significantly larger than the branches, and how the twigs are smaller still.
At a very basic level, by observing these slight differences within their art work, children will be begin to learn about perspective.
Materials:
- White Card Stock or Mixed Media Paper
- Black Crayon or Marker Pen
- Acrylic Paint
- A Selection of Paintbrushes inc. Fine Tipped Brush
- Popsicle Stick
Download the Step by Step How to Paint a Winter Tree Guide:
The printable download includes a step-by-step How to Paint a Winter Tree guide
and a starter template with pre-drawn slopes.
The templates are available to members of the Arty Crafty Kids club.
Members will need to log in to access the template:
https://www.artycraftykids.com/product/flow-painting-snowy-winter-tree/
Not a Member?

Watch the Snowy Winter Tree Art Tutorial Video:
Let’s Paint a Snowy Winter Tree!
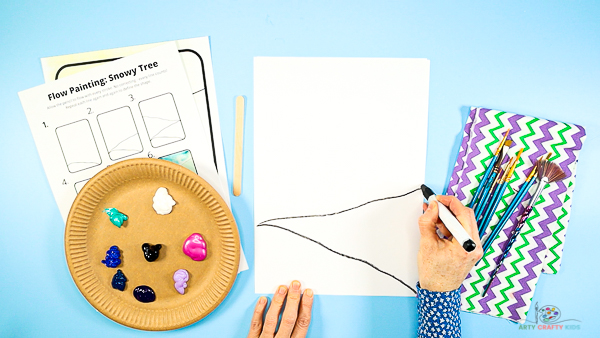
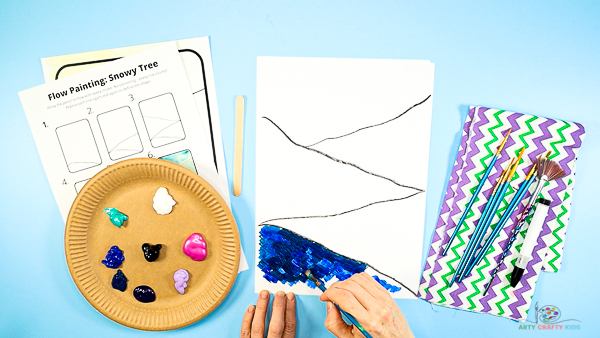
Draw the First Two Wintery Slopes
Begin the Snowy Winter Tree Art by drawing the first two slopes with a black crayon.
The first slope should start a few inches above the bottom corner of the sheet and slope down and across to the opposite corner.
The line can be straight or wavy.
Draw the second line as shown above.
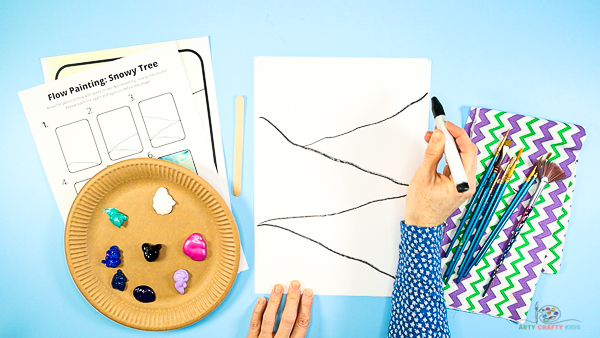
Draw the Final Two Wintery Slopes
Draw a further two slopes to create the impression of background hills/mountains.
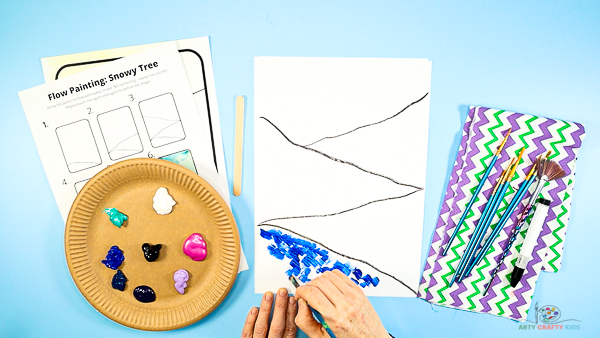
Paint the First Slope Blue
To project the impression of a Wintery scene, paint the slopes ‘cool’ colors – these are shades of blue, green and purple.
Use two shades of the same color or add white with each slope.
Add a Second Shade of Blue
Our first slope is made up of two dark shades of blue, blended together with small strokes to create a textured effect.
The addition of the lighter shade helps to create a sense of perspective and depth.

Paint the Next Slope a Cool Shade
Select a different color for the second slope.
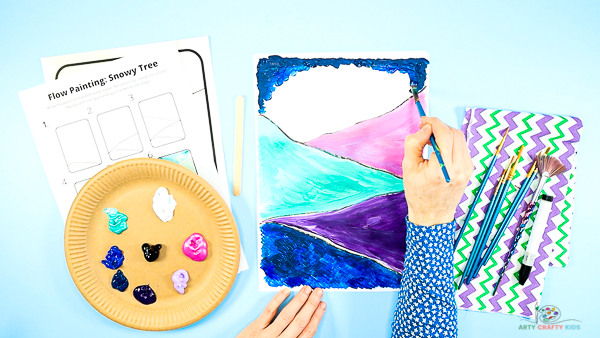
Paint the Final Two Slopes and Frame the Sky with Dark Blue
Paint the final two slopes two different colors – our example progresses from cool shades of blue to warm/cool pink.
The remaining white space will become the sky.
Create a “frame” of dark blue as shown above.

Add a Lighter Shade of Blue to the Frame
Next, add a lighter shade of blue within the frame.

Apply Water and White Paint to the Paint Brush
Pop the paintbrush into water and remove some of the excess liquid. Try to keep the paintbrush damp, but not dripping!
Next, add white paint to the damp brush.
Start from the light blue area of the frame and drag the paint in a downwards motion to join the slopes.
With a damp brush, the paint should spread easily and blend beautifully to create lighter shades of blue.
Continue this process until the “Sky” area is full, adding only white paint.
Notice how an area of “light” has been created above the slopes?
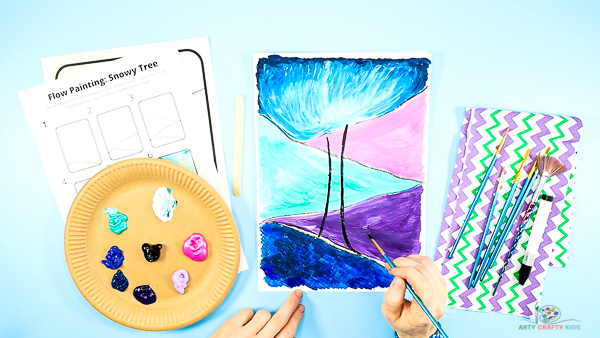
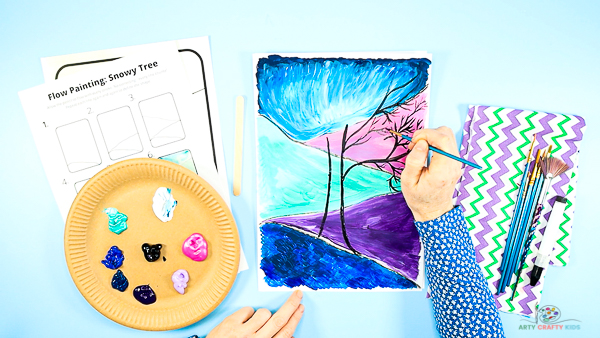
The Winter Tree: Draw Two Vertical Lines Across the Slopes
Apply a fine tipped paintbrush with black paint.
Draw two vertical lines as shown above to form the sides of the Winter tree.
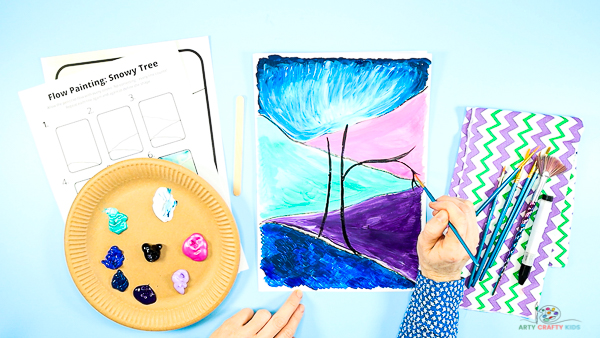
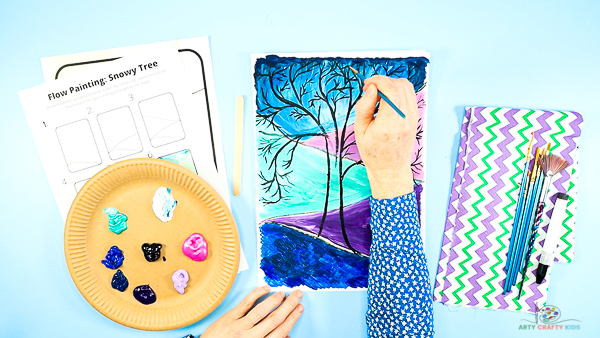
Draw the First Tree Branch
Next, draw a wavy horizontal line that branches away from the the vertical line (the side of the tree).
From each new line that branches away from the side of the tree, draw additional lines that offshoot from the first. There is no limit to the number of lines “twigs” that can be drawn and they can branch out in any direction, be any shape and any length.
Develop the Tree Branch with Twigs
With each new branch add a series of twigs and slowly work around the tree, filling the upper half of the painting with multiple tree branches.
Line work, especially with paint, can be tricky and Arty Crafty Kids may find that their hands wobble. Embrace the wobbles! The tree and its branches will like more interesting for it and since Winter trees without their leaves often look misshapen and crooked, the wobbly lines will add a sense a realism to painting.
Fill the Space with Tree Branches and Twist
Continue filling the space around the tree with wobbly, flowing lines to create the trees’ shape.
Remember to create multiple twigs that offshoot from each branch.
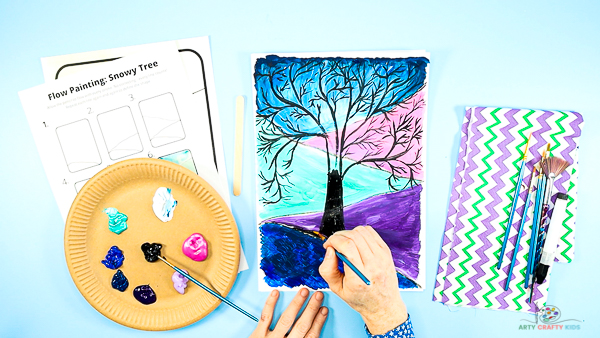
Fill the Trunk of the Tree
Once the tree shape is formed, select a thicker and slightly rounder brush and begin filling the trunk with black paint.
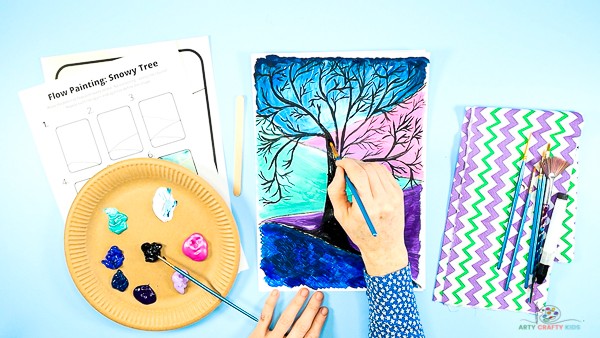
Blend the Branches into the Trunk
Been the trunk with the larger, more prominent branches.

Add a Snowy Layer to the Branches
Next, use a fine tipped paintbrush to add a snowy layer to some of the branches and twigs.
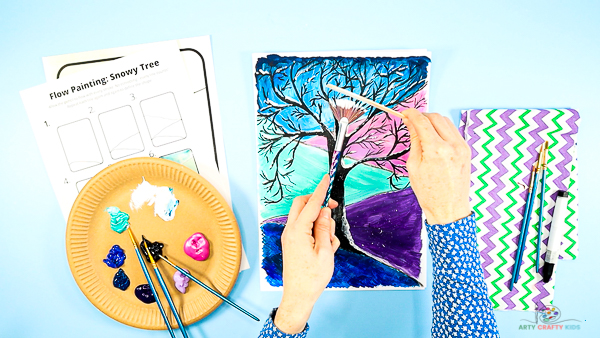
Splatter White Paint to Create the Impression of Snow
Finally, scrape a popsicle stick against a white paint covered paintbrush to create a splatter effect all over the Winter tree.
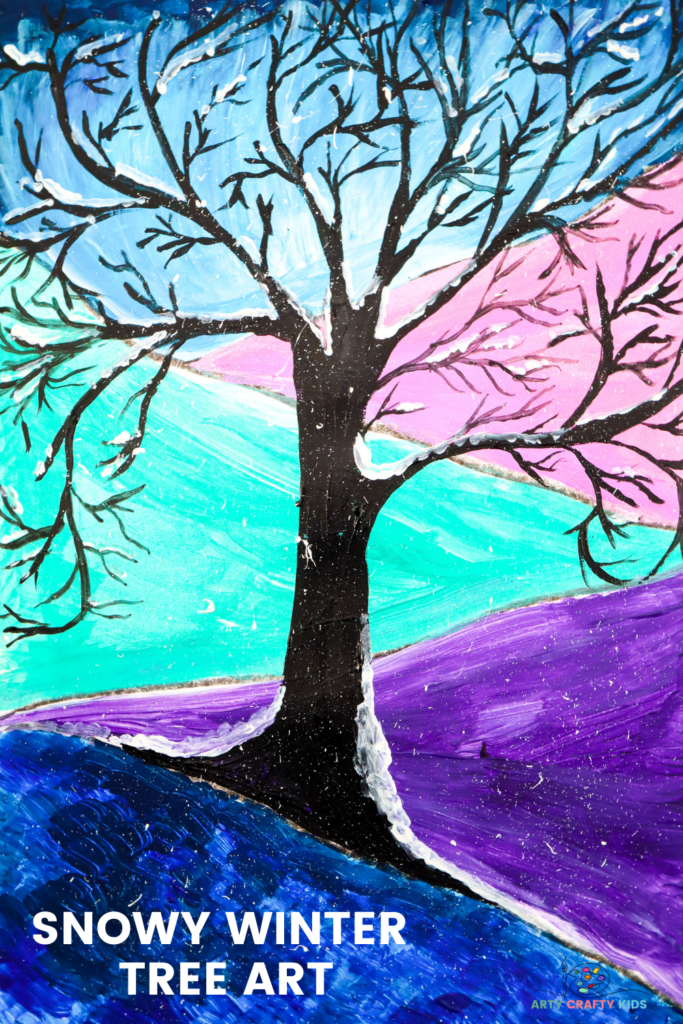
The Snowy Winter Tree Art Tutorial is Complete!
I hope your Arty Crafty Kids enjoy recreating this Snowy Winter Tree Art project. For simplified variations of this art idea, take a look at our Bubble Wrap Winter Tree and Fingerprint Winter Tree Art.
Do share their creations with us on Instagram!