

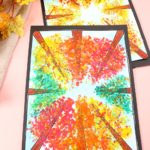
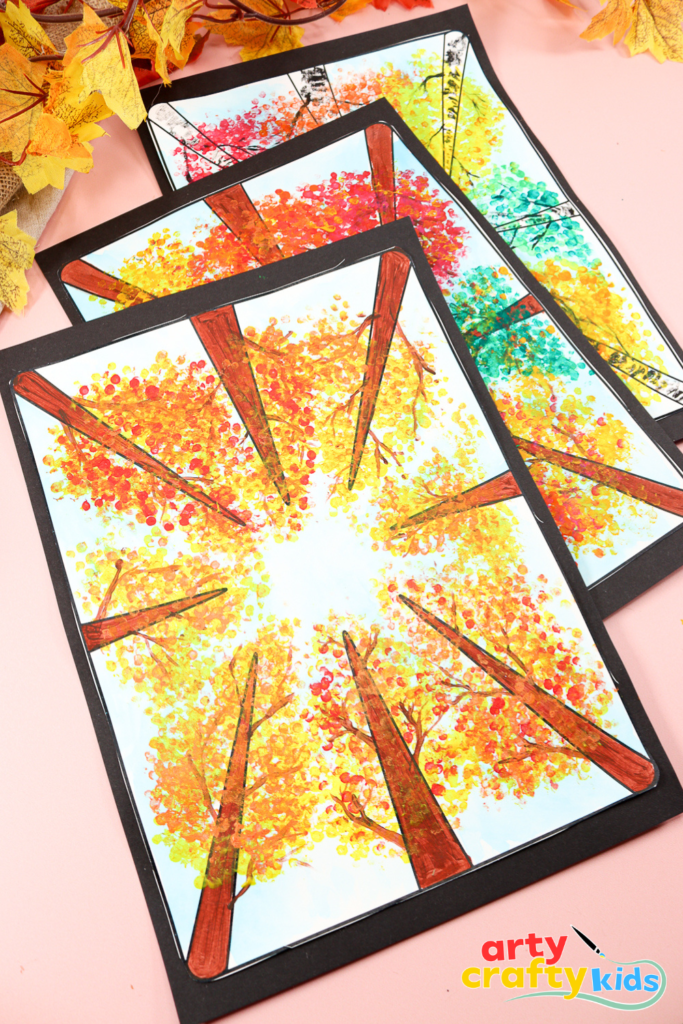
Have you ever stood in the woods, looked up, and taken in the magic of trees as their branches stretch high and their leaves blend into a canopy of color? This Perspective Autumn Tree Art project captures that feeling, with children recreating the view of Fall trees from below.
Through this activity, kids will explore perspective by drawing trees that appear to soar into the sky, while experimenting with rich Autumn colors to capture the warmth of the season.
Using simple painting techniques like dotting and layering, they’ll discover how small marks can come together to form a burst of Fall foliage.
It’s a creative and calming way to celebrate the season, encouraging children to notice the beauty of the natural world while building skills in color, technique, and artistic perspective.
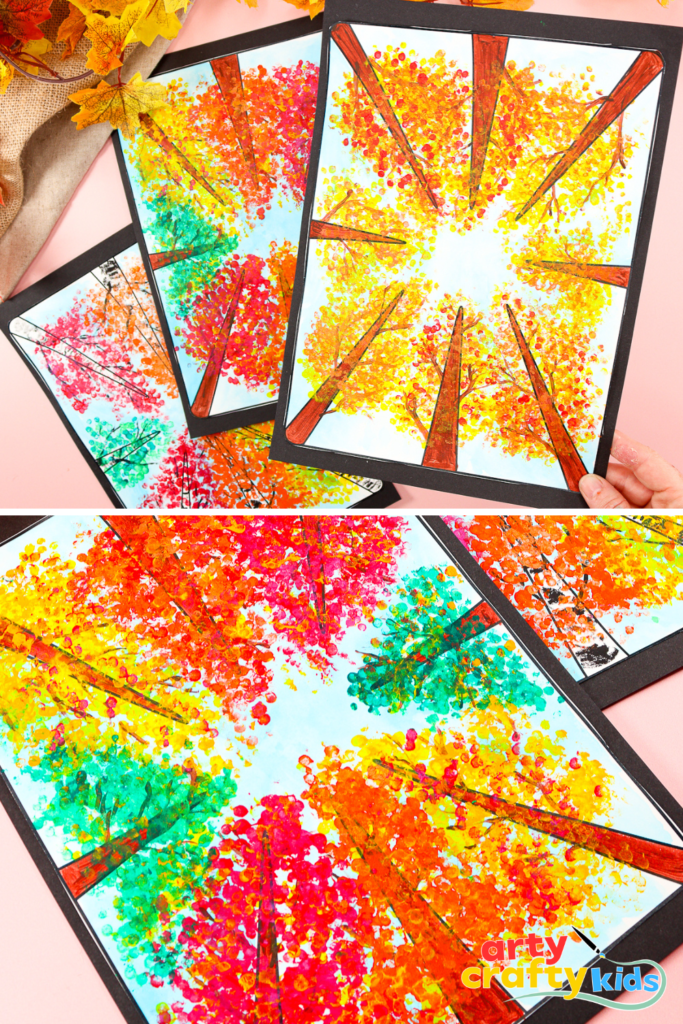
The included template serves as a simple prompt, giving children the freedom to color and create their own unique trees — whether that’s tall, brown trunks, striking white birch trees, or adding extra branches to make their canopy full and vibrant.
Autumn Tree Art You Might Also Like
If you’re looking for more creative ways to capture the colors of Fall, try a flow-drawing birch tree painting, build a 3D paper Autumn tree with changing Fall leaves, or explore texture and contrast with a black glue Autumn tree art project.
How to Make Perspective Autumn Tree Art
Materials:
- Mixed Media Paper or White Card Stock
- Watercolor Paint Palette
- Acrylic Paint
- Q-tips
- Elastic Band or Tape
- Fine-Tipped Paint Brush
- Perspective Tree Template (members will need to login to access the templates).

Not a Member?
Join the Arty Crafty Kids club to access the Perspective Tree Art Template and 100s more Art and Craft templates, How to Draw Guides, and Coloring Pages.

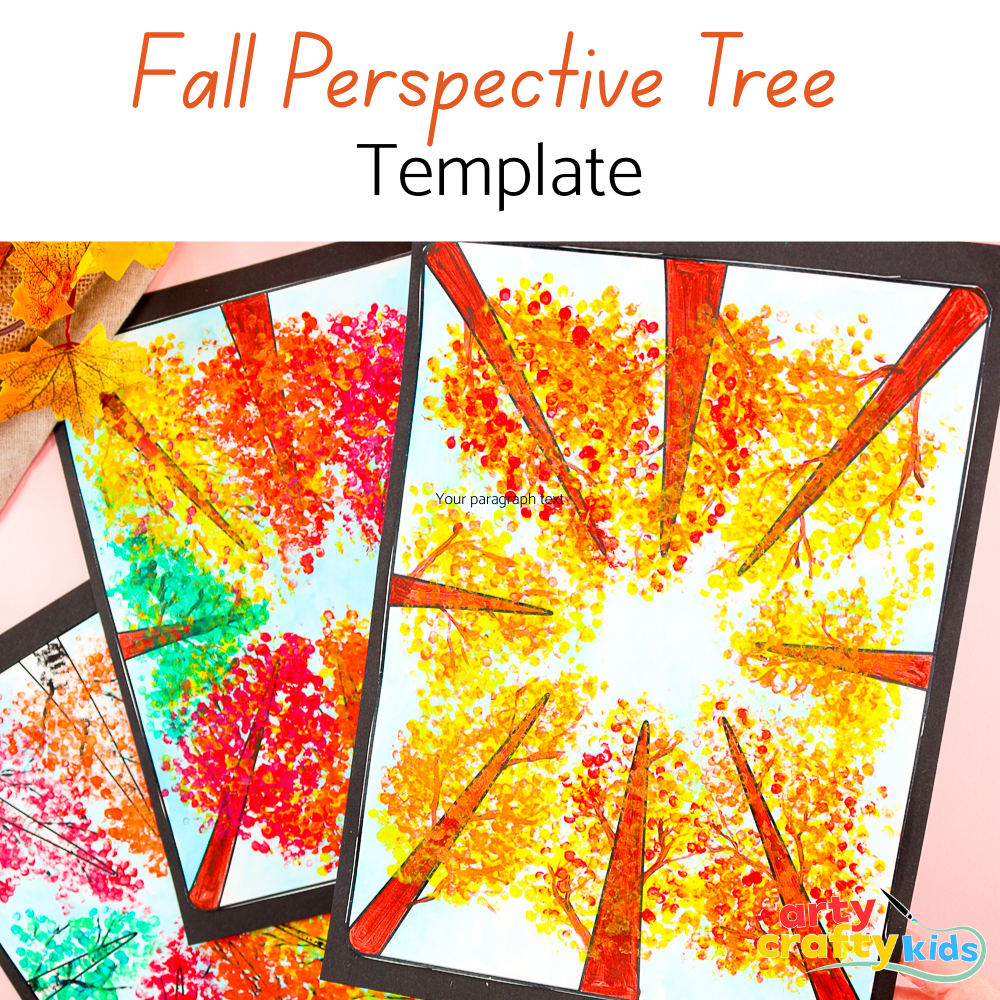
Perspective Tree Art Template
Bring the magic of Fall into the classroom or home with our Perspective Autumn Tree Art Template.
Designed to guide children as they paint tall tree trunks stretching into the sky, this printable makes it easy to explore perspective while adding vibrant Autumn leaves.
Perfect for seasonal art projects, it’s a fun way for kids to practice color, technique, and creativity.
Step-by-Step for Painting a Fall Perspective Tree
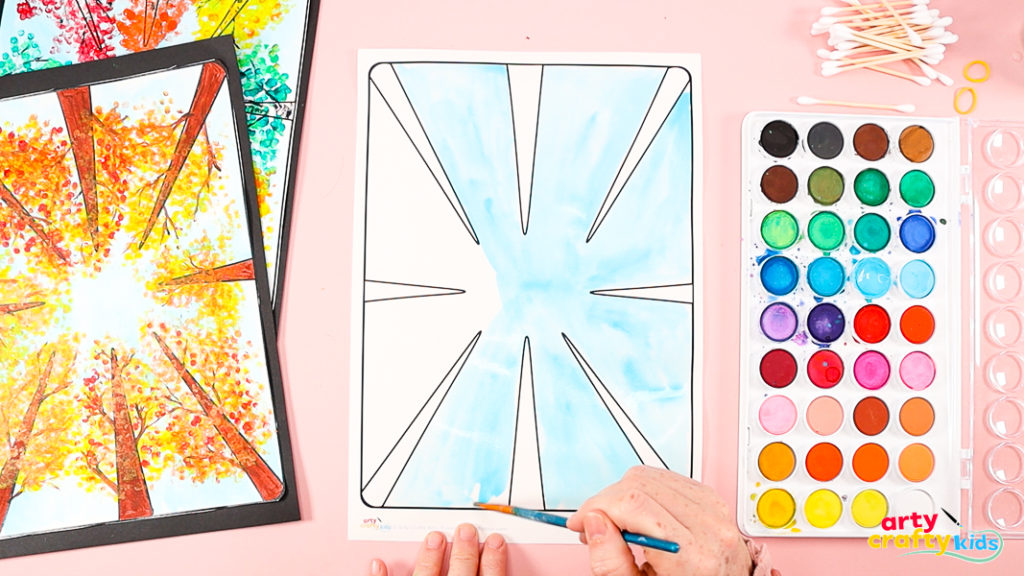
Step 1: Paint the Sky
Begin by painting the background sky.
A light wash of blue watercolor works beautifully, creating the feeling of looking up on a crisp Autumn day.
Let the sky dry before moving on to the next step.
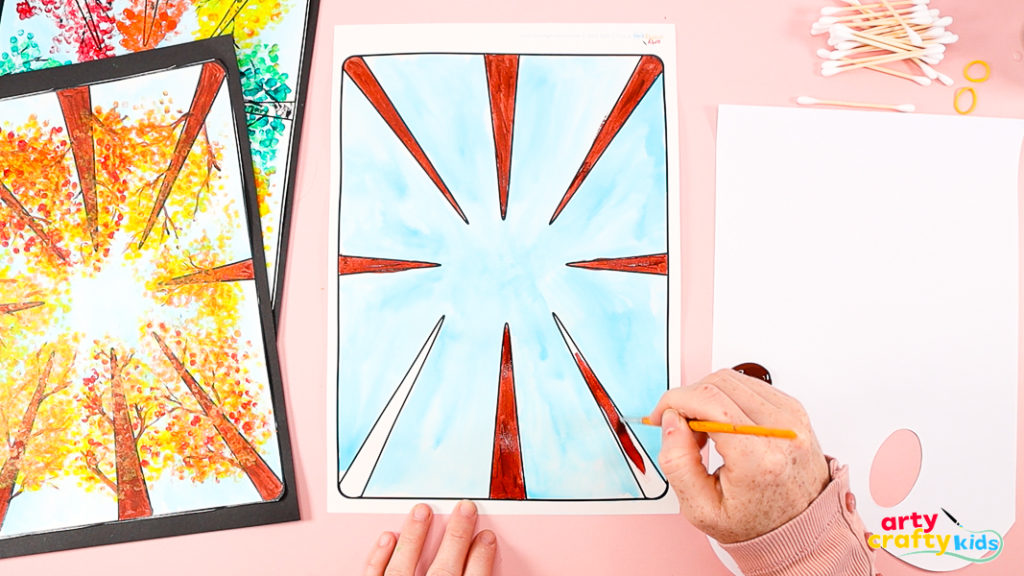
Step 2: Paint the trees brown.
Next, use the template to paint the tree trunks.
This time, switch from watercolors to acrylic paint for bolder, richer tones. A mix of deep browns with touches of red or orange will add warmth and help the trunks stand out beautifully against the soft blue sky.
Encourage children to experiment with brushstrokes and even layer shades for extra depth.
Tip: Try painting light birch trees by simply adding black markings to the trunks.
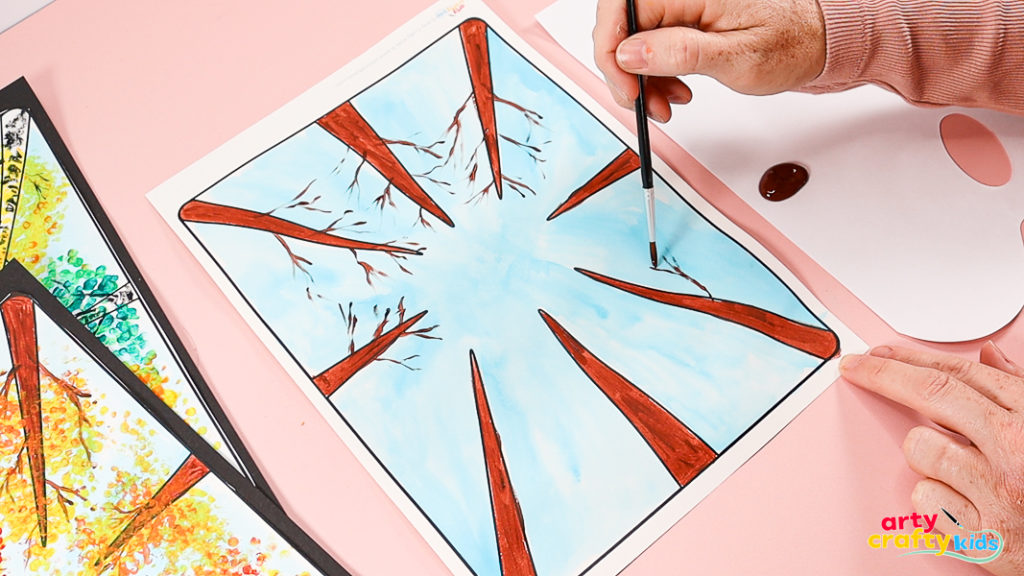
Step 3: Paint the tree branches.
Use a fine-tipped brush to add a few gentle, wriggly lines that suggest branches stretching out from each trunk.
For more inspiration, take a look at our Four Season Tree Painting project!
For perspective, keep the branches shorter and finer at the top, and make them slightly longer and thicker towards the bottom.
This helps create the feeling of looking up at tall trees stretching into the sky.
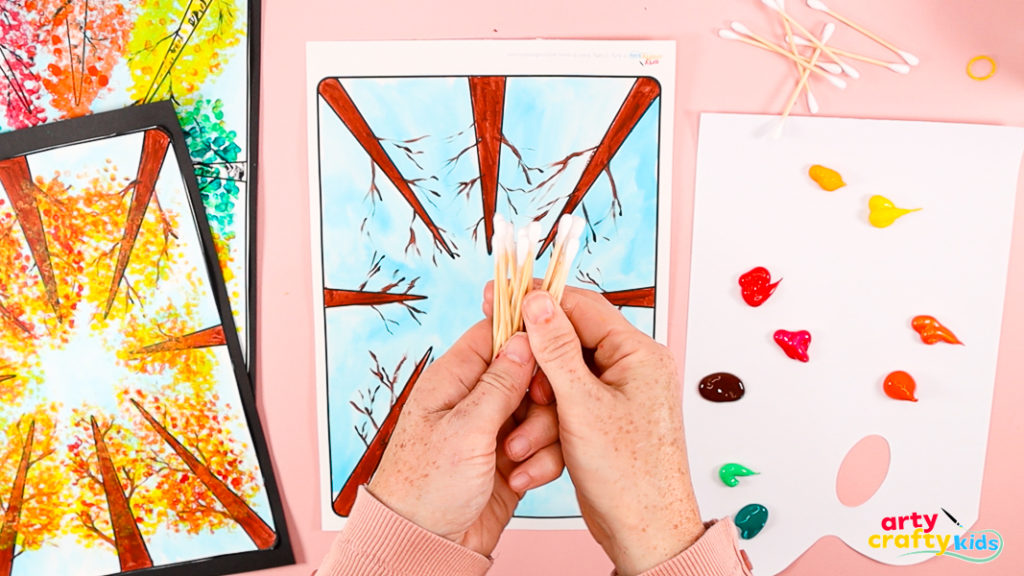
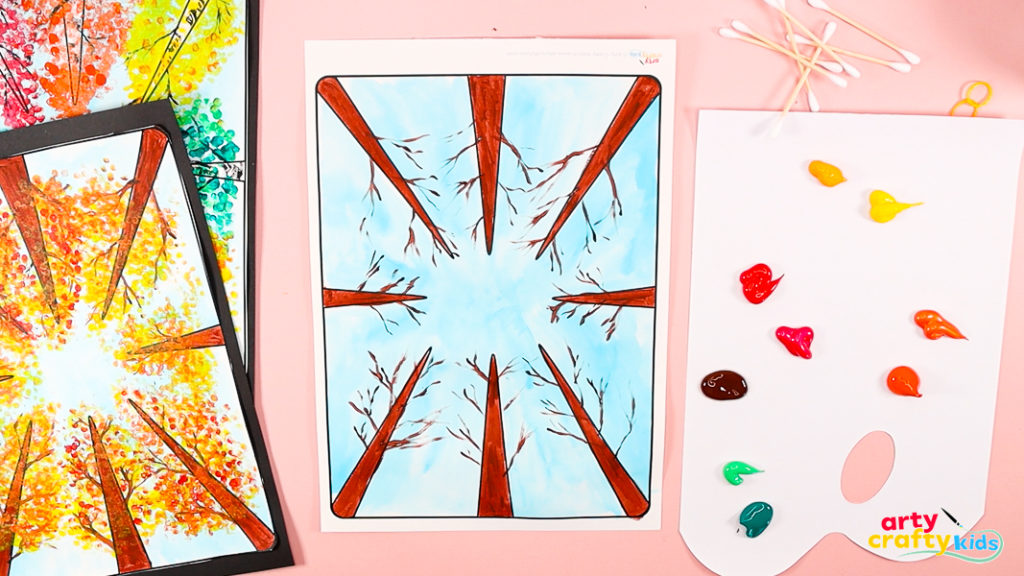
Step 4: Bunch up a collection of Q-tips.
Gather a small bundle of Q-tips and hold them together with an elastic band or tape.
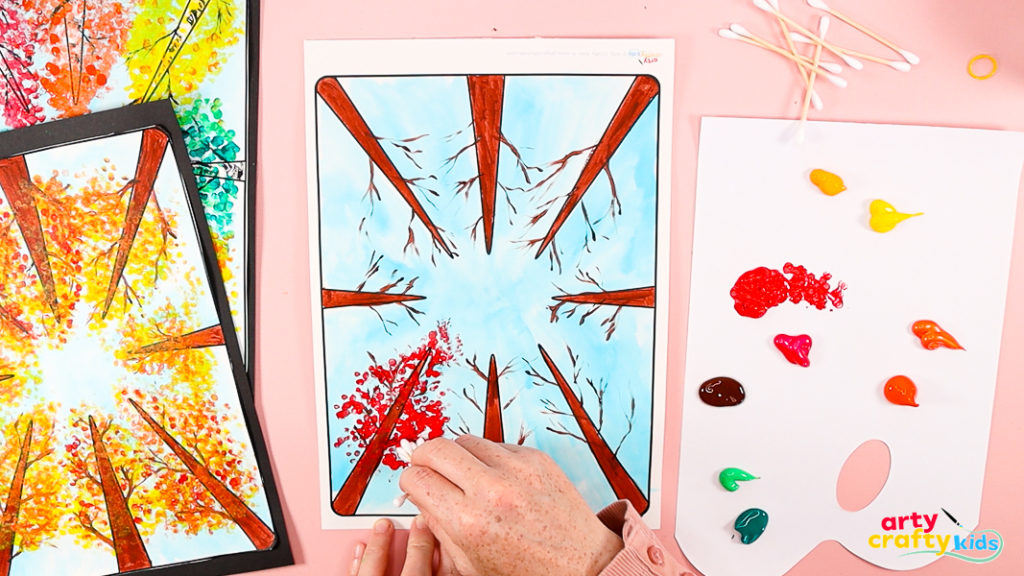
Step 5: Painting the Autumn trees.
Dip the ends into paint and start dotting around the tops of the branches to form clusters of leaves.
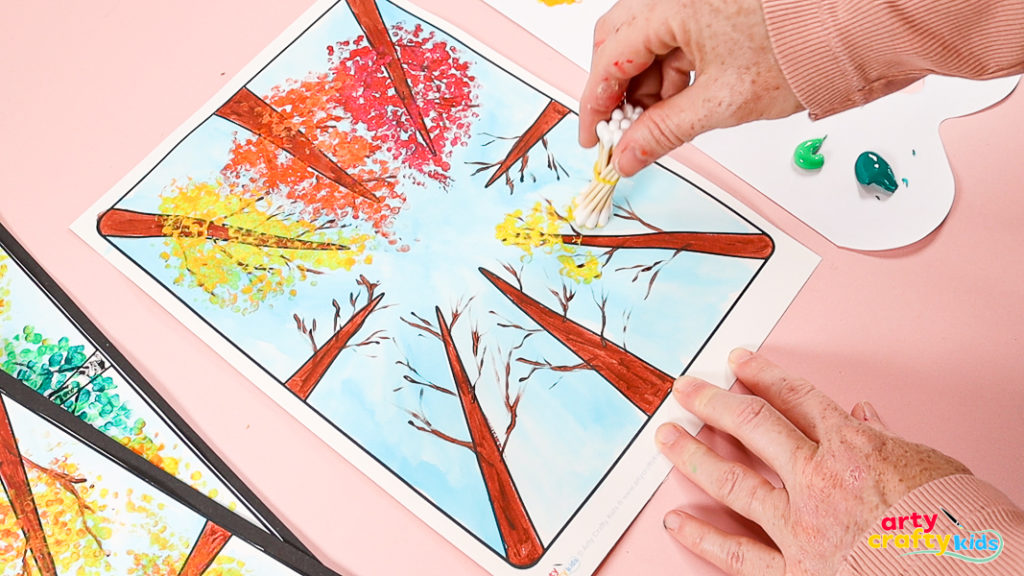
Each tree can showcase a different stage of the chlorophyll change, with leaves shifting from fresh green to golden yellow and orange, and finally into deep reds, purples, and browns.
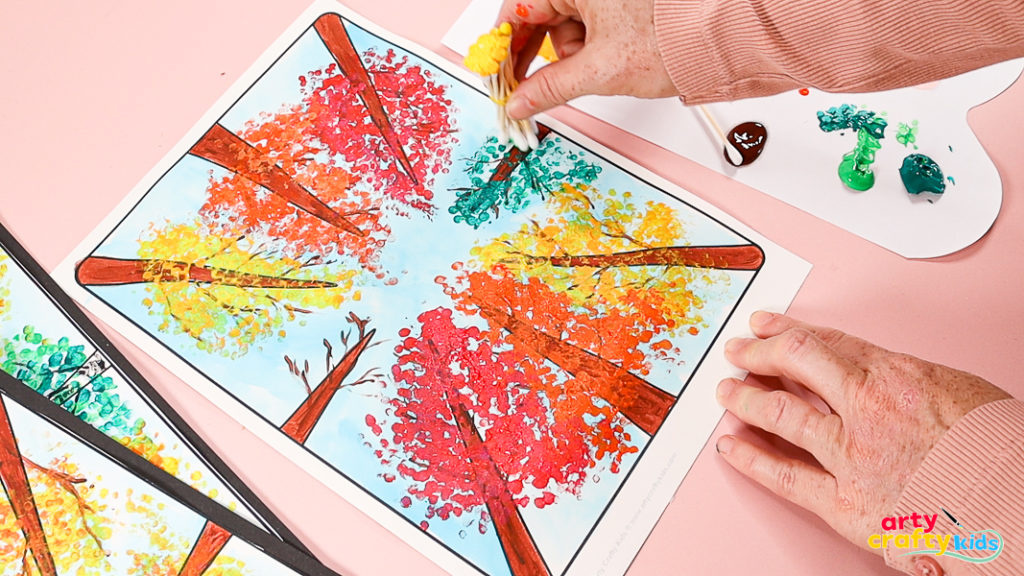
Children might enjoy blending and layering the different colors to create a more natural, realistic effect.
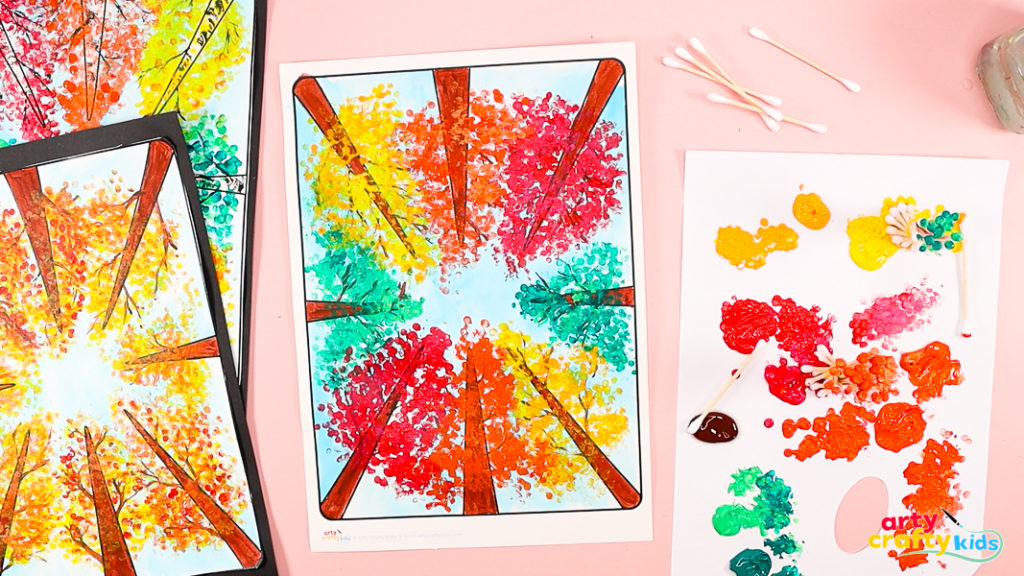
The Autumn Tree Art tutorial is complete.
Keep dotting until the treetops feel full and vibrant, layering different colors to create movement and depth.
Each tree can show a different stage of the season, from green through yellow and orange to rich reds and browns.
Once the leaves are finished, allow the painting to dry completely.
For a polished look, mount the artwork on black cardstock to frame the scene and make the colors really pop.
Learning Outcomes
By completing this project, children will:
- Explore Perspective: Understand how size, angle, and placement create the illusion of looking up at tall trees.
- Experiment with Color: Use the Autumn palette to explore warm tones, layering, and blending, while also connecting to the science of seasonal leaf changes.
- Develop Technique: Practice brush control for fine branches and experiment with dot-painting for texture and depth.
- Encourage Observation: Notice details in nature, such as the way leaves cluster, colors shift, and branches extend.
- Foster Creativity and Confidence: Enjoy freedom to adapt the template, try different tree types, and make artistic choices that result in unique, personal artwork.
Teacher’s Note
This Perspective Autumn Tree Art project supports key areas of the art curriculum.
Children explore perspective by drawing from a low viewpoint, practice mark-making through fine brush lines and dot painting, and develop an understanding of color theory by working with warm tones, layering, and blending.
The activity also encourages observation of nature and promotes creative decision-making, offering opportunities for cross-curricular links with science (seasonal changes and the chlorophyll process).


