
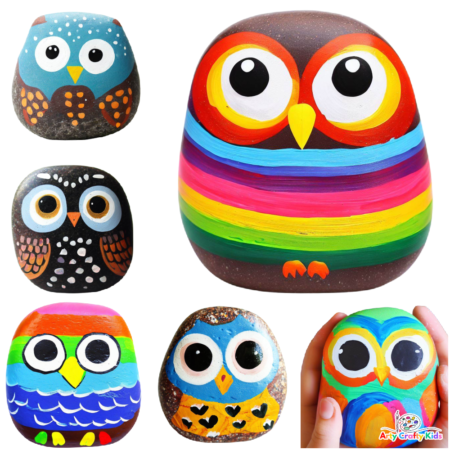
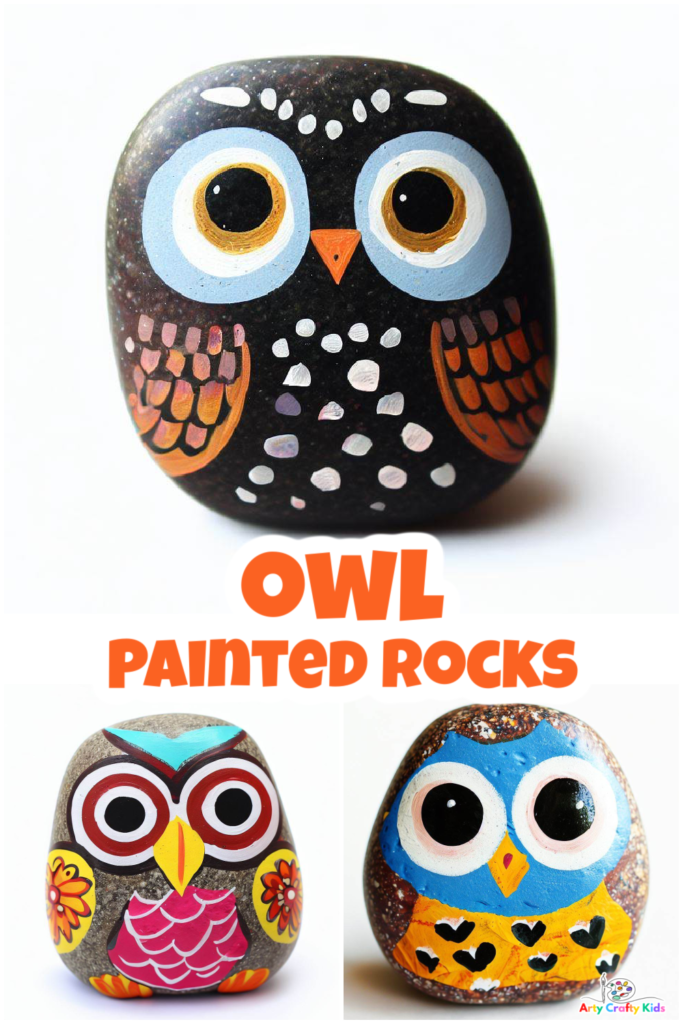
Make adorable owl painted rocks with the kids this autumn! With our step-by-step tutorial, crafting these cute owl designs on rocks is a breeze, suitable for kids of all ages, even preschoolers!
The natural shape of rocks make them an ideal canvas for owl paintings, and this guide showcases the simplest method to turn an ordinary, flat rock into an adorable miniature owl.
These charming owl creations can find a home in gardens, be discovered by fellow children, be gifted to someone special, or even cherished as delightful pet rocks!
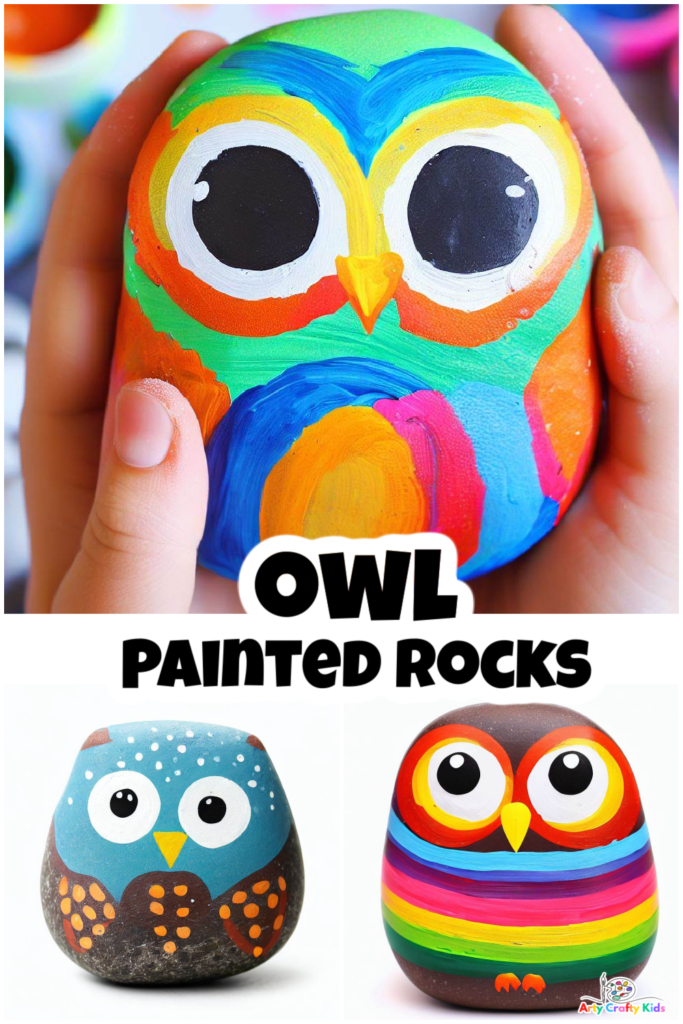
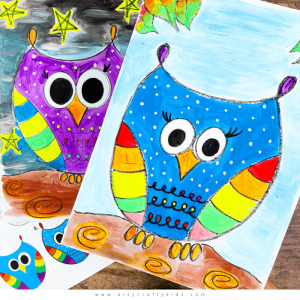
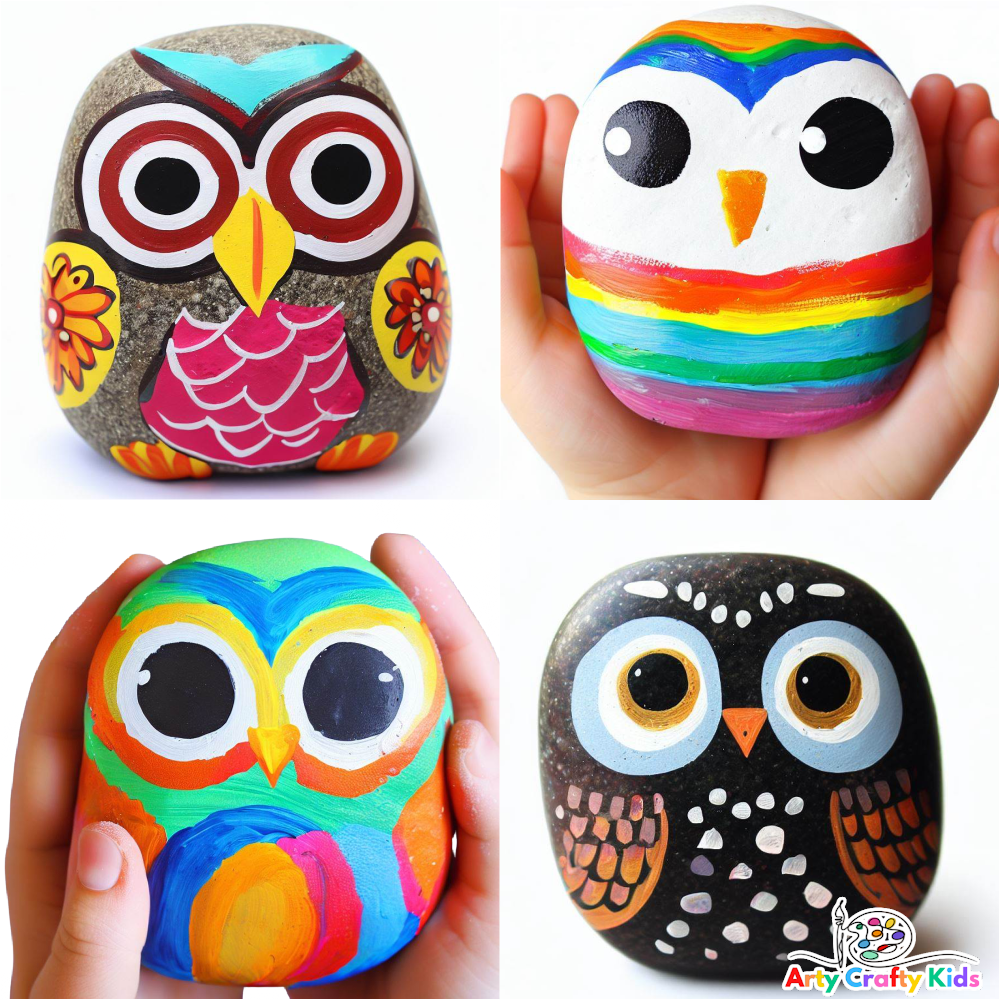
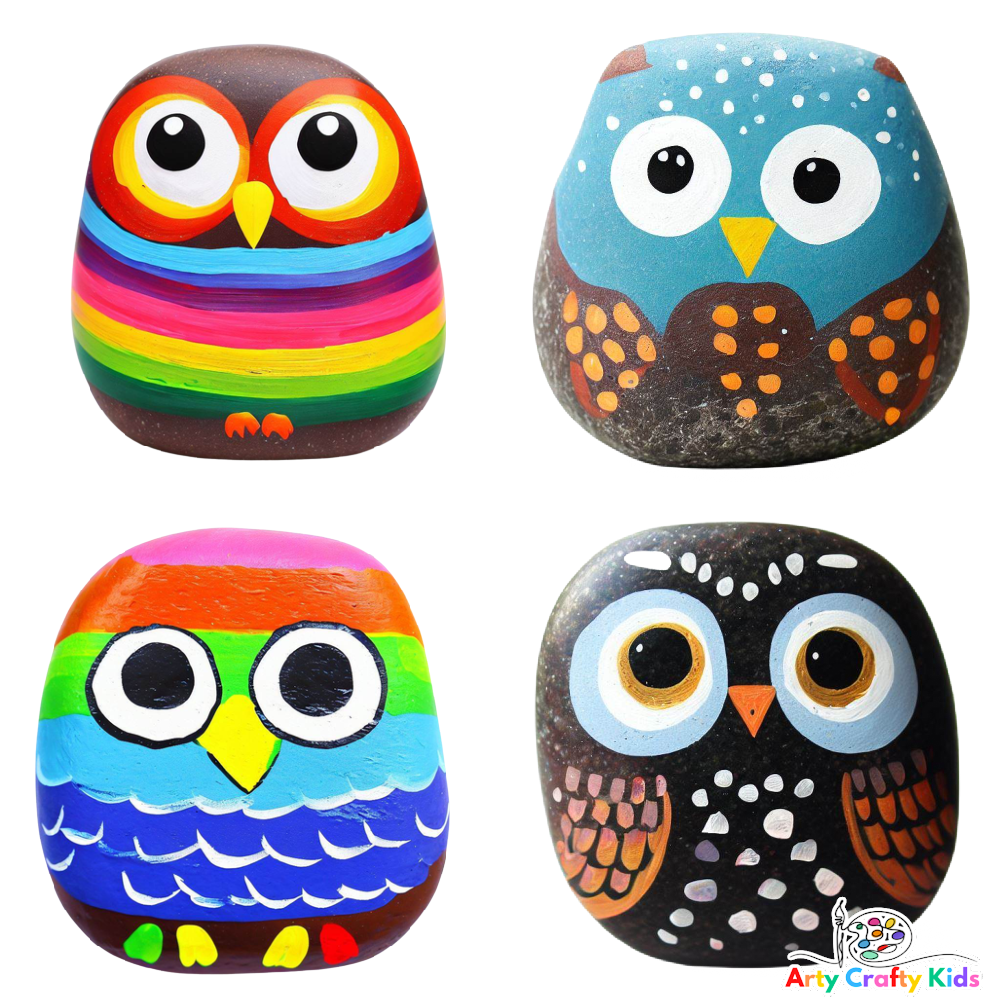
And at the heart of this tutorial, we share multiple painting options to help children make the owls their own!
Once the big signature eyes are painted, Arty Crafty Kids can add feathers as dots, stripes and swirls in all sorts of colors to help bring the creations to life.
How to Make Rock Painted Owls
Materials you will Need for Rock Painting:
- Smooth, flat and clean rocks
- Acrylic paints in various colors (brown, white, black, and rainbow colors)
- Paintbrushes (thin and medium-sized)
- Water and paper towels (for cleaning brushes)
- Palette or disposable plate (for mixing paints)
- Pencil (for sketching, optional)
- Sealant (optional, to protect the finished painting)
- OPTIONAL: How to Draw an Owl Printable Step-by-Step
Let’s Make Owl Painted Rocks!
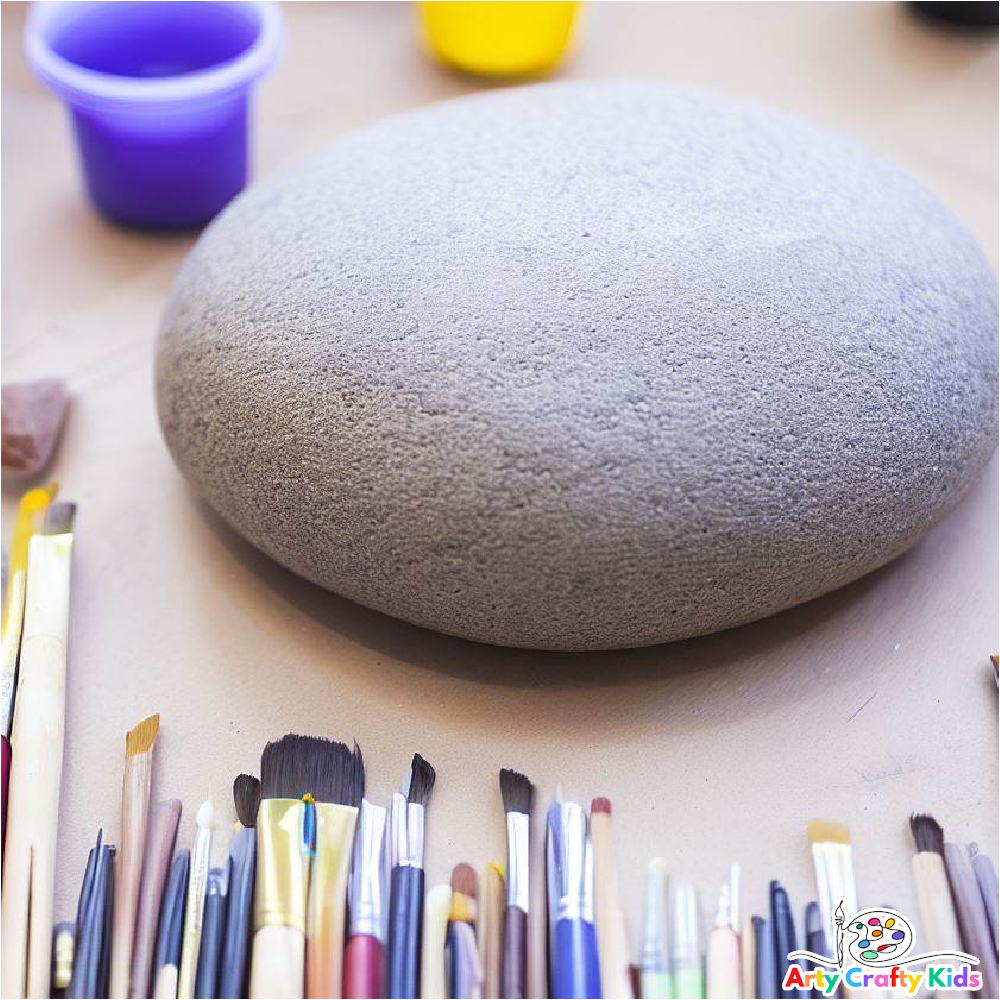
Step 1: Prepare the Rock
Select a smooth, oval shaped rock.
Before you start painting, wash the rock with water and thoroughly dry it with a towel or leave it to air dry.
Step 2: Sketch the Basic Owl Shape (Optional)
Optional: Using our ‘How to Draw an Owl‘ tutorial for guidance, lightly sketch a basic owl shape with a pencil.
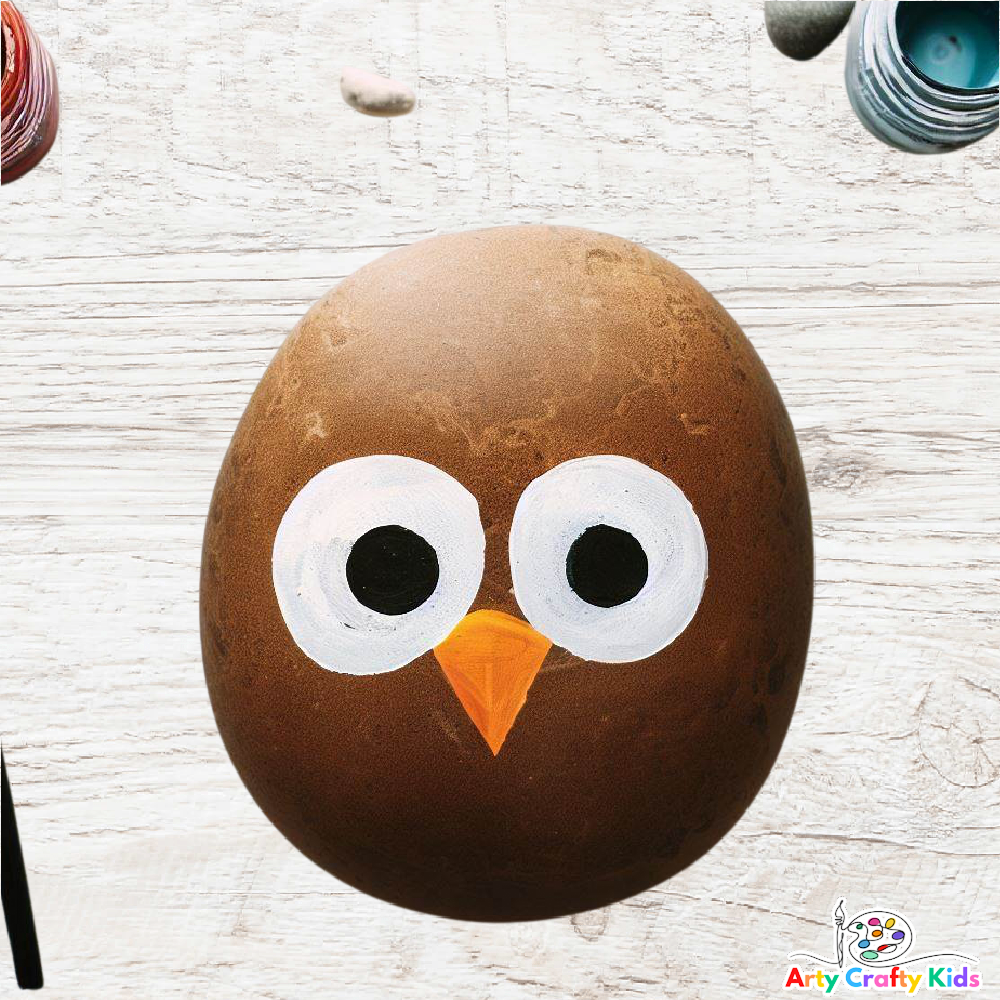
OR go ahead and use white paint to create two very large white eyes.
Once dry, paint a pair of smaller black circles inside the white for pupils.
Step 3: Paint a Small Beak
Next, using orange or yellow paint, add a small but long triangular ( or diamond shaped) beak in between the two large eyes.
This will complete the basic features of the owl painting!
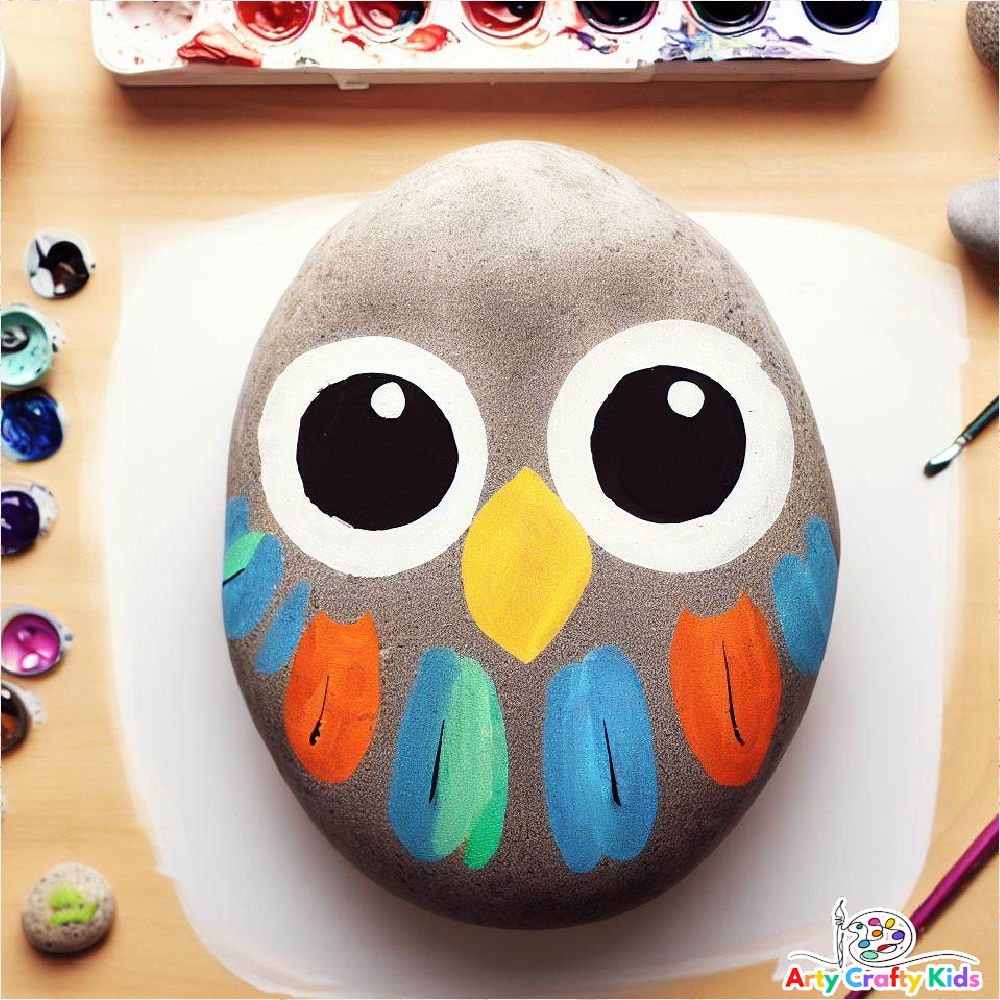
Step 4: Decorate the Owl
Using a thin paintbrush, dip it into the colored paint and create feathery strokes around the owl’s eyes to indicate its feathers.
You can make these strokes go outward to give the impression of wings.
To create defined wings, use a thin paintbrush to paint a pair slightly curved lines on either side of the rock.
Add some small, feathery strokes along these lines to give the wings texture and fill the wings with small paint strokes.
Throughout the painting process, get creative with color and contrast. Perhaps the paint strokes within the wings could be multiple colors, a color gradient of a preferred shade or they could be completely random and overlapping in presentation.
To add a touch of whimsy, you can paint rainbow-colored stripes onto the owl’s body. Use a thin paintbrush to create curved stripes of different colors, following the natural rock shape of the owl’s body.
Step 5: Enhance the Owl Painting with Details
With a thin brush, paint small black dots or short strokes around the owl’s eyes and body to add more feather details.
OR bolden the eyes with additional rings of color!
Step 6: Finishing Touches
Let the paint dry completely. If you’d like, apply a sealant to protect the paint on the rock – modge podge glue is a great option!
The Owl Painted Rocks are Complete!
After your creative Arty Crafty Kids have grasped the basic techniques of painting their rock owls, the possibilities for decorating are boundless.
Older children may choose to take their design a step further, adding intricate detailing using paint or acrylic pens, while younger ones can joyfully finish their owls with anything from abstract patterns to uncomplicated feather-like shapes.